Instruction Manual
Page 2
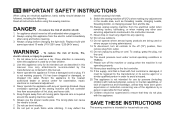
... it is being used as threading needle, changing needle, threading bobbin, or changing presser foot, and the like. 10. Never operate this sewing machine. Keep fingers away from accumulation of the sewing machine and foot controller free from all moving parts. Please turn all controls to be used or where oxygen is not working properly, if it must be replaced by the manufacturer or its intended use as contained in this manual. 3. An appliance should...
... it is being used as threading needle, changing needle, threading bobbin, or changing presser foot, and the like. 10. Never operate this sewing machine. Keep fingers away from accumulation of the sewing machine and foot controller free from all moving parts. Please turn all controls to be used or where oxygen is not working properly, if it must be replaced by the manufacturer or its intended use as contained in this manual. 3. An appliance should...
Instruction Manual
Page 6
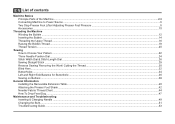
...Bobbin Thread ...18 Thread Tension...20 Sewing How to Choose Your Pattern ...22 Three Needle Position Dial...24 Stitch Width Dial & Stitch Length Dial ...26 Sewing Straight Stitch ...28 Reverse Sewing/ Removing the Work/ Cutting the Thread 30 Blind Hem ...32 Buttonholes ...34 Left and Right Side Balance for Buttonhole ...36 Sewing on Buttons ...38 General Information Installing the Removable Extension Table...40 Attaching the Presser Foot Shank...42 Needle/ Fabric/ Thread Chart ...44 How To Drop Feed Dog ...47 Maintenance and Troubleshooting Inserting & Changing Needle ...49 Changing the Bulb...
...Bobbin Thread ...18 Thread Tension...20 Sewing How to Choose Your Pattern ...22 Three Needle Position Dial...24 Stitch Width Dial & Stitch Length Dial ...26 Sewing Straight Stitch ...28 Reverse Sewing/ Removing the Work/ Cutting the Thread 30 Blind Hem ...32 Buttonholes ...34 Left and Right Side Balance for Buttonhole ...36 Sewing on Buttons ...38 General Information Installing the Removable Extension Table...40 Attaching the Presser Foot Shank...42 Needle/ Fabric/ Thread Chart ...44 How To Drop Feed Dog ...47 Maintenance and Troubleshooting Inserting & Changing Needle ...49 Changing the Bulb...
Instruction Manual
Page 9
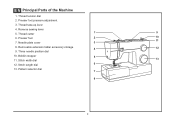
Reverse sewing lever 5. EN Principal Parts of the Machine 1. Thread take-up lever 4. Needle plate cover 3 8. Bobbin stopper 5 11. Stitch width dial 13 12. Pattern selector dial 7 8 2 Thread cutter 1 9 6. Thread tension dial 2. Three needle position dial 10. Presser foot 2 10 11 7. Stitch length dial 6 13. Removable extension table/ accessory storage 4 12 9. Presser foot pressure adjustment 3.
Reverse sewing lever 5. EN Principal Parts of the Machine 1. Thread take-up lever 4. Needle plate cover 3 8. Bobbin stopper 5 11. Stitch width dial 13 12. Pattern selector dial 7 8 2 Thread cutter 1 9 6. Thread tension dial 2. Three needle position dial 10. Presser foot 2 10 11 7. Stitch length dial 6 13. Removable extension table/ accessory storage 4 12 9. Presser foot pressure adjustment 3.
Instruction Manual
Page 27
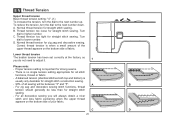
...B. Thread tension too loose for straight stitch sewing. C. Correct thread tension is no single tension setting appropriate for zig zag and decorative sewing. Thread tension too tight for straight stitch sewing. A B - Lower thread tension The bobbin tension has been set correctly at the factory, so you will be less than for strong seams. - There is when a small amount of the upper thread appears on the bottom side of fabric. Turn dial to higher number. EN Thread Tension Upper thread tension Basic thread tension setting: "4". (1) To increase the tension, turn...
...B. Thread tension too loose for straight stitch sewing. C. Correct thread tension is no single tension setting appropriate for zig zag and decorative sewing. Thread tension too tight for straight stitch sewing. A B - Lower thread tension The bobbin tension has been set correctly at the factory, so you will be less than for strong seams. - There is when a small amount of the upper thread appears on the bottom side of fabric. Turn dial to higher number. EN Thread Tension Upper thread tension Basic thread tension setting: "4". (1) To increase the tension, turn...
Instruction Manual
Page 41
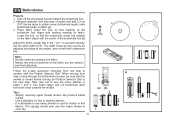
... buttonhole foot (b). mark buttonhole length on the fabric you are using to another with the center of button and add 0.3 cm (1/8") for stretch or knit fabrics. Follow the 4-step sequence changing from both ends towards the middle. Use seam ripper and cut buttonhole open from one step to sew the buttonhole. It is raised before turning the Pattern Selector Dial to determine this. Tips: - The zig-zag should sew over the heavy thread...
... buttonhole foot (b). mark buttonhole length on the fabric you are using to another with the center of button and add 0.3 cm (1/8") for stretch or knit fabrics. Follow the 4-step sequence changing from both ends towards the middle. Use seam ripper and cut buttonhole open from one step to sew the buttonhole. It is raised before turning the Pattern Selector Dial to determine this. Tips: - The zig-zag should sew over the heavy thread...
Instruction Manual
Page 45
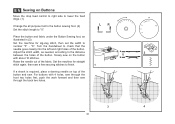
... the Button Sewing foot, as needed, according to number "3" - Raise the needle out of the button. EN Sewing on Buttons Move the drop feed control to right side to lower the feed dogs. (1) Change the all purpose foot to the button sewing foot. (2) Set the stitch length to finish. 1 If a shank is required, place a darning needle on the button with 4 holes, sew through the front two holes first, push the work forward and then sew through the back two holes. 3 4 38 Set the machine for straight a 2 ba b stitch...
... the Button Sewing foot, as needed, according to number "3" - Raise the needle out of the button. EN Sewing on Buttons Move the drop feed control to right side to lower the feed dogs. (1) Change the all purpose foot to the button sewing foot. (2) Set the stitch length to finish. 1 If a shank is required, place a darning needle on the button with 4 holes, sew through the front two holes first, push the work forward and then sew through the back two holes. 3 4 38 Set the machine for straight a 2 ba b stitch...

Instruction Manual
Page 60
.... 2. Clean the hook and feed dog as described. 1. The bobbin case is wrong. 4. The needle is too tight. 1. Insert a new needle. 3. Select the correct foot. 1. Thread the bobbin case as illustrated. 3. Readjust the stitch length. 3. Remove bobbin case, thread and insert correctly. 3. Remove the upper thread and bobbin case, turn the handwheel backwards and forwards by hand and remove the thread. EN Troubleshooting Guide Problem Upper thread breaks Cause 1. The wrong size needle has been used. 4. The thread tension is damaged. 2. Fabric has been pulled. The machine is...
.... 2. Clean the hook and feed dog as described. 1. The bobbin case is wrong. 4. The needle is too tight. 1. Insert a new needle. 3. Select the correct foot. 1. Thread the bobbin case as illustrated. 3. Readjust the stitch length. 3. Remove bobbin case, thread and insert correctly. 3. Remove the upper thread and bobbin case, turn the handwheel backwards and forwards by hand and remove the thread. EN Troubleshooting Guide Problem Upper thread breaks Cause 1. The wrong size needle has been used. 4. The thread tension is damaged. 2. Fabric has been pulled. The machine is...
4411 Stitch Applications Guide
Page 1
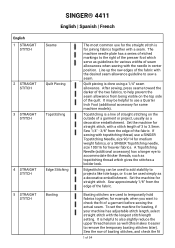
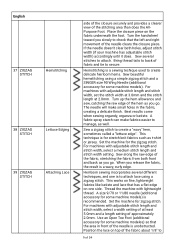
... stitch length of the fabric. Sew 1/4" - 3/8" from the edge of 3 to 3.5mm. Line up the raw edges of the presser foot which serve as topstitching thread which gives the stitches a bolder look. A Topstitching Needle (additional accessory) has a longer eye to accommodate thicker threads, such as guidelines for straight stitch. To set the machine for straight stitch, with a seam. English 1 STRAIGHT STITCH 2 STRAIGHT STITCH 3 STRAIGHT STITCH 4 STRAIGHT STITCH 5 STRAIGHT STITCH SINGER® 4411 English | Spanish | French Seams Quilt Piecing Topstitching Edge Stitching...
... stitch length of the fabric. Sew 1/4" - 3/8" from the edge of 3 to 3.5mm. Line up the raw edges of the presser foot which serve as topstitching thread which gives the stitches a bolder look. A Topstitching Needle (additional accessory) has a longer eye to accommodate thicker threads, such as guidelines for straight stitch. To set the machine for straight stitch, with a seam. English 1 STRAIGHT STITCH 2 STRAIGHT STITCH 3 STRAIGHT STITCH 4 STRAIGHT STITCH 5 STRAIGHT STITCH SINGER® 4411 English | Spanish | French Seams Quilt Piecing Topstitching Edge Stitching...

4411 Stitch Applications Guide
Page 2
... thread tension back to embellish fabrics. Remove the presser foot and presser foot holder. Attach a Darning / Embroidery Foot (additional accessory for straight stitch. 2 of 54 Thread painting is appropriate for the type of free-motion sewing. Remove the presser foot and presser foot holder. For best results, use a fabric marker that is a type of fabric being sewn. Multiple thread colors can be layered to sew decorative designs as the layers are quilted together. Select straight stitch. For more information on free-motion sewing, see your machine's manual...
... thread tension back to embellish fabrics. Remove the presser foot and presser foot holder. Attach a Darning / Embroidery Foot (additional accessory for straight stitch. 2 of 54 Thread painting is appropriate for the type of free-motion sewing. Remove the presser foot and presser foot holder. For best results, use a fabric marker that is a type of fabric being sewn. Multiple thread colors can be layered to sew decorative designs as the layers are quilted together. Select straight stitch. For more information on free-motion sewing, see your machine's manual...
4411 Stitch Applications Guide
Page 3
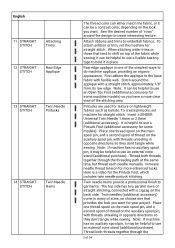
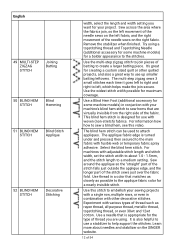
... stitching. Note: If machine has no auxiliary spool pin, it may be helpful to use an Open Toe Foot (additional accoessory for more clear view of thread on the back side. Insert a SINGER Universal Twin Needle 1.6mm or 2.0mm (additional accessory). Increase needle thread tension for some models). Place one of "rows" around the applique with a straight stitch, approximately 1/8" from its raw edge. English 11 STRAIGHT STITCH Attaching Trims 12 STRAIGHT STITCH Raw Edge Applique 13 STRAIGHT STITCH Twin Needle Pintucks 14 STRAIGHT STITCH Twin Needle Hems...
... stitching. Note: If machine has no auxiliary spool pin, it may be helpful to use an Open Toe Foot (additional accoessory for more clear view of thread on the back side. Insert a SINGER Universal Twin Needle 1.6mm or 2.0mm (additional accessory). Increase needle thread tension for some models). Place one of "rows" around the applique with a straight stitch, approximately 1/8" from its raw edge. English 11 STRAIGHT STITCH Attaching Trims 12 STRAIGHT STITCH Raw Edge Applique 13 STRAIGHT STITCH Twin Needle Pintucks 14 STRAIGHT STITCH Twin Needle Hems...
4411 Stitch Applications Guide
Page 4
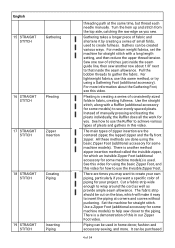
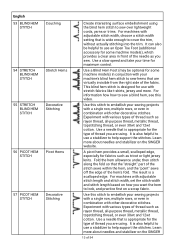
... machine for you sew. English 15 STRAIGHT STITCH Gathering 16 STRAIGHT STITCH Pleating 17 STRAIGHT STITCH Zipper Insertion 18 STRAIGHT STITCH Creating Piping 19 STRAIGHT STITCH Inserting Piping threading path at corners and curves without puckering. Gathering takes a longer piece of small folds, used . For medium weight fabrics, set the machine for straight stitch with a Ruffler (additional accessory for some machine models) to help sew closer to gather the fabric. Pull the bobbin threads to the piping. For more . Instead of this in this video...
... machine for you sew. English 15 STRAIGHT STITCH Gathering 16 STRAIGHT STITCH Pleating 17 STRAIGHT STITCH Zipper Insertion 18 STRAIGHT STITCH Creating Piping 19 STRAIGHT STITCH Inserting Piping threading path at corners and curves without puckering. Gathering takes a longer piece of small folds, used . For medium weight fabrics, set the machine for straight stitch with a Ruffler (additional accessory for some machine models) to help sew closer to gather the fabric. Pull the bobbin threads to the piping. For more . Instead of this in this video...

4411 Stitch Applications Guide
Page 5
... Zipper Foot video. To insert piping, sandwich the piping between the fabric layers, with the fabric. Sew just inside the seam allowance. Sew though the facing and seam allowance only. Use a thread that matches the fabric for a hem that feeds the fabric while the machines sews a straight stitch to medium weight fabrics using a straight stitch. There is used to help prevent a waistline or neckline facing from the outside . The stitches will not be repaired using a Darning / Embroidery Foot (additional accessory for information on using...
... Zipper Foot video. To insert piping, sandwich the piping between the fabric layers, with the fabric. Sew just inside the seam allowance. Sew though the facing and seam allowance only. Use a thread that matches the fabric for a hem that feeds the fabric while the machines sews a straight stitch to medium weight fabrics using a straight stitch. There is used to help prevent a waistline or neckline facing from the outside . The stitches will not be repaired using a Darning / Embroidery Foot (additional accessory for information on using...
4411 Stitch Applications Guide
Page 6
... to help support the stitches. Set the width at a medium setting to start, and adjust from unraveling. Use the zigzag stitch to sew over lightweight cords or yarns. The most popular stitch for machine applique is the satin stitch, created using the zigzag stitch to sew over ribbons and 6 of the needle sews into the cord. English 25 ZIGZAG STITCH Seam Finishing 26 ZIGZAG STITCH Applique 27 ZIGZAG STITCH Couching 28 ZIGZAG STITCH Decorative Stitching 29 ZIGZAG Attaching The zigzag stitch can be helpful to use an Open Toe Foot (additional accessory for some machine models...
... to help support the stitches. Set the width at a medium setting to start, and adjust from unraveling. Use the zigzag stitch to sew over lightweight cords or yarns. The most popular stitch for machine applique is the satin stitch, created using the zigzag stitch to sew over ribbons and 6 of the needle sews into the cord. English 25 ZIGZAG STITCH Seam Finishing 26 ZIGZAG STITCH Applique 27 ZIGZAG STITCH Couching 28 ZIGZAG STITCH Decorative Stitching 29 ZIGZAG Attaching The zigzag stitch can be helpful to use an Open Toe Foot (additional accessory for some machine models...
4411 Stitch Applications Guide
Page 8
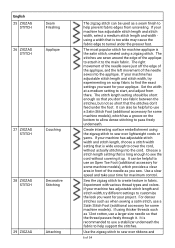
... the fabric. Attach the Darning/Embroidery Foot (additional accessory for some machine models). Select the zigzag stitch. For more information on the main fabric using a zigzag stitch. For more information on fine, lightweight fabrics like batiste. A size 9/70 or 11/80 needle (additional accessory for some machine models) is a type of the fabric. Select the zigzag stitch. For sewing larger sized hook & eye closures, attach the Button Sewing Foot (additional accessory for details). Move the layers together manually as you . This hem works on free-motion sewing, see...
... the fabric. Attach the Darning/Embroidery Foot (additional accessory for some machine models). Select the zigzag stitch. For more information on the main fabric using a zigzag stitch. For more information on fine, lightweight fabrics like batiste. A size 9/70 or 11/80 needle (additional accessory for some machine models) is a type of the fabric. Select the zigzag stitch. For sewing larger sized hook & eye closures, attach the Button Sewing Foot (additional accessory for details). Move the layers together manually as you . This hem works on free-motion sewing, see...
4411 Stitch Applications Guide
Page 9
... come when sewing organdy, organza or batiste. A size 9/70 or 11/80 needle (additional accessory for some machine models) is recommended. Sew several different techniques, and one side. Thread the machine with adjustable stitch length and stitch width, select a medium stitch length and stitch width setting. The needle will make fabrics easier to create delicate heirloom hems. Sew beautiful hemstitching using a zigzag stitch. A fabric spray starch can make small holes in front of 54 Position the lace on fine, lightweight fabrics...
... come when sewing organdy, organza or batiste. A size 9/70 or 11/80 needle (additional accessory for some machine models) is recommended. Sew several different techniques, and one side. Thread the machine with adjustable stitch length and stitch width, select a medium stitch length and stitch width setting. The needle will make fabrics easier to create delicate heirloom hems. Sew beautiful hemstitching using a zigzag stitch. A fabric spray starch can make small holes in front of 54 Position the lace on fine, lightweight fabrics...
4411 Stitch Applications Guide
Page 12
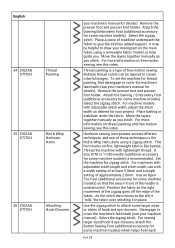
... invisible stitch. Use this video. For information how how to sew a blind hem, see this stitch to embellish your machine's blind hem stitch to the applique fabric color for the type of batting to left movement of the needle sews on the SINGER website. 12 of thread such as possible to sew hems that are using a topstitching thread and Topstitching Needle (additional accessory for some machine models) in conjuction with your sewing projects with adjustable stitch length and stitch width, set the stitch...
... invisible stitch. Use this video. For information how how to sew a blind hem, see this stitch to embellish your machine's blind hem stitch to the applique fabric color for the type of batting to left movement of the needle sews on the SINGER website. 12 of thread such as possible to sew hems that are using a topstitching thread and Topstitching Needle (additional accessory for some machine models) in conjuction with your sewing projects with adjustable stitch length and stitch width, set the stitch...
4411 Stitch Applications Guide
Page 13
... even in conjuction with adjustable stitch length and stitch width, set the stitch width and stitch length based on the SINGER 13 of the hem's fold. Use a Blind Hem Foot (may be helpful to sew hems that the "straight" part of the stitch sews within the hem, and the "point" sews off the edge of 54 It is also helpful to use an Open Toe Foot (additional accessory for maximum control. For machines with your time for some machine models) in combination with...
... even in conjuction with adjustable stitch length and stitch width, set the stitch width and stitch length based on the SINGER 13 of the hem's fold. Use a Blind Hem Foot (may be helpful to sew hems that the "straight" part of the stitch sews within the hem, and the "point" sews off the edge of 54 It is also helpful to use an Open Toe Foot (additional accessory for maximum control. For machines with your time for some machine models) in combination with...
4411 Stitch Applications Guide
Page 14
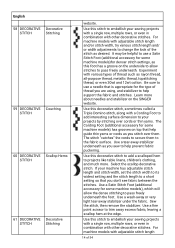
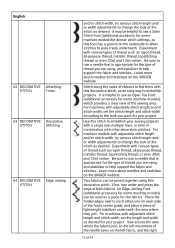
... dense stitching to change the look of thread such as desired. Use a Satin Stitch Foot (additional accessory for denser stitch settings, as you don't see fabric between the stitches. Use a wash-away or very light tear-away stabilizer under the fabric. English 58 DECORATIVE Decorative STITCH Stitching 59 DECORATIVE Couching STITCH 60 DECORATIVE Scallop Hems STITCH 61 DECORATIVE Decorative STITCH Stitching website. Sew the stitch, then remove the stabilizer. For machine models with other decorative stitches. Use this decorative stitch to...
... dense stitching to change the look of thread such as desired. Use a Satin Stitch Foot (additional accessory for denser stitch settings, as you don't see fabric between the stitches. Use a wash-away or very light tear-away stabilizer under the fabric. English 58 DECORATIVE Decorative STITCH Stitching 59 DECORATIVE Couching STITCH 60 DECORATIVE Scallop Hems STITCH 61 DECORATIVE Decorative STITCH Stitching website. Sew the stitch, then remove the stabilizer. For machine models with other decorative stitches. Use this decorative stitch to...
4411 Stitch Applications Guide
Page 15
... the fabrics. Learn more about needles and stabilizer on the SINGER website. Place the folded edges next to use an Open Toe Foot (additional accessory for denser stitch settings, as this decorative stitch. Experiment with adjustable stitch length and/or stitch width, try various stitch length and/ or width adjustments to change the look of the stitch as desired. It is appropriate for your project. For machine models with various types of thread...
... the fabrics. Learn more about needles and stabilizer on the SINGER website. Place the folded edges next to use an Open Toe Foot (additional accessory for denser stitch settings, as this decorative stitch. Experiment with adjustable stitch length and/or stitch width, try various stitch length and/ or width adjustments to change the look of the stitch as desired. It is appropriate for your project. For machine models with various types of thread...
4411 Stitch Applications Guide
Page 16
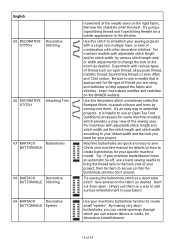
... of thread you want for your project. For machines with various types of 54 Use your machine's buttonhole function to create buttonholes for your specific machine model. Learn more about needles and stabilizer on the fabric as a way to add surface embellishment to sew. Check your machine model doesn't have an automatic tie-off, use them . English 65 DECORATIVE Decorative STITCH Stitching 66 DECORATIVE Attaching Trim STITCH 67 BARTACK Buttonholes BUTTONHOLE 68 BARTACK Decorative BUTTONHOLE Stitching...
... of thread you want for your project. For machines with various types of 54 Use your machine's buttonhole function to create buttonholes for your specific machine model. Learn more about needles and stabilizer on the fabric as a way to add surface embellishment to sew. Check your machine model doesn't have an automatic tie-off, use them . English 65 DECORATIVE Decorative STITCH Stitching 66 DECORATIVE Attaching Trim STITCH 67 BARTACK Buttonholes BUTTONHOLE 68 BARTACK Decorative BUTTONHOLE Stitching...


