
Operation Manual
Page 1
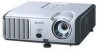
MULTIMEDIA PROJECTOR MODEL XR-40X XR-30X XR-30S OPERATION MANUAL Introduction Quick Start Setup Connections Basic Operation Useful Features Appendix
MULTIMEDIA PROJECTOR MODEL XR-40X XR-30X XR-30S OPERATION MANUAL Introduction Quick Start Setup Connections Basic Operation Useful Features Appendix

Operation Manual
Page 2
Model No.: Serial No.: ii IMPORTANT • For your assistance in reporting the loss or theft of your Projector, please record the Model and Serial Number located on the bottom of the projector and retain this information. • Before recycling the packaging, please ensure that you have checked the contents of the carton thoroughly against the list of "Supplied accessories" on page 10.
Model No.: Serial No.: ii IMPORTANT • For your assistance in reporting the loss or theft of your Projector, please record the Model and Serial Number located on the bottom of the projector and retain this information. • Before recycling the packaging, please ensure that you have checked the contents of the carton thoroughly against the list of "Supplied accessories" on page 10.
Operation Manual
Page 5
...in the literature accompanying the product. See bottom of your purchase. 2. REFER SERVICING TO QUALIFIED SERVICE PERSONNEL. Be especially careful that SHARP may be required to the presence of light. NO USER-SERVICEABLE PARTS EXCEPT LAMP UNIT. U.S.A. CONSUMER PRODUCT SAFETY ACT To ensure... warranty applicable to operate this equipment not expressly approved by the manufacturer could void the user's authority to your new SHARP Projector, using the projector, please read this product to persons. WARRANTY This is intended to alert the user to the presence of uninsulated "...
...in the literature accompanying the product. See bottom of your purchase. 2. REFER SERVICING TO QUALIFIED SERVICE PERSONNEL. Be especially careful that SHARP may be required to the presence of light. NO USER-SERVICEABLE PARTS EXCEPT LAMP UNIT. U.S.A. CONSUMER PRODUCT SAFETY ACT To ensure... warranty applicable to operate this equipment not expressly approved by the manufacturer could void the user's authority to your new SHARP Projector, using the projector, please read this product to persons. WARRANTY This is intended to alert the user to the presence of uninsulated "...

Operation Manual
Page 6
... technician for help. ONLY Declaration of conformity SHARP PROJECTOR, MODEL XR-40X/XR-30X/XR-30S This device complies with the limits for the European Union Community Market SHARP ELECTRONICS (Europe) GmbH Sonninstraße 3, D-20097 Hamburg E.U. This SHARP projector uses a DLP® chip. This very sophisticated panel contains 786,432 (XR40X/XR-30X) / 480,000 (XR-30S) pixels (micromirrors). This will not occur...
... technician for help. ONLY Declaration of conformity SHARP PROJECTOR, MODEL XR-40X/XR-30X/XR-30S This device complies with the limits for the European Union Community Market SHARP ELECTRONICS (Europe) GmbH Sonninstraße 3, D-20097 Hamburg E.U. This SHARP projector uses a DLP® chip. This very sophisticated panel contains 786,432 (XR40X/XR-30X) / 480,000 (XR-30S) pixels (micromirrors). This will not occur...

Operation Manual
Page 7
... can connect and operate all models in this operation manual, the illustration and the screen display are slightly different, depending on the projector. 1 Press MENU/HELP. • The "Picture" menu screen for explanation, and may differ slightly from the actual display. ...Example: "Picture" screen menu for setting up and operating the projector. Using the Menu Screen ENTER button Adjustment buttons (P/R/O/Q) MENU/HELP button ENTER button Adjustment buttons (P/R/O/Q) RETURN button • Press RETURN...
... can connect and operate all models in this operation manual, the illustration and the screen display are slightly different, depending on the projector. 1 Press MENU/HELP. • The "Picture" menu screen for explanation, and may differ slightly from the actual display. ...Example: "Picture" screen menu for setting up and operating the projector. Using the Menu Screen ENTER button Adjustment buttons (P/R/O/Q) MENU/HELP button ENTER button Adjustment buttons (P/R/O/Q) RETURN button • Press RETURN...

Operation Manual
Page 8
...10 Part Names and Functions 11 Inserting the Batteries 14 Usable Range 15 Quick Start Quick Start 16 Setup Setting up the Projector 18 Setting up the Projector 18 Standard Setup (Front Projection) ....... 18 Ceiling-mount Setup 18 Projection (PRJ) Mode 19 Screen Size and Projection ...Distance .. 20 Connections Connecting the Projector to Other Equipment 21 Controlling the Projector by a Computer 24 Connecting the Power Cord 24 Using Basic Operation Turning the Projector On/Off 25 Turning the Projector on 25 Turning the Power off (Putting the Projector into Standby Mode 25 Image ...
...10 Part Names and Functions 11 Inserting the Batteries 14 Usable Range 15 Quick Start Quick Start 16 Setup Setting up the Projector 18 Setting up the Projector 18 Standard Setup (Front Projection) ....... 18 Ceiling-mount Setup 18 Projection (PRJ) Mode 19 Screen Size and Projection ...Distance .. 20 Connections Connecting the Projector to Other Equipment 21 Controlling the Projector by a Computer 24 Connecting the Power Cord 24 Using Basic Operation Turning the Projector On/Off 25 Turning the Projector on 25 Turning the Power off (Putting the Projector into Standby Mode 25 Image ...

Operation Manual
Page 12
... feet) or more often. It will cause eye strain. Rest your nearest Sharp Authorized Projector Dealer or Service Center for a while. In case of the unit. Caution regarding placing of the projector ■ Place the projector on . Do not block the exhaust and intake vents. ■ Allow ... this can affect the longevity of the adjustment foot. ■ After the projector is purchased, a faint smell from 41°F to 95°F (+5°C to avoid personal injury caused by a Sharp Authorized Projector Dealer or Service Center. This is normal and is not in direct sunlight ...
... feet) or more often. It will cause eye strain. Rest your nearest Sharp Authorized Projector Dealer or Service Center for a while. In case of the unit. Caution regarding placing of the projector ■ Place the projector on . Do not block the exhaust and intake vents. ■ Allow ... this can affect the longevity of the adjustment foot. ■ After the projector is purchased, a faint smell from 41°F to 95°F (+5°C to avoid personal injury caused by a Sharp Authorized Projector Dealer or Service Center. This is normal and is not in direct sunlight ...

Operation Manual
Page 13
... lower left corner of the folder) that you are included in . If the temperature continues to install Adobe® Reader® on the projector will blink, and after a 60-second cooling-off , the temperature warn- Info • The cooling fan regulates the internal temperature, and ...Other connected equipment ■ When connecting a computer or other countries ■ The power supply voltage and the shape of the plug may change during projector operation due to "Maintenance In- To utilize these manuals, you want to setup problems or blockage of the air vents, " " and " " ...
... lower left corner of the folder) that you are included in . If the temperature continues to install Adobe® Reader® on the projector will blink, and after a 60-second cooling-off , the temperature warn- Info • The cooling fan regulates the internal temperature, and ...Other connected equipment ■ When connecting a computer or other countries ■ The power supply voltage and the shape of the plug may change during projector operation due to "Maintenance In- To utilize these manuals, you want to setup problems or blockage of the air vents, " " and " " ...

Operation Manual
Page 14
... (attached) ("AA" size, UM/SUM-3, (10' (3.0 m)) HP-7 or similar) Remote control Power cord* (1) (2) (3) (4) For U.S. Optional accessories ■ 3 RCA to the wall outlet in your nearest Sharp Authorized Projector Dealer or Service Center. 10
... (attached) ("AA" size, UM/SUM-3, (10' (3.0 m)) HP-7 or similar) Remote control Power cord* (1) (2) (3) (4) For U.S. Optional accessories ■ 3 RCA to the wall outlet in your nearest Sharp Authorized Projector Dealer or Service Center. 10

Operation Manual
Page 15
ENTER button For setting 37 items selected or adjusted on and putting the projector into standby mode. Front View Zoom ring 26 For enlarging/ reducing the picture. Projector Top View Power indicator 25, 48 STANDBY/ON 25 button For turning the power on the menu. KEYSTONE 28 button For entering the Keystone Correction...
ENTER button For setting 37 items selected or adjusted on and putting the projector into standby mode. Front View Zoom ring 26 For enlarging/ reducing the picture. Projector Top View Power indicator 25, 48 STANDBY/ON 25 button For turning the power on the menu. KEYSTONE 28 button For entering the Keystone Correction...

Operation Manual
Page 16
... computer for using a computer. 34 USB terminal Terminal connecting with the system for connecting video equipment. Refer to secure the projector. 12 COMPUTER/ 21 COMPONENT input terminal 22 Terminal for DVI digital RGB and 22 digital component signals. Kensington Security Standard connector... Using the Kensington Lock • This projector has a Kensington Security Standard connector for use it to the information that came with the USB terminal on how to use ...
... computer for using a computer. 34 USB terminal Terminal connecting with the system for connecting video equipment. Refer to secure the projector. 12 COMPUTER/ 21 COMPONENT input terminal 22 Terminal for DVI digital RGB and 22 digital component signals. Kensington Security Standard connector... Using the Kensington Lock • This projector has a Kensington Security Standard connector for use it to the information that came with the USB terminal on how to use ...

Operation Manual
Page 17
... selected or adjusted on a computer keyboard, when with the USB connection (using a USB cable or the optional remote receiver). STANDBY button 25 For putting the projector into the standby mode. MOUSE/Adjustment 34 buttons (P/R/O/Q) 37 • For moving the computer cursor when with the USB connection (using a USB cable or the...
... selected or adjusted on a computer keyboard, when with the USB connection (using a USB cable or the optional remote receiver). STANDBY button 25 For putting the projector into the standby mode. MOUSE/Adjustment 34 buttons (P/R/O/Q) 37 • For moving the computer cursor when with the USB connection (using a USB cable or the...

Operation Manual
Page 18
... batteries is incorrectly replaced. Incorrect use of the cover into the opening, and lower the cover until it clicks in place. Replace only with this projector may shorten the life of worn-out batteries. 14 Please follow the precautions below. Battery fluid from the remote control once they are kept. Caution...
... batteries is incorrectly replaced. Incorrect use of the cover into the opening, and lower the cover until it clicks in place. Replace only with this projector may shorten the life of worn-out batteries. 14 Please follow the precautions below. Battery fluid from the remote control once they are kept. Caution...

Operation Manual
Page 19
...or high temperature. • The remote control may 30° differ depending on the screen material. How- In this case, move the projector away from the remote control can be re- ever, the effective distance of the signal may malfunction under a fluorescent lamp. When using the... remote control • Ensure that you do not drop it or expose it to control the projector within the ranges shown in the illustration. Remote control sensor Note • The signal from the fluorescent lamp. 30° 23n (7 m) ...
...or high temperature. • The remote control may 30° differ depending on the screen material. How- In this case, move the projector away from the remote control can be re- ever, the effective distance of the signal may malfunction under a fluorescent lamp. When using the... remote control • Ensure that you do not drop it or expose it to control the projector within the ranges shown in the illustration. Remote control sensor Note • The signal from the fluorescent lamp. 30° 23n (7 m) ...

Operation Manual
Page 20
... connecting equipment other than a computer, see the page described below for each step. Connect the projector to the computer and plug the power cord into the AC socket of the projector and the computer is explained using one example. 3 STANDBY/ON 8 button 6 INPUT buttons 4 ENTER button 5 Adjustment buttons (P/R/O/Q) 8 ...Focus ring 4 HEIGHT ADJUST lever 4 ENTER button 5 Adjustment buttons (P/R/O/Q) 5 KEYSTONE button 1. For details, see pages 22 and 23. _PP. 21, 24 3. Place the projector facing a wall or a screen _P. 18 2. Quick Start This section shows the basic operation...
... connecting equipment other than a computer, see the page described below for each step. Connect the projector to the computer and plug the power cord into the AC socket of the projector and the computer is explained using one example. 3 STANDBY/ON 8 button 6 INPUT buttons 4 ENTER button 5 Adjustment buttons (P/R/O/Q) 8 ...Focus ring 4 HEIGHT ADJUST lever 4 ENTER button 5 Adjustment buttons (P/R/O/Q) 5 KEYSTONE button 1. For details, see pages 22 and 23. _PP. 21, 24 3. Place the projector facing a wall or a screen _P. 18 2. Quick Start This section shows the basic operation...

Operation Manual
Page 21
..." is displayed to switch the INPUT mode. _P. 29 7. Select the INPUT mode Select the "COMPUTER" using Keystone Correction. On the On the remote projector control INPUT list INPUT COMPUTER D DVI-D Computer On-screen display (RGB) COMPUTER RGB 1024 × 768 D DVI-D Video • When you press ...INPUT on 8. Adjust the projected image with the Setup Guide 1 After the projector turns on the remote control. On the On the remote projector control On-screen display _P. 25 17 See page 42.) 2 Follow the steps in the Setup Guide and adjust ...
..." is displayed to switch the INPUT mode. _P. 29 7. Select the INPUT mode Select the "COMPUTER" using Keystone Correction. On the On the remote projector control INPUT list INPUT COMPUTER D DVI-D Computer On-screen display (RGB) COMPUTER RGB 1024 × 768 D DVI-D Video • When you press ...INPUT on 8. Adjust the projected image with the Setup Guide 1 After the projector turns on the remote control. On the On the remote projector control On-screen display _P. 25 17 See page 42.) 2 Follow the steps in the Setup Guide and adjust ...

Operation Manual
Page 22
...projector, contact your nearest Sharp Authorized Projector Dealer or Service Center to the screen with the projector's feet flat and level. Doing so will eliminate the need for Keystone correction and provide the best image quality. (See page 28.) Standard Setup (Front Projection) ■ Place the projector... H Lens center L Note • Refer to page 20 for this installation. Setting up the Projector Setting up the Projector For optimal image quality, position the projector perpendicular to obtain the recommended ceiling-mount bracket (sold separately). 18 Ceiling-mount Setup ■ It...
...projector, contact your nearest Sharp Authorized Projector Dealer or Service Center to the screen with the projector's feet flat and level. Doing so will eliminate the need for Keystone correction and provide the best image quality. (See page 28.) Standard Setup (Front Projection) ■ Place the projector... H Lens center L Note • Refer to page 20 for this installation. Setting up the Projector Setting up the Projector For optimal image quality, position the projector perpendicular to obtain the recommended ceiling-mount bracket (sold separately). 18 Ceiling-mount Setup ■ It...

Operation Manual
Page 23
...;"60" 7'4("2-.82'm6"- 21.60m'(43)."1-1m1-'131.6"1m2)'(33."7-1m4-'24".32m4)'(77."5-2m8-'48".6 m) 36'(1110."2 m) Projection Distance 19 Projection (PRJ) Mode The projector can set the PRJ mode in "SCR-ADJ" menu. See page 42.) ■ Table mounted, front projection [Menu item ➞ "Front"] ■ Ceiling mounted, front...
...;"60" 7'4("2-.82'm6"- 21.60m'(43)."1-1m1-'131.6"1m2)'(33."7-1m4-'24".32m4)'(77."5-2m8-'48".6 m) 36'(1110."2 m) Projection Distance 19 Projection (PRJ) Mode The projector can set the PRJ mode in "SCR-ADJ" menu. See page 42.) ■ Table mounted, front projection [Menu item ➞ "Front"] ■ Ceiling mounted, front...

Operation Manual
Page 24
Setting up the Projector (Continued) Screen Size and Projection Distance NORMAL Mode (4:3) Picture (Screen) size Diag. [χ] Width Height Projection distance [L] Minimum [L1] Maximum [L2] 300Љ (762 cm) ...
Setting up the Projector (Continued) Screen Size and Projection Distance NORMAL Mode (4:3) Picture (Screen) size Diag. [χ] Width Height Projection distance [L] Minimum [L1] Maximum [L2] 300Љ (762 cm) ...

Operation Manual
Page 25
... Macintosh Dealer. • Depending on the computer you turn on the projector and then the other cables or connectors not listed below. After making all the connections are using a SHARP notebook computer). IMPORTANT: Ensure that the appropriate input mode has been selected... on the projector before you are made. Contact your computer's external output port. 21 Connecting the Projector to Other Equipment Before connecting, ensure that...
... Macintosh Dealer. • Depending on the computer you turn on the projector and then the other cables or connectors not listed below. After making all the connections are using a SHARP notebook computer). IMPORTANT: Ensure that the appropriate input mode has been selected... on the projector before you are made. Contact your computer's external output port. 21 Connecting the Projector to Other Equipment Before connecting, ensure that...


