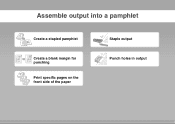
MX M453N Staples - Sharp
MX M453N Staples

Related Manual Pages


Similar Questions

Which Staples Are Used For The Saddle Stitch Feature With An Fn10 Finisher?
Is It The Ar-sc3 Staple Refills Or The Mx-scx1 Staples?
Is It The Ar-sc3 Staple Refills Or The Mx-scx1 Staples?
(Posted by tspangler 10 years ago)

Staple Cartridge?
Do you have to purchase a new staple cartridge or can you reload with standard staples?
Do you have to purchase a new staple cartridge or can you reload with standard staples?
(Posted by dawnhaslag24879 11 years ago)


Set Staple Option From Computer When Printing From Computer To Copier
Can we set the staple option when printing from computer to printer- we can do it when copying on th...
Can we set the staple option when printing from computer to printer- we can do it when copying on th...
(Posted by support45706 11 years ago)

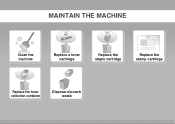
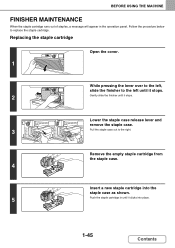
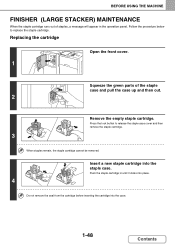
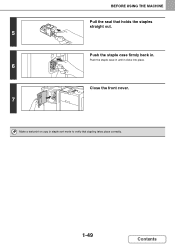
Replacing Staples Into Printer?
How do you replace/insert staples into the Sharp MX-M453N printer?
How do you replace/insert staples into the Sharp MX-M453N printer?
(Posted by jrita 12 years ago)