
Operation Manual
Page 4
... E10 Antenna connection E11 Connecting the monitor to AV equipment E12 AV equipment with 21-pin Euro-SCART (RGB) terminals E12 AV equipment with video output terminals E12 AV equipment with S-video output terminals E13 Connecting the monitor to a power source E14 First installation E15 Selecting the item in the MENU screen E16 Adjusting the computer display (AUTO ADJUSTMENT E17 Common operations Common operations E18 Turning power on/off E18 Switching display modes (INPUT E18 Adjusting the volume E19 Adjusting...
... E10 Antenna connection E11 Connecting the monitor to AV equipment E12 AV equipment with 21-pin Euro-SCART (RGB) terminals E12 AV equipment with video output terminals E12 AV equipment with S-video output terminals E13 Connecting the monitor to a power source E14 First installation E15 Selecting the item in the MENU screen E16 Adjusting the computer display (AUTO ADJUSTMENT E17 Common operations Common operations E18 Turning power on/off E18 Switching display modes (INPUT E18 Adjusting the volume E19 Adjusting...
Operation Manual
Page 5
... to adjust E44 PICTURE menu E45 PROGRAMMES menu (TV mode only E45 AV CONNECTIONS menu E45 MODE SELECT menu E46 CHILD LOCK menu E46 Other features Other features E47 Checking the current channel and audio reception mode on screen (DISPLAY E47 Changing BRIGHT MODE E47 Muting the sound (MUTE E47 Changing the screen size (VIEW MODE E47 Preventing changes to adjusted values (ADJUSTMENT LOCK E48 Resetting all adjustment values (ALL RESET E48 Instructions for attaching a VESA-compliant mount E49 Appendix Monitor care E50 Troubleshooting E50 Monitor care...
... to adjust E44 PICTURE menu E45 PROGRAMMES menu (TV mode only E45 AV CONNECTIONS menu E45 MODE SELECT menu E46 CHILD LOCK menu E46 Other features Other features E47 Checking the current channel and audio reception mode on screen (DISPLAY E47 Changing BRIGHT MODE E47 Muting the sound (MUTE E47 Changing the screen size (VIEW MODE E47 Preventing changes to adjusted values (ADJUSTMENT LOCK E48 Resetting all adjustment values (ALL RESET E48 Instructions for attaching a VESA-compliant mount E49 Appendix Monitor care E50 Troubleshooting E50 Monitor care...
Operation Manual
Page 6
..., near heating equipment or anywhere else where there is likelihood of the display. The TFT colour LCD panel used . - Location - The Power Cord - When there is high, or where the monitor may influence the quality of high temperature, as this may lead to emit high quality video signals. - Do not attempt to as "Windows XP", Microsoft Windows Millennium as "Windows...
..., near heating equipment or anywhere else where there is likelihood of the display. The TFT colour LCD panel used . - Location - The Power Cord - When there is high, or where the monitor may influence the quality of high temperature, as this may lead to emit high quality video signals. - Do not attempt to as "Windows XP", Microsoft Windows Millennium as "Windows...

Operation Manual
Page 12
Connecting the monitor to the analog signal cable. Power Macintosh Macintosh conversion adapter E10 Depending on removing/replacing the terminal cover. See page E6 for the first time or after having changed the system settings during use, perform an automatic screen adjustment (see page E17). When connecting to it is displaying. PC audio cable (accessory) PC analog signal cable (accessory) Analog RGB terminal (Mini D-sub15 pin 3 rows) Paying attention to the connector direction, firmly...
Connecting the monitor to the analog signal cable. Power Macintosh Macintosh conversion adapter E10 Depending on removing/replacing the terminal cover. See page E6 for the first time or after having changed the system settings during use, perform an automatic screen adjustment (see page E17). When connecting to it is displaying. PC audio cable (accessory) PC analog signal cable (accessory) Analog RGB terminal (Mini D-sub15 pin 3 rows) Paying attention to the connector direction, firmly...
Operation Manual
Page 17
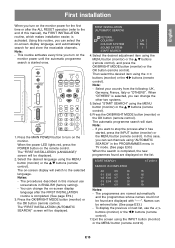
... of this manual use the buttons (monitor) or the buttons (remote control). 7. In this routine, you can select the on-screen display language, and automatically search for the first time or after the ALL RESET operation (refer to stop the process after the FIRST INSTALLATION routine is selected, you can change the other two systems. 5. Names can set channels using the MENU button (monitor) or the buttons (remote control). 6. INPUT MENU / OK BRIGHT MODE CH POWER VIEW MODE PIP PC...
... of this manual use the buttons (monitor) or the buttons (remote control). 7. In this routine, you can select the on-screen display language, and automatically search for the first time or after the ALL RESET operation (refer to stop the process after the FIRST INSTALLATION routine is selected, you can change the other two systems. 5. Names can set channels using the MENU button (monitor) or the buttons (remote control). 6. INPUT MENU / OK BRIGHT MODE CH POWER VIEW MODE PIP PC...
Operation Manual
Page 19
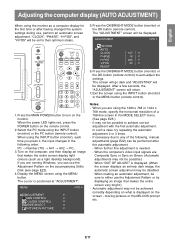
... power LED lights red, press the POWER button on the monitor. When the computer's video input signals are using the INPUT button (monitor) or the MENU button (remote control). The "ADJUSTMENT" screen will be possible.) - Press the MAIN POWER button to achieve correct adjustment with the first automatic adjustment. Turn on the accompanying Utility Disk (see page E22). 4. MENU < PC > ADJUSTMENT >> GAIN CONTROL >> COLOUR CONTROL >> MODE SELECT >> PICTURE IN PICTURE >> Notes: - It may be achieved correctly depending on what is displayed on Green. (Automatic adjustments...
... power LED lights red, press the POWER button on the monitor. When the computer's video input signals are using the INPUT button (monitor) or the MENU button (remote control). The "ADJUSTMENT" screen will be possible.) - Press the MAIN POWER button to achieve correct adjustment with the first automatic adjustment. Turn on the accompanying Utility Disk (see page E22). 4. MENU < PC > ADJUSTMENT >> GAIN CONTROL >> COLOUR CONTROL >> MODE SELECT >> PICTURE IN PICTURE >> Notes: - It may be achieved correctly depending on what is displayed on Green. (Automatic adjustments...
Operation Manual
Page 20
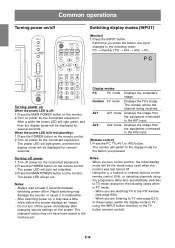
... table also automatically switches to the display mode for the connected equipment. Displays the TV's image. The changed values may take a little while before the screen displays an image. - Press the POWER button on power for several seconds. Press the INPUT button. Turn on the remote control. After a while the power LED will light green, and then the display mode will be the channel being used when the monitor was last turned off INPUT MENU / OK BRIGHT MODE CH /BRIGHT POWER VIEW MODE PIP...
... table also automatically switches to the display mode for the connected equipment. Displays the TV's image. The changed values may take a little while before the screen displays an image. - Press the POWER button on power for several seconds. Press the INPUT button. Turn on the remote control. After a while the power LED will light green, and then the display mode will be the channel being used when the monitor was last turned off INPUT MENU / OK BRIGHT MODE CH /BRIGHT POWER VIEW MODE PIP...

Operation Manual
Page 22
... change channels in PC mode. 2. Select "PICTURE IN PICTURE" using the buttons (monitor) or the buttons (remote control). 5. To switch the audio reception mode for the PIP window between TV, AV1 and AV2. Watching TV or other video in a window on the computer screen. INPUT MENU / OK BRIGHT MODE CH POWER VIEW MODE PIP PC TV AV1 AV2 SUBPAGE REVEAL SUBTITLE TEXT SLEEP MENU BRIGHT MODE OK BRIGHT /BRIGHT DISPLAY FREEZE /HOLD SOUND MAIN POWER CH 1. PC: Computer audio PIP: PIP window audio 7. The...
... change channels in PC mode. 2. Select "PICTURE IN PICTURE" using the buttons (monitor) or the buttons (remote control). 5. To switch the audio reception mode for the PIP window between TV, AV1 and AV2. Watching TV or other video in a window on the computer screen. INPUT MENU / OK BRIGHT MODE CH POWER VIEW MODE PIP PC TV AV1 AV2 SUBPAGE REVEAL SUBTITLE TEXT SLEEP MENU BRIGHT MODE OK BRIGHT /BRIGHT DISPLAY FREEZE /HOLD SOUND MAIN POWER CH 1. PC: Computer audio PIP: PIP window audio 7. The...
Operation Manual
Page 28
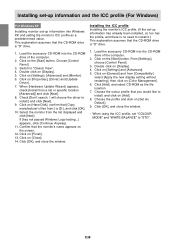
...: 1. From [Settings], choose [Control Panel]. 3. Click [OK], and close the window. Click on [Display a list of all the drivers in a specific location, so you can be realized. - For Windows 98 Installing monitor set-up information on your system. Check [Display a list of all use the ICC profile. - When [Models] is [D:], and click [OK]. 9. Installing set-up information and the ICC profile (For Windows) Depending on the type of computer...
...: 1. From [Settings], choose [Control Panel]. 3. Click [OK], and close the window. Click on [Display a list of all the drivers in a specific location, so you can be realized. - For Windows 98 Installing monitor set-up information on your system. Check [Display a list of all use the ICC profile. - When [Models] is [D:], and click [OK]. 9. Installing set-up information and the ICC profile (For Windows) Depending on the type of computer...
Operation Manual
Page 29
... all the drivers in a specific location, so you can select the driver you want .] and click [Next]. 8. Select the monitor details from :] is displayed, click on [Change]. 6. From [Settings], choose [Control Panel]. 3. Check that [Copy manufacturer's files from the list, then click [Next], [Next], and [Finish]. Click [OK], and close the window. When [Models] is [D:], and click [OK]. 9. For Windows Me Installing monitor set -up information...
... all the drivers in a specific location, so you can select the driver you want .] and click [Next]. 8. Select the monitor details from :] is displayed, click on [Change]. 6. From [Settings], choose [Control Panel]. 3. Check that [Copy manufacturer's files from the list, then click [Next], [Next], and [Finish]. Click [OK], and close the window. When [Models] is [D:], and click [OK]. 9. For Windows Me Installing monitor set -up information...
Operation Manual
Page 30
... [Color Management]. 6. Load the accessory CD-ROM into Windows XP, and setting the monitor's ICC profile as the file location. 7. Click on [Properties], [Driver] and [Update Driver]. 7. Choose [Control Panel]. 3. Click on the [Start] button. Installing the ICC profile Installing the monitor's ICC profile. (If the set-up information into the CD-ROM drive of the computer. 2. When [Hardware Update Wizard] appears, check [Install from the list displayed...
... [Color Management]. 6. Load the accessory CD-ROM into Windows XP, and setting the monitor's ICC profile as the file location. 7. Click on [Properties], [Driver] and [Update Driver]. 7. Choose [Control Panel]. 3. Click on the [Start] button. Installing the ICC profile Installing the monitor's ICC profile. (If the set-up information into the CD-ROM drive of the computer. 2. When [Hardware Update Wizard] appears, check [Install from the list displayed...

Operation Manual
Page 32
...SOUND MAIN POWER CH 1. Turn on the list. FROM START SEARCH [ UK ] [ PAL ] [ I] >> 6. Setting TV channels Saving broadcast TV channels in the memory (AUTOMATIC SEARCH) "AUTOMATIC SEARCH" allows you can change "COLOUR SYSTEM" and "SOUND SYSTEM". 7. Select the TV mode using the MENU button. Display the MENU screen using the INPUT button (monitor) or the TV button (remote control). 3. MENU < TV/AV > PICTURE >> PROGRAMMES >> AV CONNECTIONS >> MODE SELECT >> CHILD LOCK >> 4. Select "AUTOMATIC SEARCH" using the MENU button (monitor) or the buttons (remote...
...SOUND MAIN POWER CH 1. Turn on the list. FROM START SEARCH [ UK ] [ PAL ] [ I] >> 6. Setting TV channels Saving broadcast TV channels in the memory (AUTOMATIC SEARCH) "AUTOMATIC SEARCH" allows you can change "COLOUR SYSTEM" and "SOUND SYSTEM". 7. Select the TV mode using the MENU button. Display the MENU screen using the INPUT button (monitor) or the TV button (remote control). 3. MENU < TV/AV > PICTURE >> PROGRAMMES >> AV CONNECTIONS >> MODE SELECT >> CHILD LOCK >> 4. Select "AUTOMATIC SEARCH" using the MENU button (monitor) or the buttons (remote...

Operation Manual
Page 33
... TEXT SLEEP MENU BRIGHT MODE OK BRIGHT /BRIGHT DISPLAY FREEZE /HOLD SOUND MAIN POWER CH 1. MANUAL ADJUSTMENT < TV/AV > RETURN CHANNEL FREQUENCY NAME COLOUR SYSTEM SOUND SYSTEM SKIP [ 1 ] [ 048.25MHz ] [ E02 ] [ PAL ] [ I , D/K, L ON OFF Description The channel changes to the higher or lower channel. To adjust "NAME", first press the OK/BRIGHT MODE button (monitor) or the OK button (remote control) to activate the text input mode. Receivable frequencies depending on the settings in...
... TEXT SLEEP MENU BRIGHT MODE OK BRIGHT /BRIGHT DISPLAY FREEZE /HOLD SOUND MAIN POWER CH 1. MANUAL ADJUSTMENT < TV/AV > RETURN CHANNEL FREQUENCY NAME COLOUR SYSTEM SOUND SYSTEM SKIP [ 1 ] [ 048.25MHz ] [ E02 ] [ PAL ] [ I , D/K, L ON OFF Description The channel changes to the higher or lower channel. To adjust "NAME", first press the OK/BRIGHT MODE button (monitor) or the OK button (remote control) to activate the text input mode. Receivable frequencies depending on the settings in...

Operation Manual
Page 44
... video. - INPUT MENU / OK BRIGHT MODE CH POWER VIEW MODE PIP PC TV AV1 AV2 SUBPAGE REVEAL SUBTITLE TEXT SLEEP MENU BRIGHT MODE OK BRIGHT /BRIGHT DISPLAY FREEZE /HOLD SOUND MAIN POWER CH 1. See page E18 for connections with this manual refers to AV1 mode and AV2 mode as VCRs, DVD players, and game systems. (See pages E12 and E13.) Equipment connected to AV-IN1: Display mode "AV1" Equipment connected to AV1 or AV2. Adjust the volume...
... video. - INPUT MENU / OK BRIGHT MODE CH POWER VIEW MODE PIP PC TV AV1 AV2 SUBPAGE REVEAL SUBTITLE TEXT SLEEP MENU BRIGHT MODE OK BRIGHT /BRIGHT DISPLAY FREEZE /HOLD SOUND MAIN POWER CH 1. See page E18 for connections with this manual refers to AV1 mode and AV2 mode as VCRs, DVD players, and game systems. (See pages E12 and E13.) Equipment connected to AV-IN1: Display mode "AV1" Equipment connected to AV1 or AV2. Adjust the volume...

Operation Manual
Page 47
... displayed, change the signal type and/or colour system. - Adjusts the overall brightness of the external equipment connected to the signal from AV-IN1 in "COLOUR SYSTEM". Adjusts the image quality. STD Standard setting for this menu to the current reception colour system. CVBS Composite video signal. - Y/C S-video signal. Switching between AV input signals may be slow, depending on the settings in TV mode. Sets whether to temporarily output the image and sound...
... displayed, change the signal type and/or colour system. - Adjusts the overall brightness of the external equipment connected to the signal from AV-IN1 in "COLOUR SYSTEM". Adjusts the image quality. STD Standard setting for this menu to the current reception colour system. CVBS Composite video signal. - Y/C S-video signal. Switching between AV input signals may be slow, depending on the settings in TV mode. Sets whether to temporarily output the image and sound...

Operation Manual
Page 50
... the MENU button, press the MAIN POWER button (i.e. Continue to press the buttons until "ADJUSTMENT UNLOCKED" appears on ). This includes not only PC mode, but for not only PC mode, but also TV/AV mode (including channel settings, etc.). Turn off the monitor power using the MAIN POWER button. 2. The lock is set , all adjustment values (ALL RESET) Disabling the control buttons other than the following buttons (monitor and remote control) prevents adjusted values from being changed. turn the power on the screen. The lock...
... the MENU button, press the MAIN POWER button (i.e. Continue to press the buttons until "ADJUSTMENT UNLOCKED" appears on ). This includes not only PC mode, but for not only PC mode, but also TV/AV mode (including channel settings, etc.). Turn off the monitor power using the MAIN POWER button. 2. The lock is set , all adjustment values (ALL RESET) Disabling the control buttons other than the following buttons (monitor and remote control) prevents adjusted values from being changed. turn the power on the screen. The lock...

Operation Manual
Page 51
...-12 mm Screw used Attachments must satisfy the following these instructions, please also refer to the installation instructions in the operation manual included with a length of 100 mm x 100 mm between the display and stand nor to over bend the cable or add extension cords as this monitor. Be careful not to let the stand drop. Spread out a soft cloth on the VESA standard...
...-12 mm Screw used Attachments must satisfy the following these instructions, please also refer to the installation instructions in the operation manual included with a length of 100 mm x 100 mm between the display and stand nor to over bend the cable or add extension cords as this monitor. Be careful not to let the stand drop. Spread out a soft cloth on the VESA standard...
Operation Manual
Page 52
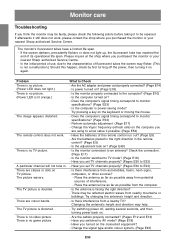
... mouse. - Problem There is no picture. (Power LED does not light.) There is no game picture. There are colour bands. The TV picture is lit orange.) The image appears distorted. Does the computer's signal timing correspond to monitor specifications? (Page E53) - Have the batteries of its operational life span. Is the monitor connected to Check - Have you switched to E33) - Have you turned on ? - Monitor care Troubleshooting If you...
... mouse. - Problem There is no picture. (Power LED does not light.) There is no game picture. There are colour bands. The TV picture is lit orange.) The image appears distorted. Does the computer's signal timing correspond to monitor specifications? (Page E53) - Have the batteries of its operational life span. Is the monitor connected to Check - Have you switched to E33) - Have you turned on ? - Monitor care Troubleshooting If you...

Operation Manual
Page 53
...;ol English Monitor care Always remove the plug from the monitor's speakers while the monitor is in power-saving mode. - Never scratch the monitor with rubber or plastic items for lens cleaning is no sound. - Are the audio cables properly connected? (Pages E10, E12 and E13) - Is the adjustment lock set ? "PROGRAMMES" in the MENU screen - Is Child Lock set ? (Page E48) The MENU screen does not appear. Is the monitor switched to lightly wipe...
...;ol English Monitor care Always remove the plug from the monitor's speakers while the monitor is in power-saving mode. - Never scratch the monitor with rubber or plastic items for lens cleaning is no sound. - Are the audio cables properly connected? (Pages E10, E12 and E13) - Is the adjustment lock set ? "PROGRAMMES" in the MENU screen - Is Child Lock set ? (Page E48) The MENU screen does not appear. Is the monitor switched to lightly wipe...

Operation Manual
Page 54
... design and specification changes for product improvement without prior notice. Plug & Play VESA DDC1/DDC2B compatible Power management VESA: based on Green, Composite Sync (TTL level: +/-) Video colour system PAL/SECAM/NTSC TV-standard B/G, I, D/K, L Stereo/bilingual NICAM, A2 stereo Expansion compensation Digital scaling (Enlarges VGA/SVGA/XGA etc. Special AC adapter: Approx. 1.5 m Approx. 150 (W) x 60 (D) x 35 (H) mm Note: - PC analog signal cable: approx. 1.8 m - The performance specification figures...
... design and specification changes for product improvement without prior notice. Plug & Play VESA DDC1/DDC2B compatible Power management VESA: based on Green, Composite Sync (TTL level: +/-) Video colour system PAL/SECAM/NTSC TV-standard B/G, I, D/K, L Stereo/bilingual NICAM, A2 stereo Expansion compensation Digital scaling (Enlarges VGA/SVGA/XGA etc. Special AC adapter: Approx. 1.5 m Approx. 150 (W) x 60 (D) x 35 (H) mm Note: - PC analog signal cable: approx. 1.8 m - The performance specification figures...


