
AL-2030 | AL-2040CS Operation Manual
Page 5
... 57 3 DRUM CARTRIDGE TD CARTRIDGE 10 REPLACEMENT 58 POWER ON 12 CLEANING THE UNIT 59 3 LOADING PAPER 8 TROUBLESHOOTING THE UNIT 4 PAPER 14 TROUBLESHOOTING 61 LOADING THE PAPER TRAY ..... 15 STATUS INDICATORS 62 BYPASS FEED MISFEED REMOVAL 63 (including special paper 17 4 INSTALLING THE SOFTWARE IF AN ORIGINAL MISFEED OCCURS WHILE USING THE 5 SPF 68 SOFTWARE... 76 COPY FLOW 46 INDEX 84 ORIGINAL PLACEMENT 47 SET THE COPY QUANTITY ....... 49 8 EXPOSURE ADJUSTMENT/ PHOTO COPYING 49 REDUCTION/ENLARGEMENT/ ZOOM 51 SELECTING THE PAPER TRAY .... 51 9 3
... 57 3 DRUM CARTRIDGE TD CARTRIDGE 10 REPLACEMENT 58 POWER ON 12 CLEANING THE UNIT 59 3 LOADING PAPER 8 TROUBLESHOOTING THE UNIT 4 PAPER 14 TROUBLESHOOTING 61 LOADING THE PAPER TRAY ..... 15 STATUS INDICATORS 62 BYPASS FEED MISFEED REMOVAL 63 (including special paper 17 4 INSTALLING THE SOFTWARE IF AN ORIGINAL MISFEED OCCURS WHILE USING THE 5 SPF 68 SOFTWARE... 76 COPY FLOW 46 INDEX 84 ORIGINAL PLACEMENT 47 SET THE COPY QUANTITY ....... 49 8 EXPOSURE ADJUSTMENT/ PHOTO COPYING 49 REDUCTION/ENLARGEMENT/ ZOOM 51 SELECTING THE PAPER TRAY .... 51 9 3

AL-2030 | AL-2040CS Operation Manual
Page 7
...) 1 2 7 10 3 8 11 9 4 12 5 13 14 6 TD cartridge Drum cartridge 7 15 3 1 Document glass 2 Operation panel 3 Front cover 4 Paper tray 1 5 Paper tray 2 (AL-2040CS only) 6 Multi-bypass tray 7 Side cover 8 Side cover open button 9 Bypass tray paper guides 16 17 10 Paper output tray 11 Paper output tray extension 12 Power switch 13 Handle 14 Power cord 15 Fusing unit release lever 16 Transfer...
...) 1 2 7 10 3 8 11 9 4 12 5 13 14 6 TD cartridge Drum cartridge 7 15 3 1 Document glass 2 Operation panel 3 Front cover 4 Paper tray 1 5 Paper tray 2 (AL-2040CS only) 6 Multi-bypass tray 7 Side cover 8 Side cover open button 9 Bypass tray paper guides 16 17 10 Paper output tray 11 Paper output tray extension 12 Power switch 13 Handle 14 Power cord 15 Fusing unit release lever 16 Transfer...

AL-2030 | AL-2040CS Operation Manual
Page 8
...13 Power save indicator Lights up when the unit is in a power save mode. (p.54, p.55) 14 Tray select key Use to select a paper feed station (paper tray 1, paper tray 2* or multibypass tray). (p.51) 15 Paper feed location indicators Light up when the unit is used , the zoom copy ratio range is shown by a... indicator Use to select any reduction or enlargement copy ratio from one-sided originals. For description of copies made to date. (p.56) * AL-2040CS only 6 Selected mode is being used as a printer and scanner*. OPERATION PANEL 1 Original to copy key and indicators* Two-sided copies...
...13 Power save indicator Lights up when the unit is in a power save mode. (p.54, p.55) 14 Tray select key Use to select a paper feed station (paper tray 1, paper tray 2* or multibypass tray). (p.51) 15 Paper feed location indicators Light up when the unit is used , the zoom copy ratio range is shown by a... indicator Use to select any reduction or enlargement copy ratio from one-sided originals. For description of copies made to date. (p.56) * AL-2040CS only 6 Selected mode is being used as a printer and scanner*. OPERATION PANEL 1 Original to copy key and indicators* Two-sided copies...

AL-2030 | AL-2040CS Operation Manual
Page 9
...all the accessories are supplied with the unit. (p.8) 2 Remove the protective materials. (p.9) 3 Install the TD cartridge. (p.10) 4 Load the paper in the paper tray (p.15) or the multi-bypass tray . (p.17) 5 Plug the other end of the power cord into the nearest outlet. (p.12) 6 Install the software.*1 (p.19) 7 ...(p.36) your document. *1 If you are only using the unit for copying, skip this step. *2 The scanner function is only available on the AL-2040CS. 7 SETUP PROCEDURE 2 When using the unit for the first time, setup the unit following the procedure shown below to use , or if ...
...all the accessories are supplied with the unit. (p.8) 2 Remove the protective materials. (p.9) 3 Install the TD cartridge. (p.10) 4 Load the paper in the paper tray (p.15) or the multi-bypass tray . (p.17) 5 Plug the other end of the power cord into the nearest outlet. (p.12) 6 Install the software.*1 (p.19) 7 ...(p.36) your document. *1 If you are only using the unit for copying, skip this step. *2 The scanner function is only available on the AL-2040CS. 7 SETUP PROCEDURE 2 When using the unit for the first time, setup the unit following the procedure shown below to use , or if ...

AL-2030 | AL-2040CS Operation Manual
Page 15
In cases where the machine will not be used . Copy quantity Exposure adjustment Zoom Tray Two-sided copy (AL-2040CS only) 1 copy AUTO 100% Paper tray 1 The "Original to minimize power consumption. Initial settings of time, the unit will automatically enter auto power shut-off the power switch and remove the ...
In cases where the machine will not be used . Copy quantity Exposure adjustment Zoom Tray Two-sided copy (AL-2040CS only) 1 copy AUTO 100% Paper tray 1 The "Original to minimize power consumption. Initial settings of time, the unit will automatically enter auto power shut-off the power switch and remove the ...
AL-2030 | AL-2040CS Operation Manual
Page 16
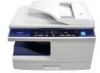
... and envelopes must be fed one sheet at a time through the multi-bypass tray. 14 to 34.5 lbs.*2 (52g/m2 to 128g/m2) *1 Do not use only paper recommended by SHARP. to 34.5 lbs. (105g/m2 to load paper into the tray. PAPER For best results, use non-standard envelopes, and envelopes that have metal clasps...
... and envelopes must be fed one sheet at a time through the multi-bypass tray. 14 to 34.5 lbs.*2 (52g/m2 to 128g/m2) *1 Do not use only paper recommended by SHARP. to 34.5 lbs. (105g/m2 to load paper into the tray. PAPER For best results, use non-standard envelopes, and envelopes that have metal clasps...

AL-2030 | AL-2040CS Operation Manual
Page 17
...width of the paper tray and pull the paper tray out until it stops. 2 Remove the pressure plate lock. LOADING THE PAPER TRAY 1 Raise the handle of the paper. Move paper guide B to the copy paper width and length. Paper guide B Paper guide A 15 Pressure plate lock 4 Adjust the paper guides on the paper tray to the ... location. Rotate the pressure plate lock in the direction of the arrow to fix it while pressing down the pressure plate of the paper tray. 3 3 Store the pressure plate lock which has been removed in step 2. To store the pressure plate lock, rotate the lock...
...width of the paper tray and pull the paper tray out until it stops. 2 Remove the pressure plate lock. LOADING THE PAPER TRAY 1 Raise the handle of the paper. Move paper guide B to the copy paper width and length. Paper guide B Paper guide A 15 Pressure plate lock 4 Adjust the paper guides on the paper tray to the ... location. Rotate the pressure plate lock in the direction of the arrow to fix it while pressing down the pressure plate of the paper tray. 3 3 Store the pressure plate lock which has been removed in step 2. To store the pressure plate lock, rotate the lock...

AL-2030 | AL-2040CS Operation Manual
Page 18
... size and type. • When loading paper, ensure there is no space between the paper and the guide, and check if the guide is not set too narrow causing the paper to the paper tray, remove the old paper already contained in the tray. Placing new paper on top of rips, dust, wrinkles,... and curled or bent edges. • Make sure all paper from the air, resulting in paper jams. • When adding new paper to bend. Do not load paper above the ...
... size and type. • When loading paper, ensure there is no space between the paper and the guide, and check if the guide is not set too narrow causing the paper to the paper tray, remove the old paper already contained in the tray. Placing new paper on top of rips, dust, wrinkles,... and curled or bent edges. • Make sure all paper from the air, resulting in paper jams. • When adding new paper to bend. Do not load paper above the ...

AL-2030 | AL-2040CS Operation Manual
Page 48
... the copier, and provides higher reliability by reducing wear and tear on both sides of copies, see page 49. COPY FLOW 1 Make sure that paper has been loaded in the paper tray (p.15) or multi-bypass tray (p.17), and check the paper size (p.14). To enlarge or reduce the copy, see page 52. 4 Start copying. AL-2040CS...
... the copier, and provides higher reliability by reducing wear and tear on both sides of copies, see page 49. COPY FLOW 1 Make sure that paper has been loaded in the paper tray (p.15) or multi-bypass tray (p.17), and check the paper size (p.14). To enlarge or reduce the copy, see page 52. 4 Start copying. AL-2040CS...

AL-2030 | AL-2040CS Operation Manual
Page 49
...progress, the print job will begin when the copy job is completed. • The scanning function cannot be used while a copy job is in progress. (AL-2040CS only) About interrupt copying If you press the start ( ) key to begin automatically after the print data in the unit's memory is printed (interrupt... copies may suffer damage. In addition, toner may scatter inside the machine or the drum cartridge may be striped or blurred. • When using the paper tray or multi-bypass tray is in the SPF. 1 Open the SPF, and place the original. 2 Place an original face down the SPF lightly.
...progress, the print job will begin when the copy job is completed. • The scanning function cannot be used while a copy job is in progress. (AL-2040CS only) About interrupt copying If you press the start ( ) key to begin automatically after the print data in the unit's memory is printed (interrupt... copies may suffer damage. In addition, toner may scatter inside the machine or the drum cartridge may be striped or blurred. • When using the paper tray or multi-bypass tray is in the SPF. 1 Open the SPF, and place the original. 2 Place an original face down the SPF lightly.

AL-2030 | AL-2040CS Operation Manual
Page 53
... quantity display. • To reset the ratio to 400% in the following order: paper tray 1, paper tray 2*, multi-bypass tray. * AL-2040CS only 51 Each time you press the tray select ( ) key, the location indicated by the paper feed location indicator changes in 1% increments. (When the SPF is being used, the ... preset reduction ratios and two enlargement ratios can be displayed in the display. SELECTING THE PAPER TRAY Press the tray select ( ) key. When the key is 50% to 200%.) 1 Set the original and check the paper size. 2 Use the copy ratio selector key and/or ZOOM ( , ) keys ...
... quantity display. • To reset the ratio to 400% in the following order: paper tray 1, paper tray 2*, multi-bypass tray. * AL-2040CS only 51 Each time you press the tray select ( ) key, the location indicated by the paper feed location indicator changes in 1% increments. (When the SPF is being used, the ... preset reduction ratios and two enlargement ratios can be displayed in the display. SELECTING THE PAPER TRAY Press the tray select ( ) key. When the key is 50% to 200%.) 1 Set the original and check the paper size. 2 Use the copy ratio selector key and/or ZOOM ( , ) keys ...

AL-2030 | AL-2040CS Operation Manual
Page 63
.... - Unlock the scan head locking switch. 9 Is original image too dark or Adjust the exposure manually. on . 12 Side cover closed ? Paper misfeeds Store paper flat in the wrapper in the paper tray not set "Fusing not appropriate. frequently. Printing is not The fusing temperature is In the user programs, set properly? Clean the...
.... - Unlock the scan head locking switch. 9 Is original image too dark or Adjust the exposure manually. on . 12 Side cover closed ? Paper misfeeds Store paper flat in the wrapper in the paper tray not set "Fusing not appropriate. frequently. Printing is not The fusing temperature is In the user programs, set properly? Clean the...

AL-2030 | AL-2040CS Operation Manual
Page 64
... required indicator Blinking TD cartridge must be replaced. Push the tray all the way in or load paper in the display. "P" is blinking in the tray. - The paper tray or multi-bypass tray is locked. Power save indicator is blinking. The paper tray indicator is steadily lit. Check if the 57 "CH" is...sure to cancel the preheat mode. 54 The unit is steadily lit in the display. Press any key to use only genuine SHARP parts and supplies. The TD cartridge is not cartridge is closed. original, "OP" blinking may appear even when the OC cover ...
... required indicator Blinking TD cartridge must be replaced. Push the tray all the way in or load paper in the display. "P" is blinking in the tray. - The paper tray or multi-bypass tray is locked. Power save indicator is blinking. The paper tray indicator is steadily lit. Check if the 57 "CH" is...sure to cancel the preheat mode. 54 The unit is steadily lit in the display. Press any key to use only genuine SHARP parts and supplies. The TD cartridge is not cartridge is closed. original, "OP" blinking may appear even when the OC cover ...

AL-2030 | AL-2040CS Operation Manual
Page 66
... area 1 Gently remove the misfed paper from the paper feed area, pull out the paper tray and remove the misfed paper. Toner on copies. • If the paper has been fed through the multi-bypass tray, do not remove the misfed paper through the multi-bypass tray. If the paper cannot be removed, proceed to "B: Misfeed in the fusing area...
... area 1 Gently remove the misfed paper from the paper feed area, pull out the paper tray and remove the misfed paper. Toner on copies. • If the paper has been fed through the multi-bypass tray, do not remove the misfed paper through the multi-bypass tray. If the paper cannot be removed, proceed to "B: Misfeed in the fusing area...

AL-2030 | AL-2040CS Operation Manual
Page 68
D: Misfeed in the direction of the lower side cover, pull out the lower paper tray and remove the misfed paper. Then close the lower paper tray. 2 Close the lower side cover. 3 Close the side cover by pressing the round projections near the side cover open the front cover, ...see "INSTALLING THE TD CARTRIDGE" (p.10). 3 Rotate the roller rotating knob in the lower paper feed area 1 Open the lower side cover (under the multi-bypass tray) and remove the misfed paper. To open button. When closing the covers, be damaged. The misfeed ( ) indicator will go out and...
D: Misfeed in the direction of the lower side cover, pull out the lower paper tray and remove the misfed paper. Then close the lower paper tray. 2 Close the lower side cover. 3 Close the side cover by pressing the round projections near the side cover open the front cover, ...see "INSTALLING THE TD CARTRIDGE" (p.10). 3 Rotate the roller rotating knob in the lower paper feed area 1 Open the lower side cover (under the multi-bypass tray) and remove the misfed paper. To open button. When closing the covers, be damaged. The misfeed ( ) indicator will go out and...
AL-2030 | AL-2040CS Operation Manual
Page 71
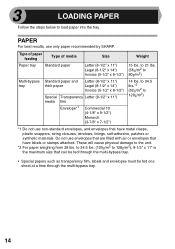
...AL-2030 AL-2040CS Type Digital multifunctional system, desk-top type Copy / printer system Dry, electrostatic transfer Originals Sheets, bound documents Printer function Available - Cable required (USB only) Available - Cable required (USB only) Paper tray 250 sheets x 1 250 sheets x 2 Multi-bypass tray Paper output tray...system SPF Moving original Fusing system Heat rollers Development system Magnetic brush development Light source Cold cathode fluorescent lamp Copier Resolution Printer 600 x 300dpi (Auto/Manual mode) 600 x 600dpi (Photo mode) 600dpi Scanner - 600 ...
...AL-2030 AL-2040CS Type Digital multifunctional system, desk-top type Copy / printer system Dry, electrostatic transfer Originals Sheets, bound documents Printer function Available - Cable required (USB only) Available - Cable required (USB only) Paper tray 250 sheets x 1 250 sheets x 2 Multi-bypass tray Paper output tray...system SPF Moving original Fusing system Heat rollers Development system Magnetic brush development Light source Cold cathode fluorescent lamp Copier Resolution Printer 600 x 300dpi (Auto/Manual mode) 600 x 600dpi (Photo mode) 600dpi Scanner - 600 ...

AL-2030 | AL-2040CS Operation Manual
Page 72
...our policy of production units. The performance specification figures indicated are nominal values of continuous improvement, SHARP reserves the right to make design and specification changes for product improvement without prior notice. AL-2030 AL-2040CS Bit depth 1 bit or 8 bit/pixel Sensor Color CCD Scanning speed Max. 2.88ms... ready state and "Selection of copy start state" set to ON in the user programs (8-1/2" x 11" (A4), paper fed from these values in the tray 1 and performing continuous one-sided printing of the same page. *7 The first-copy time is used under the operating ...
...our policy of production units. The performance specification figures indicated are nominal values of continuous improvement, SHARP reserves the right to make design and specification changes for product improvement without prior notice. AL-2030 AL-2040CS Bit depth 1 bit or 8 bit/pixel Sensor Color CCD Scanning speed Max. 2.88ms... ready state and "Selection of copy start state" set to ON in the user programs (8-1/2" x 11" (A4), paper fed from these values in the tray 1 and performing continuous one-sided printing of the same page. *7 The first-copy time is used under the operating ...

AL-2030 | AL-2040CS Operation Manual
Page 74
...the side cover and front cover, and to remove the TD cartridge, see "TD CARTRIDGE REPLACEMENT" (p.57). 3 Raise the handle of the paper tray and pull the paper tray out until it stops. 4 Push the center of the pressure plate down until it locks in place and lock the plate using the pressure... this unit, be locked to prevent shipping damage. 7 Close the multi-bypass tray and the paper output tray extension, and attach the packing materials and tape which has been stored in the front of the paper tray. 5 Push the paper tray back into the carton. To open and close the front cover and side cover...
...the side cover and front cover, and to remove the TD cartridge, see "TD CARTRIDGE REPLACEMENT" (p.57). 3 Raise the handle of the paper tray and pull the paper tray out until it stops. 4 Push the center of the pressure plate down until it locks in place and lock the plate using the pressure... this unit, be locked to prevent shipping damage. 7 Close the multi-bypass tray and the paper output tray extension, and attach the packing materials and tape which has been stored in the front of the paper tray. 5 Push the paper tray back into the carton. To open and close the front cover and side cover...

AL-2030 | AL-2040CS Operation Manual
Page 86
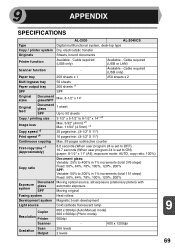
...cable 71 Interrupt copying 47 Introduction 4 L LAN interface cable 25, 71 Light and dark indicator 6, 49 Light key 6, 49 Loading paper 14 Loading the paper tray 15 84 SPF 59 - TD cartridge replacement required indicator 6, 57, 62 Appendix 69 Auto clear time 54, 55 Auto power shut-...off mode 54, 55 Automatic exposure adjustment ........ 50 B Before installation 20 Button Manager 19, 36 Bypass feed 17 Bypass tray paper guides 5, 18 C Cautions - Transfer charger 60 Clear key 6, 49, 56 Conventions used in this manual and online manual 4 Copy flow 46...
...cable 71 Interrupt copying 47 Introduction 4 L LAN interface cable 25, 71 Light and dark indicator 6, 49 Light key 6, 49 Loading paper 14 Loading the paper tray 15 84 SPF 59 - TD cartridge replacement required indicator 6, 57, 62 Appendix 69 Auto clear time 54, 55 Auto power shut-...off mode 54, 55 Automatic exposure adjustment ........ 50 B Before installation 20 Button Manager 19, 36 Bypass feed 17 Bypass tray paper guides 5, 18 C Cautions - Transfer charger 60 Clear key 6, 49, 56 Conventions used in this manual and online manual 4 Copy flow 46...
AL-2030 | AL-2040CS Operation Manual
Page 87
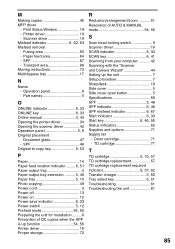
Transport area 66 Moving instructions 72 Multi-bypass tray 17 N Name - SPF 48 Original to copy key 6, 53 P Paper 14 Paper feed location indicator ......... 6, 51 Paper output tray 5 Paper output tray extension .......... 5, 46 Paper tray 5, 15 Photo copying 49 Power cord 5 Power off 13 Power on ...71 T TD cartridge 5, 10, 57 TD cartridge replacement 57 TD cartridge replacement required indicator 6, 57, 62 Transfer charger 5, 60 Tray select key 6, 51 Troubleshooting 61 Troubleshooting the unit 61 85 Printer driver 19 - Part names 5 O ONLINE indicator 6, 33 ONLINE...
Transport area 66 Moving instructions 72 Multi-bypass tray 17 N Name - SPF 48 Original to copy key 6, 53 P Paper 14 Paper feed location indicator ......... 6, 51 Paper output tray 5 Paper output tray extension .......... 5, 46 Paper tray 5, 15 Photo copying 49 Power cord 5 Power off 13 Power on ...71 T TD cartridge 5, 10, 57 TD cartridge replacement 57 TD cartridge replacement required indicator 6, 57, 62 Transfer charger 5, 60 Tray select key 6, 51 Troubleshooting 61 Troubleshooting the unit 61 85 Printer driver 19 - Part names 5 O ONLINE indicator 6, 33 ONLINE...


