
AL-1631 | AL-1641CS Operation Manual
Page 3
... changes, e.g., near the unit and shall be easily accessible. Caution: • Place the unit on a firm, level surface. • Do not install the unit in a humid or dusty location. • When the unit is not used for a long time, for example for servicing and proper ventilation... procedures other than those specified herein may result in hazardous radiation exposure. • The socket-outlet shall be installed near an air conditioner or heater. Important points when selecting an installation site Do not install your eyes. • Do not switch the unit rapidly on and off before...
... changes, e.g., near the unit and shall be easily accessible. Caution: • Place the unit on a firm, level surface. • Do not install the unit in a humid or dusty location. • When the unit is not used for a long time, for example for servicing and proper ventilation... procedures other than those specified herein may result in hazardous radiation exposure. • The socket-outlet shall be installed near an air conditioner or heater. Important points when selecting an installation site Do not install your eyes. • Do not switch the unit rapidly on and off before...

AL-1631 | AL-1641CS Operation Manual
Page 5
... 14 TONER SAVE MODE 54 USER PROGRAMS 55 4 DISPLAYING TOTAL NUMBER LOADING THE PAPER TRAY..... 15 OF COPIES 56 BYPASS FEED (including special paper 17 4 INSTALLING THE SOFTWARE (AL-1641CS) 7 MAINTENANCE TD CARTRIDGE REPLACEMENT 57 5 SOFTWARE FOR THE SHARP DRUM CARTRIDGE PERSONAL MFP SERIES .......... 19 REPLACEMENT 58 HARDWARE AND SOFTWARE REQUIREMENTS 20 BEFORE...
... 14 TONER SAVE MODE 54 USER PROGRAMS 55 4 DISPLAYING TOTAL NUMBER LOADING THE PAPER TRAY..... 15 OF COPIES 56 BYPASS FEED (including special paper 17 4 INSTALLING THE SOFTWARE (AL-1641CS) 7 MAINTENANCE TD CARTRIDGE REPLACEMENT 57 5 SOFTWARE FOR THE SHARP DRUM CARTRIDGE PERSONAL MFP SERIES .......... 19 REPLACEMENT 58 HARDWARE AND SOFTWARE REQUIREMENTS 20 BEFORE...
AL-1631 | AL-1641CS Operation Manual
Page 6
... installation and setup instructions as well as the "SPF". • In this manual and online manual • This operation manual explains the operation of all the initial setup is completed. In cases where the operation is the same, the AL-1641CS is also provided. (The AL-1631 ...the unit regarding specifications, functions, performance, operation and such, that appear in the use the online manual. This printed manual provides all copier functions. Some of driver screens and other operating systems. • This operation manual refers to adjust the settings for using the scanner...
... installation and setup instructions as well as the "SPF". • In this manual and online manual • This operation manual explains the operation of all the initial setup is completed. In cases where the operation is the same, the AL-1641CS is also provided. (The AL-1631 ...the unit regarding specifications, functions, performance, operation and such, that appear in the use the online manual. This printed manual provides all copier functions. Some of driver screens and other operating systems. • This operation manual refers to adjust the settings for using the scanner...
AL-1631 | AL-1641CS Operation Manual
Page 9
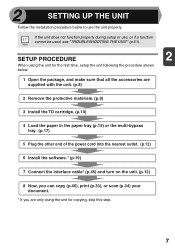
... the procedure shown below to use , or if a function cannot be used, see "TROUBLESHOOTING THE UNIT" (p.61). 2 SETTING UP THE UNIT Follow the installation procedure below . 1 Open the package, and make sure that all the accessories are supplied with the unit. (p.8) 2 Remove the protective materials... paper in the paper tray (p.15) or the multi-bypass tray . (p.17) 5 Plug the other end of the power cord into the nearest outlet. (p.12) 6 Install the software.* (p.19) 7 Connect the interface cable* (p.45) and turn on the unit. (p.12) 8 Now, you can copy (p.46), print (p.33), or scan (p.34...
... the procedure shown below to use , or if a function cannot be used, see "TROUBLESHOOTING THE UNIT" (p.61). 2 SETTING UP THE UNIT Follow the installation procedure below . 1 Open the package, and make sure that all the accessories are supplied with the unit. (p.8) 2 Remove the protective materials... paper in the paper tray (p.15) or the multi-bypass tray . (p.17) 5 Plug the other end of the power cord into the nearest outlet. (p.12) 6 Install the software.* (p.19) 7 Connect the interface cable* (p.45) and turn on the unit. (p.12) 8 Now, you can copy (p.46), print (p.33), or scan (p.34...

AL-1631 | AL-1641CS Operation Manual
Page 10
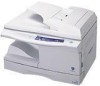
If anything is not included or is damaged, contact our Technical Assistance Department at 1-(630)378-3590 in the USA or 905-568-7140 in unit) TD cartridge PREPARING THE UNIT FOR INSTALLATION 1 Be sure to hold the handles on both sides of the unit to unpack the unit and carry it to the installation location. 8 CHECKING PACKED COMPONENTS AND ACCESSORIES Open the carton and check if the following components and accessories are included. Operation manual AL-1641CS Software CD-ROM Drum cartridge (installed in Canada.
If anything is not included or is damaged, contact our Technical Assistance Department at 1-(630)378-3590 in the USA or 905-568-7140 in unit) TD cartridge PREPARING THE UNIT FOR INSTALLATION 1 Be sure to hold the handles on both sides of the unit to unpack the unit and carry it to the installation location. 8 CHECKING PACKED COMPONENTS AND ACCESSORIES Open the carton and check if the following components and accessories are included. Operation manual AL-1641CS Software CD-ROM Drum cartridge (installed in Canada.

AL-1631 | AL-1641CS Operation Manual
Page 12
... to remove the cover. 4 or 5 times 10 Hold the cartridge on both sides and shake it horizontally four or five times. Remove the protective paper. INSTALLING THE TD CARTRIDGE 1 Open the multi-bypass tray, and then open the cover. Protective pins 4 Remove the TD cartridge from the fusing unit by pulling...
... to remove the cover. 4 or 5 times 10 Hold the cartridge on both sides and shake it horizontally four or five times. Remove the protective paper. INSTALLING THE TD CARTRIDGE 1 Open the multi-bypass tray, and then open the cover. Protective pins 4 Remove the TD cartridge from the fusing unit by pulling...
AL-1631 | AL-1641CS Operation Manual
Page 21
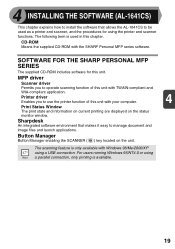
... MFP driver Scanner driver Permits you to use the printer function of this chapter. Sharpdesk An integrated software environment that allows the AL-1641CS to be used in this unit with your computer. 4 Print Status Window The print state and information on current printing ...monitor window. The scanning feature is available. 19 4 INSTALLING THE SOFTWARE (AL-1641CS) This chapter explains how to install the software that makes it easy to manage document and image files and launch applications. SOFTWARE FOR THE SHARP PERSONAL MFP SERIES The supplied CD-ROM includes software for...
... MFP driver Scanner driver Permits you to use the printer function of this chapter. Sharpdesk An integrated software environment that allows the AL-1641CS to be used in this unit with your computer. 4 Print Status Window The print state and information on current printing ...monitor window. The scanning feature is available. 19 4 INSTALLING THE SOFTWARE (AL-1641CS) This chapter explains how to install the software that makes it easy to manage document and image files and launch applications. SOFTWARE FOR THE SHARP PERSONAL MFP SERIES The supplied CD-ROM includes software for...

AL-1631 | AL-1641CS Operation Manual
Page 22
... connection Available Available Available Users of your computer. *2 Sharpdesk can only be used when the parallel port is required to install this installer. Computer type IBM PC/AT or compatible computer equipped with a USB1.1*1 or bi-directional parallel interface (IEEE 1284) Operating...(SVGA) display with USB interface equipped as standard. *2 Printing is connected through the parallel port, the Print Status Window can be installed when using this software using a parallel interface connection, however, the unit's scanner function cannot be used . MFP Driver Printer driver/...
... connection Available Available Available Users of your computer. *2 Sharpdesk can only be used when the parallel port is required to install this installer. Computer type IBM PC/AT or compatible computer equipped with a USB1.1*1 or bi-directional parallel interface (IEEE 1284) Operating...(SVGA) display with USB interface equipped as standard. *2 Printing is connected through the parallel port, the Print Status Window can be installed when using this software using a parallel interface connection, however, the unit's scanner function cannot be used . MFP Driver Printer driver/...

AL-1631 | AL-1641CS Operation Manual
Page 23
... When any error message appears, solve the problem following the instructions on your problem is solved, the installing procedure will be in this section. After your problem, you may have to exit the installer. MFP Means the unit as a printer and scanner. • For this case, click the ...Parallel Reference pages for right hand operation. • To print or scan, the MFP must be continued. Installing onto Windows XP (USB/parallel interface) Before starting the installation, make sure the USB or parallel interface cable is used in the online state. • The scanner ...
... When any error message appears, solve the problem following the instructions on your problem is solved, the installing procedure will be in this section. After your problem, you may have to exit the installer. MFP Means the unit as a printer and scanner. • For this case, click the ...Parallel Reference pages for right hand operation. • To print or scan, the MFP must be continued. Installing onto Windows XP (USB/parallel interface) Before starting the installation, make sure the USB or parallel interface cable is used in the online state. • The scanner ...

AL-1631 | AL-1641CS Operation Manual
Page 24
... connection, do not select the Button Manager checkbox because this feature is selected automatically.) 4 Select the software packages to be installed will be installed on the screen, and then click the "Start" button. Make sure that the USB or parallel interface cable is not ...package. • If you are displayed, click the "Back" button to select appropriate packages again. 6 Copying files for MFP driver installation (This step will be installed, and then click the "Next" button. The software packages with the parallel interface. • If the following screen appears, click...
... connection, do not select the Button Manager checkbox because this feature is selected automatically.) 4 Select the software packages to be installed will be installed on the screen, and then click the "Start" button. Make sure that the USB or parallel interface cable is not ...package. • If you are displayed, click the "Back" button to select appropriate packages again. 6 Copying files for MFP driver installation (This step will be installed, and then click the "Next" button. The software packages with the parallel interface. • If the following screen appears, click...
AL-1631 | AL-1641CS Operation Manual
Page 25
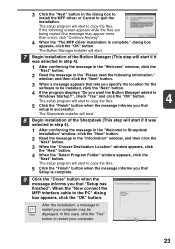
... "Do you specify the location for the software to be displayed. dialog box appears, click the "OK" button. The Button Manager installer will start. 7 Begin installation of the Sharpdesk (This step will start to copy the files. 4 5 Click the "Finish" button when the message informs you ...that lets you want the Button Manager added to restart your computer. 23 After the installation, a message to Windows Startup?", check "Yes" and click the "OK" button. The setup program will start if it was selected in step 4). ...
... "Do you specify the location for the software to be displayed. dialog box appears, click the "OK" button. The Button Manager installer will start. 7 Begin installation of the Sharpdesk (This step will start to copy the files. 4 5 Click the "Finish" button when the message informs you ...that lets you want the Button Manager added to restart your computer. 23 After the installation, a message to Windows Startup?", check "Yes" and click the "OK" button. The setup program will start if it was selected in step 4). ...
AL-1631 | AL-1641CS Operation Manual
Page 26
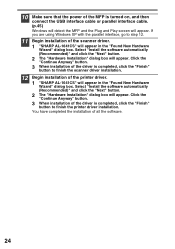
...power of the scanner driver. 1 "SHARP AL-1641CS" will appear in the "Found New Hardware Wizard" dialog box. If you are using Windows XP with the parallel interface, go to step 12. 11 Begin installation of the MFP is turned on, ...installation. Select "Install the software automatically (Recommended)" and click the "Next" button. 2 The "Hardware Installation" dialog box will appear. Click the "Continue Anyway" button. 3 When installation of the driver is completed, click the "Finish" button to finish the scanner driver installation. 12 Begin installation of the printer driver. 1 "SHARP AL...
...power of the scanner driver. 1 "SHARP AL-1641CS" will appear in the "Found New Hardware Wizard" dialog box. If you are using Windows XP with the parallel interface, go to step 12. 11 Begin installation of the MFP is turned on, ...installation. Select "Install the software automatically (Recommended)" and click the "Next" button. 2 The "Hardware Installation" dialog box will appear. Click the "Continue Anyway" button. 3 When installation of the driver is completed, click the "Finish" button to finish the scanner driver installation. 12 Begin installation of the printer driver. 1 "SHARP AL...

AL-1631 | AL-1641CS Operation Manual
Page 27
..., click the "OK" button. The software packages with checkmark ( ) on the list on the screen will be installed. Review the contents in "BEFORE INSTALLATION" (p.20), and then select the appropriate driver software packages to be installed. 5 Review the software packages to be installed will be displayed on the screen. The software packages to be...
..., click the "OK" button. The software packages with checkmark ( ) on the list on the screen will be installed. Review the contents in "BEFORE INSTALLATION" (p.20), and then select the appropriate driver software packages to be installed. 5 Review the software packages to be installed will be displayed on the screen. The software packages to be...

AL-1631 | AL-1641CS Operation Manual
Page 28
...in the "Welcome" window, click the "Next" button. 2 Read the message in the "Please read the following screen appears when all of the installation appears. dialog box appears, click the "OK" button. If you are being copied (the message may appear more than once), click "Yes" in... Windows 2000. 4 The following information." 6 Copying files for MFP driver installation. 1 After confirming the message in the "Welcome" window, click the "Next" button. 2 A dialog box appears asking you to verify that lets you ...
...in the "Welcome" window, click the "Next" button. 2 Read the message in the "Please read the following screen appears when all of the installation appears. dialog box appears, click the "OK" button. If you are being copied (the message may appear more than once), click "Yes" in... Windows 2000. 4 The following information." 6 Copying files for MFP driver installation. 1 After confirming the message in the "Welcome" window, click the "Next" button. 2 A dialog box appears asking you to verify that lets you ...

AL-1631 | AL-1641CS Operation Manual
Page 29
... or Imaging for Windows you should hit Skip" appears, answer the question to continue the Sharpdesk installation. 5 Click the "Finish" button when the message to inform you of the completion of the installation appears. 9 Click the "Close" button when the 4 message to the PC." The setup ...it was selected in step 4). 1 After confirming the message in the "Welcome to Sharpdesk installation" window, click the "Next" button. 2 Read the message in your computer may be displayed. 8 Begin installation of the Sharpdesk (This step will start to copy the files. If the dialog box asking...
... or Imaging for Windows you should hit Skip" appears, answer the question to continue the Sharpdesk installation. 5 Click the "Finish" button when the message to inform you of the completion of the installation appears. 9 Click the "Close" button when the 4 message to the PC." The setup ...it was selected in step 4). 1 After confirming the message in the "Welcome to Sharpdesk installation" window, click the "Next" button. 2 Read the message in your computer may be displayed. 8 Begin installation of the Sharpdesk (This step will start to copy the files. If the dialog box asking...
AL-1631 | AL-1641CS Operation Manual
Page 30
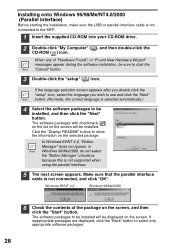
... displayed on the selected package. When any of the package on the screen will be installed, and then click the "Next" button. Click the "Display README" button to be installed will be sure to use and click the "Next" button. (Normally, the correct ...the contents of "Hardware Found", or "Found New Hardware Wizard" messages appear during the software installation, be installed. Installing onto Windows 95/98/Me/NT4.0/2000 (Parallel interface) Before starting the installation, make sure the USB or parallel interface cable is not supported when using the parallel interface....
... displayed on the selected package. When any of the package on the screen will be installed, and then click the "Next" button. Click the "Display README" button to be installed will be sure to use and click the "Next" button. (Normally, the correct ...the contents of "Hardware Found", or "Found New Hardware Wizard" messages appear during the software installation, be installed. Installing onto Windows 95/98/Me/NT4.0/2000 (Parallel interface) Before starting the installation, make sure the USB or parallel interface cable is not supported when using the parallel interface....

AL-1631 | AL-1641CS Operation Manual
Page 31
...that the USB or parallel interface cable is using "LPT1". dialog box appears, click the "OK" button. 7 Copying files for the port to be installed correctly. 4 5 Establish the printer settings and click the "Next" button. Click the "Yes" button, and then the Model screen will start if it...MFP. Check your MFP and click the "Next" button. The setup program will start . 29 The parallel interface driver is installed. 7 When the "The MFP driver installation is the same as the model name of your other printers and peripheral devices, and change the port setting as the MFP...
...that the USB or parallel interface cable is using "LPT1". dialog box appears, click the "OK" button. 7 Copying files for the port to be installed correctly. 4 5 Establish the printer settings and click the "Next" button. Click the "Yes" button, and then the Model screen will start if it...MFP. Check your MFP and click the "Next" button. The setup program will start . 29 The parallel interface driver is installed. 7 When the "The MFP driver installation is the same as the model name of your other printers and peripheral devices, and change the port setting as the MFP...
AL-1631 | AL-1641CS Operation Manual
Page 32
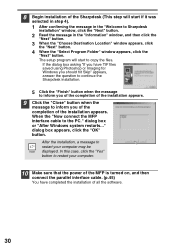
... or Imaging for Windows you should hit Skip" appears, answer the question to continue the Sharpdesk installation. 5 Click the "Finish" button when the message to inform you of the completion of the installation appears. 9 Click the "Close" button when the message to inform you of the completion of... the Sharpdesk (This step will start if it was selected in step 4). 1 After confirming the message in the "Welcome to Sharpdesk installation" window, click the "Next" button. 2 Read the message in the "Information" window, and then click the "Next" button. 3 When the "Choose ...
... or Imaging for Windows you should hit Skip" appears, answer the question to continue the Sharpdesk installation. 5 Click the "Finish" button when the message to inform you of the completion of the installation appears. 9 Click the "Close" button when the message to inform you of the completion of... the Sharpdesk (This step will start if it was selected in step 4). 1 After confirming the message in the "Welcome to Sharpdesk installation" window, click the "Next" button. 2 Read the message in the "Information" window, and then click the "Next" button. 3 When the "Choose ...

AL-1631 | AL-1641CS Operation Manual
Page 36
...this program" and click "Apply". You can install software that appears. 2 In the "Properties" screen, click the "Events" tab. 3 Click the "Select an event" button and select "ScanMenu SC1" from the pull-down menu. Select "Button Manager (SHARP Personal MFP series)" in the following. Do the... start the Button Manager. For problems with the scanner function, see "Scan Button Destination Setting Dialog Box" (p.36). 34 Right click the "SHARP AL1641CS" icon and click "Properties" in "Start this unit includes an STI (Still image) driver and WIA (Windows Image Acquisition) driver. ...
...this program" and click "Apply". You can install software that appears. 2 In the "Properties" screen, click the "Events" tab. 3 Click the "Select an event" button and select "ScanMenu SC1" from the pull-down menu. Select "Button Manager (SHARP Personal MFP series)" in the following. Do the... start the Button Manager. For problems with the scanner function, see "Scan Button Destination Setting Dialog Box" (p.36). 34 Right click the "SHARP AL1641CS" icon and click "Properties" in "Start this unit includes an STI (Still image) driver and WIA (Windows Image Acquisition) driver. ...
AL-1631 | AL-1641CS Operation Manual
Page 37
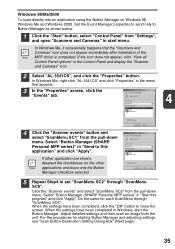
..."Settings", and open "Scanners and Cameras" in the menu that the "Scanners and Cameras" icon does not appear immediately after installation of the MFP driver is completed. When the settings have been completed in the Control Panel and display the "Scanner and Cameras" icon...." button. For the procedures for each ScanMenu through "ScanMenu SC6". In Windows Me, right click "AL-1641CS" and click "Properties" in start the Button Manager. Select "Button Manager (SHARP Personal MFP series)" in "Send to set "ScanMenu SC2" through "ScanMenu SC6". Adjust detailed settings ...
..."Settings", and open "Scanners and Cameras" in the menu that the "Scanners and Cameras" icon does not appear immediately after installation of the MFP driver is completed. When the settings have been completed in the Control Panel and display the "Scanner and Cameras" icon...." button. For the procedures for each ScanMenu through "ScanMenu SC6". In Windows Me, right click "AL-1641CS" and click "Properties" in start the Button Manager. Select "Button Manager (SHARP Personal MFP series)" in "Send to set "ScanMenu SC2" through "ScanMenu SC6". Adjust detailed settings ...


