UXA100 Operation Manual
Page 1
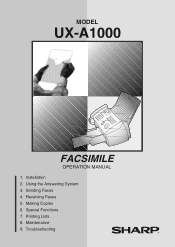
Sending Faxes 4. Maintenance 9. Special Functions 7. Receiving Faxes 5. Making Copies 6. Printing Lists 8. Troubleshooting Installation 2. MODEL UX-A1000 FACSIMILE OPERATION MANUAL 1. Using the Answering System 3.
Sending Faxes 4. Maintenance 9. Special Functions 7. Receiving Faxes 5. Making Copies 6. Printing Lists 8. Troubleshooting Installation 2. MODEL UX-A1000 FACSIMILE OPERATION MANUAL 1. Using the Answering System 3.

UXA100 Operation Manual
Page 2
... Consumer Protection Act of either the sending machine, business, business entity or individual. Reorient or relocate the receiving antenna. - As an ENERGY STAR partner, SHARP has determined that this equipment does cause harmful interference to program this equipment. Connect the equipment into your facsimile machine, please refer to Part 15...
... Consumer Protection Act of either the sending machine, business, business entity or individual. Reorient or relocate the receiving antenna. - As an ENERGY STAR partner, SHARP has determined that this equipment does cause harmful interference to program this equipment. Connect the equipment into your facsimile machine, please refer to Part 15...
UXA100 Operation Manual
Page 3
...OFF: Approx. 200 letter pages Replacement cartridge: SHARP UX-C70B Ink Save mode ON: Approx. 600 letter pages Ink Save mode OFF: Approx. 400 letter pages 1.8 MB (approx. 100 average pages; 20 minutes of your inkjet fax are shown below. Approx. 6 seconds (only... when ECM is initially turned off. Automatic dialing Print cartridge yield* (at standard resolution, excluding time for choosing a SHARP inkjet fax machine! The features and specifications of voice messages (including ...
...OFF: Approx. 200 letter pages Replacement cartridge: SHARP UX-C70B Ink Save mode ON: Approx. 600 letter pages Ink Save mode OFF: Approx. 400 letter pages 1.8 MB (approx. 100 average pages; 20 minutes of your inkjet fax are shown below. Approx. 6 seconds (only... when ECM is initially turned off. Automatic dialing Print cartridge yield* (at standard resolution, excluding time for choosing a SHARP inkjet fax machine! The features and specifications of voice messages (including ...

UXA100 Operation Manual
Page 4
... mm) Weight (without attachments) 2 Approx. 11 lbs. (5.0 kg) Paper tray capacity Letter: Approx. 200 sheets (20-lb. Contrast control Automatic/Dark selectable Reception modes TEL/FAX/TAD Copy function Single/Multi/Sort (99 copies/page) Telephone function Yes (cannot be higher than the line on the tray) Legal: 100 sheets Recommended...
... mm) Weight (without attachments) 2 Approx. 11 lbs. (5.0 kg) Paper tray capacity Letter: Approx. 200 sheets (20-lb. Contrast control Automatic/Dark selectable Reception modes TEL/FAX/TAD Copy function Single/Multi/Sort (99 copies/page) Telephone function Yes (cannot be higher than the line on the tray) Legal: 100 sheets Recommended...
UXA100 Operation Manual
Page 5
...machine and consult a qualified service representative. Connecting it falls. If an object falls into the machine that you attempt to use the fax machine in conjunction with digital telephone systems. Important safety information Do not disassemble this machine or attempt any kind into the machine or the...or the housing damaged. Do not install or use the machine near a swimming pool. As a part of our policy of continuous improvement, SHARP reserves the right to make design and specification changes for use on a line which has call waiting, call forwarding, or certain other kind of...
...machine and consult a qualified service representative. Connecting it falls. If an object falls into the machine that you attempt to use the fax machine in conjunction with digital telephone systems. Important safety information Do not disassemble this machine or attempt any kind into the machine or the...or the housing damaged. Do not install or use the machine near a swimming pool. As a part of our policy of continuous improvement, SHARP reserves the right to make design and specification changes for use on a line which has call waiting, call forwarding, or certain other kind of...

UXA100 Operation Manual
Page 6
Use caution when installing or modifying telephone lines. There may be easily accessible. 4 Avoid using a telephone (other than a cordless type) during an electrical storm. Never touch bare telephone wires or terminals unless the telephone line has been disconnected at the network interface. Do not use a telephone to report a gas leak in wet locations unless the jack is specifically designed for wet locations. Never install telephone jacks in the vicinity of electric shock from lightning. The power outlet must be installed near the equipment and must be a remote risk of the ...
Use caution when installing or modifying telephone lines. There may be easily accessible. 4 Avoid using a telephone (other than a cordless type) during an electrical storm. Never touch bare telephone wires or terminals unless the telephone line has been disconnected at the network interface. Do not use a telephone to report a gas leak in wet locations unless the jack is specifically designed for wet locations. Never install telephone jacks in the vicinity of electric shock from lightning. The power outlet must be installed near the equipment and must be a remote risk of the ...

UXA100 Operation Manual
Page 7
...Cartridge 17 Connecting the Telephone Line Cord 24 Entering Your Name and Fax Number 26 Setting the Date and Time 28 Setting the Reception Mode 30 Volume Adjustment 31 2. Sending Faxes 54 Transmittable Documents 54 Loading the Document 55 Adjusting the Resolution and... Contrast 57 Sending a Fax by Normal Dialing 60 Sending a Fax by Automatic Dialing 61 Batch Page Numbering 72 Sending a Fax From Memory 73 4. Receiving Faxes 78 Using FAX Mode 78 5 Table ...
...Cartridge 17 Connecting the Telephone Line Cord 24 Entering Your Name and Fax Number 26 Setting the Date and Time 28 Setting the Reception Mode 30 Volume Adjustment 31 2. Sending Faxes 54 Transmittable Documents 54 Loading the Document 55 Adjusting the Resolution and... Contrast 57 Sending a Fax by Normal Dialing 60 Sending a Fax by Automatic Dialing 61 Batch Page Numbering 72 Sending a Fax From Memory 73 4. Receiving Faxes 78 Using FAX Mode 78 5 Table ...

UXA100 Operation Manual
Page 8
... Index 130 6 Printing Lists 100 8. Table of Contents Using TEL Mode 79 Optional Reception Settings 81 Substitute Reception to Service 92 Blocking Reception of Unwanted Faxes 94 Polling (Requesting a Fax Transmission 95 7. Making Copies 85 6.
... Index 130 6 Printing Lists 100 8. Table of Contents Using TEL Mode 79 Optional Reception Settings 81 Substitute Reception to Service 92 Blocking Reception of Unwanted Faxes 94 Polling (Requesting a Fax Transmission 95 7. Making Copies 85 6.

UXA100 Operation Manual
Page 9
... (pages 61 and 66). 7 Number keys Use these keys to the currently selected reception mode; A Look at the Operation Panel 1 23 45 6 TEL FAX 01 02 PLAIN PAPER INKJET FAX 03 04 05 06 TAD REC/MEMO PLAY 07 08 13 14 09 10 11 12 15 16/POLL 17/G1 18/G2...
... (pages 61 and 66). 7 Number keys Use these keys to the currently selected reception mode; A Look at the Operation Panel 1 23 45 6 TEL FAX 01 02 PLAIN PAPER INKJET FAX 03 04 05 06 TAD REC/MEMO PLAY 07 08 13 14 09 10 11 12 15 16/POLL 17/G1 18/G2...
UXA100 Operation Manual
Page 10
...). 8 REPEAT key Press this key while listening to a message to play it is completed. 17 START/MEMORY key Press this key after dialing to begin fax transmission (page 61). Press this key before it again (page 36). 9 SKIP key Press this key while listening to a message to skip to the next... message (page 36). 10 DELETE key Press this key to erase recorded messages (page 37). 11 SPEED DIAL key Press this key to dial a fax or voice number using an abbreviated 2-digit Speed Dial number (pages 61 and 67). 12 SPEAKER key Press this key to listen to the line...
...). 8 REPEAT key Press this key while listening to a message to play it is completed. 17 START/MEMORY key Press this key after dialing to begin fax transmission (page 61). Press this key before it again (page 36). 9 SKIP key Press this key while listening to a message to skip to the next... message (page 36). 10 DELETE key Press this key to erase recorded messages (page 37). 11 SPEED DIAL key Press this key to dial a fax or voice number using an abbreviated 2-digit Speed Dial number (pages 61 and 67). 12 SPEAKER key Press this key to listen to the line...

UXA100 Operation Manual
Page 11
Installation Unpacking Checklist Before setting up, make sure you have all of the following items. If any are missing, contact your dealer or retailer. 1. Installation 1. Paper tray Paper tray cover Document tray Document Print exit support cartridge Handset Handset cord Telephone line cord Operation manual Rapid Key labels 9
Installation Unpacking Checklist Before setting up, make sure you have all of the following items. If any are missing, contact your dealer or retailer. 1. Installation 1. Paper tray Paper tray cover Document tray Document Print exit support cartridge Handset Handset cord Telephone line cord Operation manual Rapid Key labels 9

UXA100 Operation Manual
Page 12
To remove the condensation, turn on the scanning glass, preventing proper scanning of documents for transmission. Keep dust away from a cold to keep in mind when setting up Do not place the machine in direct sunlight. Removing the packing tape 1 Open the print compartment cover. • Press as shown and pull the cover toward you. 2 Remove the tape. 10 About condensation If the machine is moved from the machine. Do not place the machine near heaters or air conditioners. Attachments Attachments Points to a warm place, it is possible that condensation may form on the ...
To remove the condensation, turn on the scanning glass, preventing proper scanning of documents for transmission. Keep dust away from a cold to keep in mind when setting up Do not place the machine in direct sunlight. Removing the packing tape 1 Open the print compartment cover. • Press as shown and pull the cover toward you. 2 Remove the tape. 10 About condensation If the machine is moved from the machine. Do not place the machine near heaters or air conditioners. Attachments Attachments Points to a warm place, it is possible that condensation may form on the ...

UXA100 Operation Manual
Page 13
Use the handset to make ordinary phone calls, or to transmit and receive faxes manually. 11 Make sure the handset cord goes into either jack. 1. Installation 3 Close the printer cover. Attachments Connecting the handset Connect the handset as shown and place it on the side of the handset cord are identical, so they will go into the jack marked with a handset symbol on the handset rest. ♦ The ends of the machine!
Use the handset to make ordinary phone calls, or to transmit and receive faxes manually. 11 Make sure the handset cord goes into either jack. 1. Installation 3 Close the printer cover. Attachments Connecting the handset Connect the handset as shown and place it on the side of the handset cord are identical, so they will go into the jack marked with a handset symbol on the handset rest. ♦ The ends of the machine!

UXA100 Operation Manual
Page 14
Paper plate Attach the document tray. 2 1 12 Attachments Attaching the paper trays Attach the paper tray. Pull the paper plate toward you and attach the paper tray cover.
Paper plate Attach the document tray. 2 1 12 Attachments Attaching the paper trays Attach the paper tray. Pull the paper plate toward you and attach the paper tray cover.

UXA100 Operation Manual
Page 15
Installation Pull out the received document tray. 1. Attachments Attach the document exit support. 13
Installation Pull out the received document tray. 1. Attachments Attach the document exit support. 13

UXA100 Operation Manual
Page 16
Recommended paper weight is as follows: Letter size: Approx. 200 sheets (20-Ib. The maximum number of sheets is 20-lb. Printing on the reverse side may result in the tray, take it out and combine it into the tray, PRINT SIDE UP. • If paper remains in poor print quality. 14 Copy Bond. maximum stack height should not be higher than this line Be sure to load legal paper, flip up the paper tray extension. 3 Pull the paper plate toward you and insert the stack of the paper. copier paper at room temperature; The stack should not exceed line on the print side of paper ...
Recommended paper weight is as follows: Letter size: Approx. 200 sheets (20-Ib. The maximum number of sheets is 20-lb. Printing on the reverse side may result in the tray, take it out and combine it into the tray, PRINT SIDE UP. • If paper remains in poor print quality. 14 Copy Bond. maximum stack height should not be higher than this line Be sure to load legal paper, flip up the paper tray extension. 3 Pull the paper plate toward you and insert the stack of the paper. copier paper at room temperature; The stack should not exceed line on the print side of paper ...

UXA100 Operation Manual
Page 17
1. Loading Printing Paper LETTER Place the LEGAL cover using the appropriate notch for the size of paper loaded 15 Installation 4 Pull the paper plate toward you and replace the paper tray cover.
1. Loading Printing Paper LETTER Place the LEGAL cover using the appropriate notch for the size of paper loaded 15 Installation 4 Pull the paper plate toward you and replace the paper tray cover.

UXA100 Operation Manual
Page 18
Connecting the Power Cord Connecting the Power Cord Plug the power cord into any other kind of lightning or power surges, we recommend that you plug in the power cord without doing so may damage the machine. Surge protectors can be purchased at most telephone specialty stores. 16 Note: If your area experiences a high incidence of outlet. The machine does not have removed all of the packing tape before plugging in or unplugging the power cord. Caution! ♦ Do not plug the power cord into a 120 V, 60 Hz, grounded AC (3-prong) outlet. "CHECK CARTRIDGE" normally appears in...
Connecting the Power Cord Connecting the Power Cord Plug the power cord into any other kind of lightning or power surges, we recommend that you plug in the power cord without doing so may damage the machine. Surge protectors can be purchased at most telephone specialty stores. 16 Note: If your area experiences a high incidence of outlet. The machine does not have removed all of the packing tape before plugging in or unplugging the power cord. Caution! ♦ Do not plug the power cord into a 120 V, 60 Hz, grounded AC (3-prong) outlet. "CHECK CARTRIDGE" normally appears in...
UXA100 Operation Manual
Page 19
...♦ When replacing the print cartridge, be cleared by removing the paper jam (see page 23. It is recommended that you do not use a SHARP UX-C70B cartridge. 1. If opened while printing, printing will stop. If PRINTER ERROR or PRINTER ERROR/CHECK PAPER appears... Caution! The error can usually...yield (at 4% coverage) Initial cartridge Ink Save mode ON: Approx. 300 letter pages Ink Save mode OFF: Approx. 200 letter pages Replacement cartridge (SHARP UX-C70B) Ink Save mode ON: Approx. 600 letter pages Ink Save mode OFF: Approx. 400 letter pages Ink Save mode is loaded before installing...
...♦ When replacing the print cartridge, be cleared by removing the paper jam (see page 23. It is recommended that you do not use a SHARP UX-C70B cartridge. 1. If opened while printing, printing will stop. If PRINTER ERROR or PRINTER ERROR/CHECK PAPER appears... Caution! The error can usually...yield (at 4% coverage) Initial cartridge Ink Save mode ON: Approx. 300 letter pages Ink Save mode OFF: Approx. 200 letter pages Replacement cartridge (SHARP UX-C70B) Ink Save mode ON: Approx. 600 letter pages Ink Save mode OFF: Approx. 400 letter pages Ink Save mode is loaded before installing...

UXA100 Operation Manual
Page 20
Note: If the print compartment cover is between the "CARTRIDGE EXCHANGE AREA" arrows on the label, and then pull the green lever and open the cartridge holder cover. • If you are going to its home position. To make the cartridge return to the CARTRIDGE EXCHANGE AREA when this has happened, close the cover and then open for approximately 30 minutes with a cartridge installed, the cartridge will automatically return to use the old cartridge again, place it again. 18 If you remove all of the cartridge. 4 Make sure the cartridge holder is left open it in an air-tight ...
Note: If the print compartment cover is between the "CARTRIDGE EXCHANGE AREA" arrows on the label, and then pull the green lever and open the cartridge holder cover. • If you are going to its home position. To make the cartridge return to the CARTRIDGE EXCHANGE AREA when this has happened, close the cover and then open for approximately 30 minutes with a cartridge installed, the cartridge will automatically return to use the old cartridge again, place it again. 18 If you remove all of the cartridge. 4 Make sure the cartridge holder is left open it in an air-tight ...