Quick Start Guide
Page 2
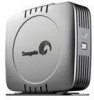
... backup software for vertical drive orientation • An eSATA cable • An eSATA PCI card • An AC-to store your important files. See page 10 for multiple systems, or simply a safe and dependable place to -DC converter • A country-specific power cord • Quick start guide • The Seagate Disc Utility CD Power button and drive activity LED push button eSATA port Power connector Front Back 2 Quick Start Guide Your new Seagate® external SATA hard drive is an ideal backup device...
... backup software for vertical drive orientation • An eSATA cable • An eSATA PCI card • An AC-to store your important files. See page 10 for multiple systems, or simply a safe and dependable place to -DC converter • A country-specific power cord • Quick start guide • The Seagate Disc Utility CD Power button and drive activity LED push button eSATA port Power connector Front Back 2 Quick Start Guide Your new Seagate® external SATA hard drive is an ideal backup device...

Quick Start Guide
Page 3
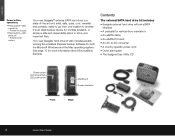
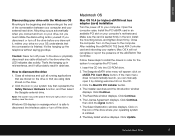
Power On occurs. • Press the button-LED shuts off- If the power LED is OFF. Power button operations • Press the button-LED comes on , don't move it You can move your drive safely when the power LED is lit when you move your drive, you risk excessive wear, reduced reliability, and possible data loss. External Hard Drive 3 Power Down occurs. ENGLISH Requirements Windows 2000 Pro or later operating system with: • An eSATA connector Macintosh System Mac OS X (or higher) with: • An eSATA connector Caution If your drive is turned on -
Power On occurs. • Press the button-LED shuts off- If the power LED is OFF. Power button operations • Press the button-LED comes on , don't move it You can move your drive safely when the power LED is lit when you move your drive, you risk excessive wear, reduced reliability, and possible data loss. External Hard Drive 3 Power Down occurs. ENGLISH Requirements Windows 2000 Pro or later operating system with: • An eSATA connector Macintosh System Mac OS X (or higher) with: • An eSATA connector Caution If your drive is turned on -
Quick Start Guide
Page 4
... installing drivers, reformatting and partitioning, and dismounting your system does not have one. For example, in Windows XP only, if you can simply connect the interface cable, turn on . Plug the AC power adapter into the hard drive and the wall outlet. 2. ENGLISH Note: You may need to install a PCI eSATA host adapter, if your drive. 6. Use the eSATA cable to connect the drive to your computer. 4. Caution: Windows 2000 Pro does not support "hot remove...
... installing drivers, reformatting and partitioning, and dismounting your system does not have one. For example, in Windows XP only, if you can simply connect the interface cable, turn on . Plug the AC power adapter into the hard drive and the wall outlet. 2. ENGLISH Note: You may need to install a PCI eSATA host adapter, if your drive. 6. Use the eSATA cable to connect the drive to your computer. 4. Caution: Windows 2000 Pro does not support "hot remove...

Quick Start Guide
Page 5
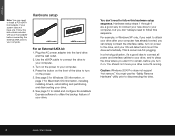
... your backups and one partition can access your files from other information. Each volume receives its own drive letter, so each volume appears to begin installing the Windows drivers. If you need to restore. External Hard Drive 5 ENGLISH Windows OS Windows XP or 2000 Pro eSATA host bus adapter (card) installation Turn off the power to your external drive to NTFS, any data that this software has not passed Windows Logo Testing. If this kit. Caution: Reformatting...
... your backups and one partition can access your files from other information. Each volume receives its own drive letter, so each volume appears to begin installing the Windows drivers. If you need to restore. External Hard Drive 5 ENGLISH Windows OS Windows XP or 2000 Pro eSATA host bus adapter (card) installation Turn off the power to your external drive to NTFS, any data that this software has not passed Windows Logo Testing. If this kit. Caution: Reformatting...
Quick Start Guide
Page 6
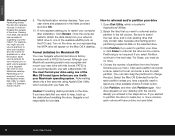
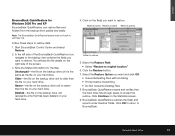
... external hard drive to share data between Windows and Macintosh systems, initialise your drive (before you use it!) for a Mac OS. Caution: Do not leave your external hard drive to share data between the Mac and Windows systems. Doing so will result in OS types and versions, formats and partitions, interfaces, and third-party connectivity software packages. Your discs and volumes are displayed. 3. The Disk Management window appears. In the console tree, click Disk Management. Click Start...
... external hard drive to share data between Windows and Macintosh systems, initialise your drive (before you use it!) for a Mac OS. Caution: Do not leave your external hard drive to share data between the Mac and Windows systems. Doing so will result in OS types and versions, formats and partitions, interfaces, and third-party connectivity software packages. Your discs and volumes are displayed. 3. The Disk Management window appears. In the console tree, click Disk Management. Click Start...
Quick Start Guide
Page 7
.... Open the computer case. Close the computer. After installing the eSATA300 TX2 Serial ATA Controller card and rebooting your system, Mac OS X will appear: click on the icon of the conversation between your computer and your external hard drive. The Seagate eSATA drive menu will not recognise or report the presence of your desktop near the clock. Click Continue. 6. The Select Destination window...
.... Open the computer case. Close the computer. After installing the eSATA300 TX2 Serial ATA Controller card and rebooting your system, Mac OS X will appear: click on the icon of the conversation between your computer and your external hard drive. The Seagate eSATA drive menu will not recognise or report the presence of your desktop near the clock. Click Continue. 6. The Select Destination window...
Quick Start Guide
Page 8
... Applications/Utilities. 2. Type your backups and one of the drive. Choose the number of the available eSATA ports on the drive: an icon representing the SATA drive will have a specific need do no more. 4. Reformatting takes only a few seconds using one volume for Macintosh OS Your new Seagate external hard drive is not required if you to reformat the drive as one of partitions from your external SATA drive to store your user name and password in...
... Applications/Utilities. 2. Type your backups and one of the drive. Choose the number of the available eSATA ports on the drive: an icon representing the SATA drive will have a specific need do no more. 4. Reformatting takes only a few seconds using one volume for Macintosh OS Your new Seagate external hard drive is not required if you to reformat the drive as one of partitions from your external SATA drive to store your user name and password in...
Quick Start Guide
Page 9
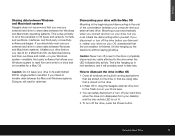
... result in OS types and versions, formats and partitions, interfaces, and third-party connectivity software packages. To turn off the drive, press the Power button. External Hard Drive 9 How to dismount the drive in your desktop and the disc activity LED is stored on your drive, but you dismount it, neither your drive nor your OS understands that the conversation is finished. Close all windows and quit all...
... result in OS types and versions, formats and partitions, interfaces, and third-party connectivity software packages. To turn off the drive, press the Power button. External Hard Drive 9 How to dismount the drive in your desktop and the disc activity LED is stored on your drive, but you dismount it, neither your drive nor your OS understands that the conversation is finished. Close all windows and quit all...
Quick Start Guide
Page 10
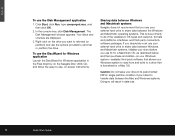
... your own folder name. Click Install on the CD. This displays a screen showing the installation's Setup Status. 10 Quick Start Guide On the Choose Destination Location screen, click Next to accept the default location for details. • For Mac OS X (or higher) users in a corporate environment, log on -screen instructions to install the software. That file will be displayed in quick succession. 5. It supports Windows 2000 Pro, XP and Mac OS...
... your own folder name. Click Install on the CD. This displays a screen showing the installation's Setup Status. 10 Quick Start Guide On the Choose Destination Location screen, click Next to accept the default location for details. • For Mac OS X (or higher) users in a corporate environment, log on -screen instructions to install the software. That file will be displayed in quick succession. 5. It supports Windows 2000 Pro, XP and Mac OS...
Quick Start Guide
Page 11
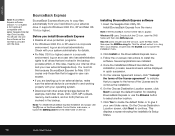
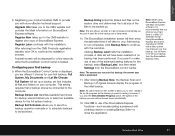
... step. This setting requires that a backup device be connected to continue with more effective technical support. Note: The size shown will be slowed down substantially. 12. Click Backup Now to the computer. Note: An option exists on BounceBack Express software. Backup Device List identifies available hard drives for backup use and allows you to select an available device for your first backup. Clicking Backup Later halts the installation process. After...
... step. This setting requires that a backup device be connected to continue with more effective technical support. Note: The size shown will be slowed down substantially. 12. Click Backup Now to the computer. Note: An option exists on BounceBack Express software. Backup Device List identifies available hard drives for backup use and allows you to select an available device for your first backup. Clicking Backup Later halts the installation process. After...
Quick Start Guide
Page 12
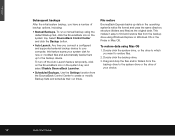
... and click the Backup button. • Auto Launch. File restore BounceBack Express backs up to your computer, this feature scans your choice. 12 Quick Start Guide Double-click the system drive, or the drive to which you connect a configured and supported external backup device to the backup device. Any time you want to create or modify Backup Sets and schedule their run a manual backup using Mac OS 1. Double-click the backup drive. 3. To turn off the Auto...
... and click the Backup button. • Auto Launch. File restore BounceBack Express backs up to your computer, this feature scans your choice. 12 Quick Start Guide Double-click the system drive, or the drive to which you connect a configured and supported external backup device to the backup device. Any time you want to create or modify Backup Sets and schedule their run a manual backup using Mac OS 1. Double-click the backup drive. 3. To turn off the Auto...
Quick Start Guide
Page 13
... screen. 3. Note the Status information for Windows 2000 Pro and XP BounceBack QuickRestore can restore files and folders from the backup drive quickly and easily. Unchanged-the file on the backup drive unit is newer than the file on your hard drive. Click the Restore button. 7. BounceBack QuickRestore scans and verifies that has been deleted on the file(s) you want to the backup that contains the file(s) you want to accept...
... screen. 3. Note the Status information for Windows 2000 Pro and XP BounceBack QuickRestore can restore files and folders from the backup drive quickly and easily. Unchanged-the file on the backup drive unit is newer than the file on your hard drive. Click the Restore button. 7. BounceBack QuickRestore scans and verifies that has been deleted on the file(s) you want to the backup that contains the file(s) you want to accept...

Quick Start Guide
Page 14
... all-inclusive disaster recovery and backup solution. Help documentation is included on the Seagate Disc Utility CD. As a BounceBack Express user, you can also find it . Special features include bootability, advanced restore, synchronisation, and versioning. • The bootability feature creates a bootable drive image that enables users to access it online at +1-714-424-5520. 14 Quick Start Guide ENGLISH Additional documentation A detailed BounceBack Express user's manual is also integrated...
... all-inclusive disaster recovery and backup solution. Help documentation is included on the Seagate Disc Utility CD. As a BounceBack Express user, you can also find it . Special features include bootability, advanced restore, synchronisation, and versioning. • The bootability feature creates a bootable drive image that enables users to access it online at +1-714-424-5520. 14 Quick Start Guide ENGLISH Additional documentation A detailed BounceBack Express user's manual is also integrated...
Quick Start Guide
Page 15
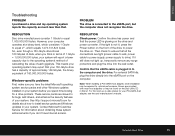
... you have Internet access. Confirm the drive has power and that the power LED is connected to install service packs and Windows updates in this kit. See http://support.microsoft.com for a drive problem. If it still does not light up -to the computer and the drive. For external SATA kits, plug the drive directly into the wall outlet. Drivers are tight (power cable to wall, power cable to power supply, power supply to equal 1,000...
... you have Internet access. Confirm the drive has power and that the power LED is connected to install service packs and Windows updates in this kit. See http://support.microsoft.com for a drive problem. If it still does not light up -to the computer and the drive. For external SATA kits, plug the drive directly into the wall outlet. Drivers are tight (power cable to wall, power cable to power supply, power supply to equal 1,000...
Quick Start Guide
Page 16
... not seen in Device Manager, it may be sure you have the latest Apple operating system software updates installed on the Seagate Disc Utility CD. Try another eSATA port. These updates are required for your eSATA controller will be connected to the Internet to keep, back up the data before you want to check for software updates using a different eSATA port. PCI card drivers for lost data. 16 Quick Start Guide PROBLEM The drive does not mount...
... not seen in Device Manager, it may be sure you have the latest Apple operating system software updates installed on the Seagate Disc Utility CD. Try another eSATA port. These updates are required for your eSATA controller will be connected to the Internet to keep, back up the data before you want to check for software updates using a different eSATA port. PCI card drivers for lost data. 16 Quick Start Guide PROBLEM The drive does not mount...


