User Guide for Mac
Page 10
... and then remounts with the name you dragged to give your desktop automatically creates a OneTouch 4 Plus or OneTouch 4 Mini mounted volume: Figure 11: Maxtor Manager Icon Step 11: Double-click the OneTouch 4icon. The dmg file you entered. Step 8: Click Erase. Step 7: Fill in... the warning sheet. Any of the Mac OS Extended options will work. • For Name, enter the name you want to your OneTouch 4 drive. • Deselect Install Mac OS 9 Disk Driver...
... and then remounts with the name you dragged to give your desktop automatically creates a OneTouch 4 Plus or OneTouch 4 Mini mounted volume: Figure 11: Maxtor Manager Icon Step 11: Double-click the OneTouch 4icon. The dmg file you entered. Step 8: Click Erase. Step 7: Fill in... the warning sheet. Any of the Mac OS Extended options will work. • For Name, enter the name you want to your OneTouch 4 drive. • Deselect Install Mac OS 9 Disk Driver...

User Guide for Mac
Page 26
An Erase Disk sheet is displayed: Maxtor OneTouch IV 23 Figure 14: Disk Utility Erase Step 7: Enter this information: • For Volume Format, select Mac OS Extended... Step 8: Click Erase. Any of the Mac OS Extended options will work. • For Name, enter the name you want to give your OneTouch 4 drive. • Deselect Install Mac OS 9 Disk Driver.
An Erase Disk sheet is displayed: Maxtor OneTouch IV 23 Figure 14: Disk Utility Erase Step 7: Enter this information: • For Volume Format, select Mac OS Extended... Step 8: Click Erase. Any of the Mac OS Extended options will work. • For Name, enter the name you want to give your OneTouch 4 drive. • Deselect Install Mac OS 9 Disk Driver.

User Guide for Mac
Page 74
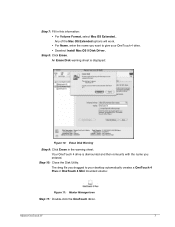
Step 9: Close the Disk Utility. Step 7: Click Erase. Step 10: Click the Maxtor Manager desktop icon. The My Drives view opens and your OneTouch 4 drive. • Deselect Install Mac OS 9 Disk Driver. Your OneTouch 4 drive is dismounted and then remounts with the name you want to give your OneTouch drive is displayed: Figure 19: Erase Disk Warning Step 8: Click Erase in the Erase Disk sheet. An Erase Disk sheet is ready for use: Maxtor OneTouch IV 71 Any of the Mac OS Extended options will work. • For Name, enter the name you entered.
Step 9: Close the Disk Utility. Step 7: Click Erase. Step 10: Click the Maxtor Manager desktop icon. The My Drives view opens and your OneTouch 4 drive. • Deselect Install Mac OS 9 Disk Driver. Your OneTouch 4 drive is dismounted and then remounts with the name you want to give your OneTouch drive is displayed: Figure 19: Erase Disk Warning Step 8: Click Erase in the Erase Disk sheet. An Erase Disk sheet is ready for use: Maxtor OneTouch IV 71 Any of the Mac OS Extended options will work. • For Name, enter the name you entered.


