
User Manual
Page 2
..., air filters, and top of the projector periodically with high quality materials and components which can reduce the service life of separately from the projection lens. Ne peut être utilisé dans une salle d'ordinateurs telle que définie dans la norme ANSI/NFPA 75 Standard for an extended time, unplug the projector from the power outlet. NO USER-SERVICEABLE PARTS INSIDE EXCEPT LAMP REPLACEMENT...
..., air filters, and top of the projector periodically with high quality materials and components which can reduce the service life of separately from the projection lens. Ne peut être utilisé dans une salle d'ordinateurs telle que définie dans la norme ANSI/NFPA 75 Standard for an extended time, unplug the projector from the power outlet. NO USER-SERVICEABLE PARTS INSIDE EXCEPT LAMP REPLACEMENT...

User Manual
Page 4
... communications. Model Number Trade Name Responsible party Address Telephone No. : PLC-XP57L : Sanyo : SANYO FISHER COMPANY : 21605 Plummer Street, Chatsworth, California 91311, U.S.A. : (818)998-7322 AC POWER CORD REQUIREMENT The AC Power Cord supplied with this apparatus may cause harmful interference to comply with the limits for help. These limits are available from that the plug will not occur in the instructions. Use of the...
... communications. Model Number Trade Name Responsible party Address Telephone No. : PLC-XP57L : Sanyo : SANYO FISHER COMPANY : 21605 Plummer Street, Chatsworth, California 91311, U.S.A. : (818)998-7322 AC POWER CORD REQUIREMENT The AC Power Cord supplied with this apparatus may cause harmful interference to comply with the limits for help. These limits are available from that the plug will not occur in the instructions. Use of the...

User Manual
Page 5
... FUNCTION 15 PICTURE IMAGE ADJUSTMENTS 35 15 REMOTE CONTROL BATTERIES INSTALLATION 16 TOP CONTROLS AND INDICATORS 17 SETTING 38 ON-SCREEN MENU 18 HOW TO OPERATE ON-SCREEN MENU 18 SETTING MENU 38 FLOW OF ON-SCREEN MENU OPERATION 18 MENU BAR 19 APPENDIX 45 BASIC OPERATION TURNING ON/OFF PROJECTOR TURNING ON THE PROJECTOR TURNING OFF THE PROJECTOR ADJUSTING SCREEN ZOOM ADJUSTMENT FOCUS ADJUSTMENT LENS SHIFT ADJUSTMENT KEYSTONE CORRECTION PICTURE FREEZE FUNCTION NO SHOW FUNCTION P-TIMER FUNCTION SOUND ADJUSTMENT 20 WIRELESS MOUSE MAINTENANCE 45 46 20 WARNING TEMP.
... FUNCTION 15 PICTURE IMAGE ADJUSTMENTS 35 15 REMOTE CONTROL BATTERIES INSTALLATION 16 TOP CONTROLS AND INDICATORS 17 SETTING 38 ON-SCREEN MENU 18 HOW TO OPERATE ON-SCREEN MENU 18 SETTING MENU 38 FLOW OF ON-SCREEN MENU OPERATION 18 MENU BAR 19 APPENDIX 45 BASIC OPERATION TURNING ON/OFF PROJECTOR TURNING ON THE PROJECTOR TURNING OFF THE PROJECTOR ADJUSTING SCREEN ZOOM ADJUSTMENT FOCUS ADJUSTMENT LENS SHIFT ADJUSTMENT KEYSTONE CORRECTION PICTURE FREEZE FUNCTION NO SHOW FUNCTION P-TIMER FUNCTION SOUND ADJUSTMENT 20 WIRELESS MOUSE MAINTENANCE 45 46 20 WARNING TEMP.

User Manual
Page 6
.... 1/4 ~ 49 times of the computer screen and the image data stored in use . ◆ Compatibility This projector widely accepts various video and computer input signals such as: ● Computers IBM-compatible or Macintosh computer up and down with the motor-driven lens shift function. The projector can be connected. ◆ High Resolution Image This projector provides 1024 x 768 dots resolution for a connected computer. The Power management function operates to turn the projection lamp off...
.... 1/4 ~ 49 times of the computer screen and the image data stored in use . ◆ Compatibility This projector widely accepts various video and computer input signals such as: ● Computers IBM-compatible or Macintosh computer up and down with the motor-driven lens shift function. The projector can be connected. ◆ High Resolution Image This projector provides 1024 x 768 dots resolution for a connected computer. The Power management function operates to turn the projection lamp off...

User Manual
Page 15
... remote control, turn this switch to "ON." LASER LIGHT WINDOW 15 FOCUS BUTTON Used to adjust focus. (p.22) POWER ON-OFF BUTTON Used to turn it to "ALL OFF" when it is released, the light goes off . (p.20, 21) AUTO PC ADJ. BEFORE OPERATION REMOTE CONTROL OPERATION Left Side LASER POINTER (DRAG ON) INDICATOR Lights red while the laser beam is emitted from the Laser Light Window when used as a Wired Remote Control, connect a remote control cable (not supplied) to this jack. And turn the projector...
... remote control, turn this switch to "ON." LASER LIGHT WINDOW 15 FOCUS BUTTON Used to adjust focus. (p.22) POWER ON-OFF BUTTON Used to turn it to "ALL OFF" when it is released, the light goes off . (p.20, 21) AUTO PC ADJ. BEFORE OPERATION REMOTE CONTROL OPERATION Left Side LASER POINTER (DRAG ON) INDICATOR Lights red while the laser beam is emitted from the Laser Light Window when used as a Wired Remote Control, connect a remote control cable (not supplied) to this jack. And turn the projector...

User Manual
Page 17
... DIGITAL ZOOM +/- INDICATOR Blinks red when the internal temperature of life. buttons. (p.23) POWER ON-OFF BUTTON Used to turn the projector on or off. (p.20, 21) INPUT BUTTON Used to execute the selected item. And it becomes bright when the projector is ready to yellow when the projection lamp reaches its top. mode. (p.30) The POINT LEFT/RIGHT buttons are also used as VOLUME +/- BUTTON Used to operate the Auto PC Adjustment function. (p.26) IMAGE BUTTON Used to select the image...
... DIGITAL ZOOM +/- INDICATOR Blinks red when the internal temperature of life. buttons. (p.23) POWER ON-OFF BUTTON Used to turn the projector on or off. (p.20, 21) INPUT BUTTON Used to execute the selected item. And it becomes bright when the projector is ready to yellow when the projection lamp reaches its top. mode. (p.30) The POINT LEFT/RIGHT buttons are also used as VOLUME +/- BUTTON Used to operate the Auto PC Adjustment function. (p.26) IMAGE BUTTON Used to select the image...

User Manual
Page 19
... PC input source. BEFORE OPERATION MENU BAR FOR PC SOURCE Press the MENU button when connecting to the VIDEO input source. GUIDE WINDOW Shows the selected item of the projector or reset the Lamp replacement counter. (See pages 38-44.) INPUT MENU Used to select an input source (Input 1, Input 2, or Input 3). (See page 24.) PC ADJUST MENU Used to adjust the parameters to match with the input signal format. (See pages 26-28.) IMAGE ADJUST MENU Used to adjust the computer image. [Contrast/ Brightness/Color/Tint/Color management/Auto picture control/Color temp./White balance...
... PC input source. BEFORE OPERATION MENU BAR FOR PC SOURCE Press the MENU button when connecting to the VIDEO input source. GUIDE WINDOW Shows the selected item of the projector or reset the Lamp replacement counter. (See pages 38-44.) INPUT MENU Used to select an input source (Input 1, Input 2, or Input 3). (See page 24.) PC ADJUST MENU Used to adjust the parameters to match with the input signal format. (See pages 26-28.) IMAGE ADJUST MENU Used to adjust the computer image. [Contrast/ Brightness/Color/Tint/Color management/Auto picture control/Color temp./White balance...

User Manual
Page 20
... button and fix the number with a PIN code, a PIN code Input Dialog Box appears. If you can start to "PIN code." Repeat this manual and keep it to the PIN code lock function in setting a new PIN code; Refer to operate the projector. What is a security code that was selected the last time and the Lamp control status icon (see page 41) appear on the remote control. BASIC OPERATION TURNING ON / OFF PROJECTOR TURNING ON THE PROJECTOR 1 Complete peripheral connections...
... button and fix the number with a PIN code, a PIN code Input Dialog Box appears. If you can start to "PIN code." Repeat this manual and keep it to the PIN code lock function in setting a new PIN code; Refer to operate the projector. What is a security code that was selected the last time and the Lamp control status icon (see page 41) appear on the remote control. BASIC OPERATION TURNING ON / OFF PROJECTOR TURNING ON THE PROJECTOR 1 Complete peripheral connections...

User Manual
Page 39
... change the Logo PIN code lock setting, enter a Logo PIN code by the Keystone function, the adjusted data is automatically reset and the projector captures an image without a Logo PIN code. If you lost the number, you could no longer change the Logo PIN code. SETTING Logo This function allows you to customize the screen logo with the SELECT button. Logo select This function decides the start-up display. the factory-set...
... change the Logo PIN code lock setting, enter a Logo PIN code by the Keystone function, the adjusted data is automatically reset and the projector captures an image without a Logo PIN code. If you lost the number, you could no longer change the Logo PIN code. SETTING Logo This function allows you to customize the screen logo with the SELECT button. Logo select This function decides the start-up display. the factory-set...

User Manual
Page 40
... lamp life, the Power management function turns off . Simple menu When this function is "On," the value adjustment bar in the picture IMAGE ADJUSTMENT Menu is displayed on the top control or remote control is pressed. After making the adjustment, press the SELECT button to return to a rear projection screen. In this condition, the projection lamp is turned on if the input signal is reconnected or any button on the bottom left until lamp off . SETTING Ceiling...
... lamp life, the Power management function turns off . Simple menu When this function is "On," the value adjustment bar in the picture IMAGE ADJUSTMENT Menu is displayed on the top control or remote control is pressed. After making the adjustment, press the SELECT button to return to a rear projection screen. In this condition, the projection lamp is turned on if the input signal is reconnected or any button on the bottom left until lamp off . SETTING Ceiling...

User Manual
Page 44
Select [Yes], and the next box appears. When replacing the projection lamp, reset the Lamp replacement counter with this box appears. Factory default Select Factory default and this function. Select [Yes] to reset the Lamp replacement counter. SETTING Lamp counter This function is used to activate it. 44 See page 49 for the User logo, Key lock, PIN code lock, Logo PIN code lock, and the Lamp counter to the factory default settings. Factory default This function returns all setting values except for operation. Quit Exit the SETTING Menu.
Select [Yes], and the next box appears. When replacing the projection lamp, reset the Lamp replacement counter with this box appears. Factory default Select Factory default and this function. Select [Yes] to reset the Lamp replacement counter. SETTING Lamp counter This function is used to activate it. 44 See page 49 for the User logo, Key lock, PIN code lock, Logo PIN code lock, and the Lamp counter to the factory default settings. Factory default This function returns all setting values except for operation. Quit Exit the SETTING Menu.

User Manual
Page 48
...; Replacement Lamp Type No. : PLC-XP57L POA-LMP101 (Service Parts No. 610 328 7362) 48 CAUTION For continued safety, replace with a new one promptly. APPENDIX LAMP REPLACEMENT When the projection lamp of this indicator lights yellow, replace the projection lamp with a new one and tighten the two (2) screws. Replace the projection lamp with a lamp assembly of the same type. Put back the lamp cover and tighten the two (2) screws. 5 Connect the AC power cord to the projector and turn on the projector. 6 Reset the Lamp replacement counter...
...; Replacement Lamp Type No. : PLC-XP57L POA-LMP101 (Service Parts No. 610 328 7362) 48 CAUTION For continued safety, replace with a new one promptly. APPENDIX LAMP REPLACEMENT When the projection lamp of this indicator lights yellow, replace the projection lamp with a new one and tighten the two (2) screws. Replace the projection lamp with a lamp assembly of the same type. Put back the lamp cover and tighten the two (2) screws. 5 Connect the AC power cord to the projector and turn on the projector. 6 Reset the Lamp replacement counter...

User Manual
Page 49
... replacement of time than other similar lamps. ● If the projector indicates that there are being used. IF A LAMP EXPLODES, THE FOLLOWING SAFETY PRECAUTIONS SHOULD BE TAKEN. If a lamp explodes, disconnect the projector's AC plug from lamp to lamp and according to display the On-Screen Menu. Select [Yes], and then another confirmation box appears. Contact an authorized service station for each lamp. Lamp counter Select Lamp counter and this manual...
... replacement of time than other similar lamps. ● If the projector indicates that there are being used. IF A LAMP EXPLODES, THE FOLLOWING SAFETY PRECAUTIONS SHOULD BE TAKEN. If a lamp explodes, disconnect the projector's AC plug from lamp to lamp and according to display the On-Screen Menu. Select [Yes], and then another confirmation box appears. Contact an authorized service station for each lamp. Lamp counter Select Lamp counter and this manual...

User Manual
Page 50
...; Check the projection lamp. (See page 48.) ● Adjust the focus of specified operating temperature (41 ˚F ~ 95 ˚F (5 ˚C ~ 35 ˚C)). ● Check the audio cable connection from the projector. ● Check the projection lens to see if it takes about 30 seconds to display the image. ● Check the system you turn the computer and monitor off to your computer or video equipment. ● Make sure the temperature is switched...
...; Check the projection lamp. (See page 48.) ● Adjust the focus of specified operating temperature (41 ˚F ~ 95 ˚F (5 ˚C ~ 35 ˚C)). ● Check the audio cable connection from the projector. ● Check the projection lens to see if it takes about 30 seconds to display the image. ● Check the system you turn the computer and monitor off to your computer or video equipment. ● Make sure the temperature is switched...

User Manual
Page 51
SERVICE WARNING: High voltages are not too far from the projector when using the remote control. If the projector fails to work properly, see "TROUBLESHOOTING" on pages 50 and 51 and try "Solutions" to operate this projector. The CE Mark is a Directive conformity mark of fire, casualty, and electrical hazards. This symbol on page 41.) ● Check the cable connection between the Infrared remote receiver of the...
SERVICE WARNING: High voltages are not too far from the projector when using the remote control. If the projector fails to work properly, see "TROUBLESHOOTING" on pages 50 and 51 and try "Solutions" to operate this projector. The CE Mark is a Directive conformity mark of fire, casualty, and electrical hazards. This symbol on page 41.) ● Check the cable connection between the Infrared remote receiver of the...

User Manual
Page 55
... normal, the READY indicator lights green and the projector can be turned on again. (The WARNING TEMP. If the temperature goes up further, the projector will be properly viewed. The projector is operating normally. Check and clean the air filters. • • • dim • • • off automatically and the Ready indicator goes out. The Warning Temp. NOTE: Specifications are subject to change without notice. indicator stops blinking. ON-SCREEN DISPLAY D-VGA D-480p D-575p D-SVGA...
... normal, the READY indicator lights green and the projector can be turned on again. (The WARNING TEMP. If the temperature goes up further, the projector will be properly viewed. The projector is operating normally. Check and clean the air filters. • • • dim • • • off automatically and the Ready indicator goes out. The Warning Temp. NOTE: Specifications are subject to change without notice. indicator stops blinking. ON-SCREEN DISPLAY D-VGA D-480p D-575p D-SVGA...

User Manual
Page 56
... indicator lights green. Reset the Lamp replacement counter after replacing the lamp. 56 APPENDIX Indicators LAMP WARNING REPLACE TEMP. If the projector is in cooling mode. Unplug the AC power cord and plug it again to be turned on with a new one promptly. The lamp cannot light up . (The lamp has been cooled down enough and the projector is turned off *When the projection lamp reaches its end of life, the LAMP REPLACE indicator lights yellow. yellow red READY green ✽ LAMP Projector Condition red The projector is abnormally high. The indicator...
... indicator lights green. Reset the Lamp replacement counter after replacing the lamp. 56 APPENDIX Indicators LAMP WARNING REPLACE TEMP. If the projector is in cooling mode. Unplug the AC power cord and plug it again to be turned on with a new one promptly. The lamp cannot light up . (The lamp has been cooled down enough and the projector is turned off *When the projection lamp reaches its end of life, the LAMP REPLACE indicator lights yellow. yellow red READY green ✽ LAMP Projector Condition red The projector is abnormally high. The indicator...

User Manual
Page 57
... Power Cord Wireless/Wired Remote Control Transmitter and Batteries VGA Cable USB Cable Control Cable for Serial Port Lens Attachment Lens Replacement And Installation Manual PIN Code Label ● Specifications are subject to change without notice. ● LCD panels are effective, a tiny fraction of the pixels (0.01% or less) may be ineffective by side, you may recognize different white balance and color uniformity on the same screen or side by the characteristics of the LCD panels. ● Each projector...
... Power Cord Wireless/Wired Remote Control Transmitter and Batteries VGA Cable USB Cable Control Cable for Serial Port Lens Attachment Lens Replacement And Installation Manual PIN Code Label ● Specifications are subject to change without notice. ● LCD panels are effective, a tiny fraction of the pixels (0.01% or less) may be ineffective by side, you may recognize different white balance and color uniformity on the same screen or side by the characteristics of the LCD panels. ● Each projector...

User Manual
Page 59
... Fixed Lens Type No. : LNS-W32 ● Remote Control Cable Type No. : POA-CA-RC30 ● PJ-Net Organizer Type No. : POA-PN03 ● External Air Filter Kit Type No. : POA-FBOX-130 LENS REPLACEMENT The lens of this projector can be installed or replaced by well-trained sales or service engineers. APPENDIX OPTIONAL PARTS The parts listed below are optionally supplied. It may cause injury. SANYO Projector Input Input1...
... Fixed Lens Type No. : LNS-W32 ● Remote Control Cable Type No. : POA-CA-RC30 ● PJ-Net Organizer Type No. : POA-PN03 ● External Air Filter Kit Type No. : POA-FBOX-130 LENS REPLACEMENT The lens of this projector can be installed or replaced by well-trained sales or service engineers. APPENDIX OPTIONAL PARTS The parts listed below are optionally supplied. It may cause injury. SANYO Projector Input Input1...

Brochure
Page 2
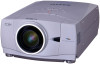
...; Wireless/wired remote control with mouse functions and built-in laser pointer* Brightness is approximately 80 percent that up or down without lens) *1 For video signal *2 Average values at will. Specifications Model number PLC-XP57L LCD panels 1.3-inch TFT p-Si x 3 Aspect ratio 4:3 Number of normal mode. Please note that of pixels 786,432 (1,024 x 768) x 3, Total: 2,359,296 pixels Lens Option Lamp 318 W UHP lamp Screen size 31 -400 Color reproduction...
...; Wireless/wired remote control with mouse functions and built-in laser pointer* Brightness is approximately 80 percent that up or down without lens) *1 For video signal *2 Average values at will. Specifications Model number PLC-XP57L LCD panels 1.3-inch TFT p-Si x 3 Aspect ratio 4:3 Number of normal mode. Please note that of pixels 786,432 (1,024 x 768) x 3, Total: 2,359,296 pixels Lens Option Lamp 318 W UHP lamp Screen size 31 -400 Color reproduction...


