
User Manual
Page 3
.... Prevent any foreign particles or dust from data loss due to avoid product malfunction Avoid malfunction and physical damage. Always use the accessories provided by or approved by dropping it. Do not cause excessive impact on the product. Do not place heavy objects on the ...neck string. Management of the product. Do not spray water on the product by Samsung. Preparation CAUTION Failure to follow all instructions lead to physical injuries or damage to exert excessive force on top of Important Data ...
.... Prevent any foreign particles or dust from data loss due to avoid product malfunction Avoid malfunction and physical damage. Always use the accessories provided by or approved by dropping it. Do not cause excessive impact on the product. Do not place heavy objects on the ...neck string. Management of the product. Do not spray water on the product by Samsung. Preparation CAUTION Failure to follow all instructions lead to physical injuries or damage to exert excessive force on top of Important Data ...

User Manual
Page 4
... Music Information ...........31 Chapter 4. Contents Safety Precautions 2 Contents 4 Chapter 1. Picture Viewing Picture Viewing 33 Picture Enlarging/Slideshow Viewing...34 Chapter 2. Preparation Checking the Product and Accessories 7 Checking the Accessories 7 Components 8 Screen Display Information 10 Button Functions 11 Charging the battery 13 Basic Use 14 Chapter 3.
... Music Information ...........31 Chapter 4. Contents Safety Precautions 2 Contents 4 Chapter 1. Picture Viewing Picture Viewing 33 Picture Enlarging/Slideshow Viewing...34 Chapter 2. Preparation Checking the Product and Accessories 7 Checking the Accessories 7 Components 8 Screen Display Information 10 Button Functions 11 Charging the battery 13 Basic Use 14 Chapter 3.

User Manual
Page 6
Preparation Checking the Product and Accessories 7 Charging the battery 13 Basic Use 14 Chapter 1.
Preparation Checking the Product and Accessories 7 Charging the battery 13 Basic Use 14 Chapter 1.
User Manual
Page 7
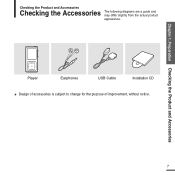
Player Earphones USB Cable Installation CD ■ Design of accessories is subject to change for the purpose of improvement, without notice. 7 Preparation Checking the Product and Accessories Checking the Product and Accessories Checking the Accessories The following diagrams are a guide and may differ slightly from the actual product appearance. Chapter 1.
Player Earphones USB Cable Installation CD ■ Design of accessories is subject to change for the purpose of improvement, without notice. 7 Preparation Checking the Product and Accessories Checking the Product and Accessories Checking the Accessories The following diagrams are a guide and may differ slightly from the actual product appearance. Chapter 1.

User Manual
Page 8
Checking the Product and Accessories Components Front, Right Side and Top Outer Ring 8 Earphone Connection Port Neck String Hole Lock Switch Screen Display Volume Control Button Back Button Move Track/Quick Search Button Touch Pad/Select Button Power & Play/Pause Button
Checking the Product and Accessories Components Front, Right Side and Top Outer Ring 8 Earphone Connection Port Neck String Hole Lock Switch Screen Display Volume Control Button Back Button Move Track/Quick Search Button Touch Pad/Select Button Power & Play/Pause Button

User Manual
Page 9
Preparation Checking the Product and Accessories Bottom Earphone Connection √ Top Power/USB Connection Port Reset Button Earphones 9 Chapter 1.
Preparation Checking the Product and Accessories Bottom Earphone Connection √ Top Power/USB Connection Port Reset Button Earphones 9 Chapter 1.

User Manual
Page 10
Checking the Product and Accessories Screen Display Information 1 2:10 AM 10 2 Samsung MP3 3 Samsung 4 11 5 12 MP3 DNSe STR REP 6 7 0:49 2/2 1:36 13 8 Rising Sun 14 9 1 Current Time Display 2 Album Title Display 3 Album Display 4 3D Sound Displays 5 File Type ...
Checking the Product and Accessories Screen Display Information 1 2:10 AM 10 2 Samsung MP3 3 Samsung 4 11 5 12 MP3 DNSe STR REP 6 7 0:49 2/2 1:36 13 8 Rising Sun 14 9 1 Current Time Display 2 Album Title Display 3 Album Display 4 3D Sound Displays 5 File Type ...

User Manual
Page 11
Chapter 1. Preparation Checking the Product and Accessories Checking the Product and Accessories Button Functions Buttons Functions and Use ■ Long press for power on/off. ■ Short press for play/pause. ■ Long press to move to ...
Chapter 1. Preparation Checking the Product and Accessories Checking the Product and Accessories Button Functions Buttons Functions and Use ■ Long press for power on/off. ■ Short press for play/pause. ■ Long press to move to ...

User Manual
Page 12
... Otherwise, touchpad CAUTION may be damaged. ■ Do not press on the TOUCH PAD if your fingers to operate the touchpad. Checking the Product and Accessories Button Functions (Continued) Buttons Functions and Use ■ Moving up, down, left or right by one selection (Picture mode). Tap and hold on the left...
... Otherwise, touchpad CAUTION may be damaged. ■ Do not press on the TOUCH PAD if your fingers to operate the touchpad. Checking the Product and Accessories Button Functions (Continued) Buttons Functions and Use ■ Moving up, down, left or right by one selection (Picture mode). Tap and hold on the left...

User Manual
Page 13
... you connect to the Power/USB Connection Port on the bottom of the player. ■ appears on your PC. 13 Preparation Checking the Product and Accessories/Charging the battery Screen Display ■ Recharging ■ (Green) Recharge Complete 1 Connect the USB cable to the USB port ( ) on the screen display of the...
... you connect to the Power/USB Connection Port on the bottom of the player. ■ appears on your PC. 13 Preparation Checking the Product and Accessories/Charging the battery Screen Display ■ Recharging ■ (Green) Recharge Complete 1 Connect the USB cable to the USB port ( ) on the screen display of the...