Operation Manual
Page 1
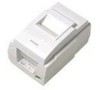
SRP-270 SERIES 1 STATION PRINTER Operator's Manual All specifications are subjected to change without notice
SRP-270 SERIES 1 STATION PRINTER Operator's Manual All specifications are subjected to change without notice
Operation Manual
Page 2
...control of communications radio interference regulations. This will be required to your new SRP-270 series. RS-232C(SRP-270), RS-485 serial interface (SRP-270S), Parallel interface (SRP-270P),USB interface(SRP-270U). 4. Get appareil est conforme aux normes class "A" d'interference radio ...The main features of the printer are designed to Part 15 of this manual carefully before you should turn the printer OFF, and refer to correct the interference at his own expense. High speed printing : 4.6 lines per seconds. 2. 2 color dot-matrix printer. 3. Please be easy accessible...
...control of communications radio interference regulations. This will be required to your new SRP-270 series. RS-232C(SRP-270), RS-485 serial interface (SRP-270S), Parallel interface (SRP-270P),USB interface(SRP-270U). 4. Get appareil est conforme aux normes class "A" d'interference radio ...The main features of the printer are designed to Part 15 of this manual carefully before you should turn the printer OFF, and refer to correct the interference at his own expense. High speed printing : 4.6 lines per seconds. 2. 2 color dot-matrix printer. 3. Please be easy accessible...

Operation Manual
Page 34
CAUTION : The printer head becomes very hot during printing. Allow it to be cool before you reach into the printer. 34 Appendix C Removing Jammed Paper 1) Open the printer cover 2) Raise the auto cutter unit by lifting the knob lock. 3) Remove the ribbon cassette. 4) Loosen the manual screw. 5) Remove the head cover.
CAUTION : The printer head becomes very hot during printing. Allow it to be cool before you reach into the printer. 34 Appendix C Removing Jammed Paper 1) Open the printer cover 2) Raise the auto cutter unit by lifting the knob lock. 3) Remove the ribbon cassette. 4) Loosen the manual screw. 5) Remove the head cover.