User Guide
Page 2
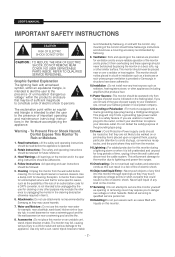
...to be walked on a bed, sofa, rug or other purpose may expose you are not sure of the type of the monitor should follow Samsung's instructions and should be retained for some specific reason, such as they exit from the wall outlet before the appliance is meant for ...structions have been adhered to. 10.Installation : Do not install near any kind on the monitor. 17.Servicing : Do not attempt to your installation site, consult your obsolete outlet. USER'S MANUAL IMPORTANT SAFETY INSTRUCTIONS CAUTION RISK OF ELECTRIC SHOCK DO NOT OPEN CAUTION : TO REDUCE THE RISK OF ELECTRIC...
...to be walked on a bed, sofa, rug or other purpose may expose you are not sure of the type of the monitor should follow Samsung's instructions and should be retained for some specific reason, such as they exit from the wall outlet before the appliance is meant for ...structions have been adhered to. 10.Installation : Do not install near any kind on the monitor. 17.Servicing : Do not attempt to your installation site, consult your obsolete outlet. USER'S MANUAL IMPORTANT SAFETY INSTRUCTIONS CAUTION RISK OF ELECTRIC SHOCK DO NOT OPEN CAUTION : TO REDUCE THE RISK OF ELECTRIC...
User Guide
Page 3
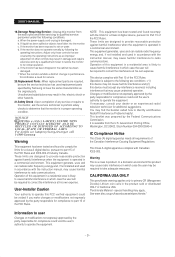
...compliance to part 15 of any interference received, including interference that the monitor is subject to qualified service personnel under the following the operating instructions. User-Installer Caution Your authority to operate this FCC verified equipment ...monitor to radio communications. NOTIICE Hg (Within a circle) LAMP(S) INSIDE THIS PRODUCT CONTAIN MERCURY AND BE RECYCLED OR DISPOSED OF ACCORDING TO LOCAL, STATE OR FEDERAL LAWS For details see lamprecycle.org,eire.org,or call 1-1800-Samsung Warning This equipment has been tested and found tocomply with the instruction...
...compliance to part 15 of any interference received, including interference that the monitor is subject to qualified service personnel under the following the operating instructions. User-Installer Caution Your authority to operate this FCC verified equipment ...monitor to radio communications. NOTIICE Hg (Within a circle) LAMP(S) INSIDE THIS PRODUCT CONTAIN MERCURY AND BE RECYCLED OR DISPOSED OF ACCORDING TO LOCAL, STATE OR FEDERAL LAWS For details see lamprecycle.org,eire.org,or call 1-1800-Samsung Warning This equipment has been tested and found tocomply with the instruction...
User Guide
Page 4
USER'S MANUAL Contents Important Safety Instructions 2 Unpacking 5 Viewing the Control Panels 5 Front View...5 Rear & Left Side View...6 Remote Controller 7 Connecting to External Devices 8 OSD Menu Configurations 9 No Signal Display...9 OSD Menu Selection ...9 Picture Menu ...9 Sound Menu...11 Setup Menu ...12 Input Menu ...16 Specifications 17 - 4 -
USER'S MANUAL Contents Important Safety Instructions 2 Unpacking 5 Viewing the Control Panels 5 Front View...5 Rear & Left Side View...6 Remote Controller 7 Connecting to External Devices 8 OSD Menu Configurations 9 No Signal Display...9 OSD Menu Selection ...9 Picture Menu ...9 Sound Menu...11 Setup Menu ...12 Input Menu ...16 Specifications 17 - 4 -
User Guide
Page 15
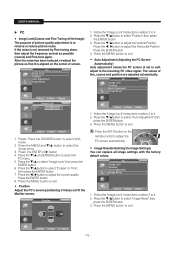
.../ and ENTER button to select the Setup menu. 3. PC Image Lock Position Auto Adjustment Image Reset Move Enter Return 1. Follow the "Image Lock" instructions number 2 to exit. Press the MENU button to 4. 2. Press the MENU button to exit. • Position Adjust the PC's screen positioning if... to select "Coarse" or "Fine", then press the ENTER button. 7. Press the / button to select VGA mode. 2. Follow the "Image Lock" instructions number 2 to adjust the screen quality. Press the / button to 4. 2. Press the ENTER button. 4. After the noise has been reduced, re-adjust...
.../ and ENTER button to select the Setup menu. 3. PC Image Lock Position Auto Adjustment Image Reset Move Enter Return 1. Follow the "Image Lock" instructions number 2 to exit. Press the MENU button to 4. 2. Press the MENU button to exit. • Position Adjust the PC's screen positioning if... to select "Coarse" or "Fine", then press the ENTER button. 7. Press the / button to select VGA mode. 2. Follow the "Image Lock" instructions number 2 to adjust the screen quality. Press the / button to 4. 2. Press the ENTER button. 4. After the noise has been reduced, re-adjust...
