Samsung SMH1611S/XAA Research
View Results Below
Free Samsung SMH1611S/XAA manuals!
Problems with Samsung SMH1611S/XAA?
Ask a Question
Free Samsung SMH1611S/XAA manuals!
Problems with Samsung SMH1611S/XAA?
Ask a Question
Related Manual Pages


Similar Questions


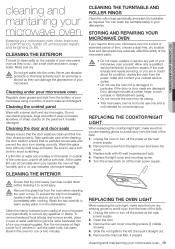
Turntable
We just installed a brand new unit and the turntable does not turn. Is there a certain setting that ...
We just installed a brand new unit and the turntable does not turn. Is there a certain setting that ...
(Posted by grandmanetter 12 years ago)

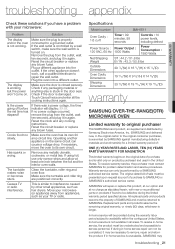
Replace Door Handle
How does the door assembly come apart to replace the door handle.
How does the door assembly come apart to replace the door handle.
(Posted by danlewis72 13 years ago)