User Manual Ver.1.0 (English)
Page 47
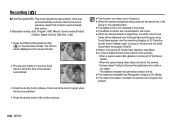
... and the white focus frame turns green.(Total 9) å Return to 8). Press the shutter button halfway. The focus frame turns to focus on the screen left side. 2. When a person wears dark glasses or some conditions this mode. å The effects functions are far. å The maximum available ...look at the face of the subject automatically. 3. The FR icon will focus on the nearest person. å The Digital zoom is not activated in this function cannot work properly. - Camera doesn't detect a face as the brightness is activated. 4. The size and position of the auto focus frame is 2....
... and the white focus frame turns green.(Total 9) å Return to 8). Press the shutter button halfway. The focus frame turns to focus on the screen left side. 2. When a person wears dark glasses or some conditions this mode. å The effects functions are far. å The maximum available ...look at the face of the subject automatically. 3. The FR icon will focus on the nearest person. å The Digital zoom is not activated in this function cannot work properly. - Camera doesn't detect a face as the brightness is activated. 4. The size and position of the auto focus frame is 2....

User Manual Ver.1.0 (English)
Page 56
..., Taiwan, Mexico. - Video White - many, U.K., Holland, Italy, Kuwait, Malaysia, New Zealand, Singapore, Spain, Sweden, Switzerland, Thailand, Norway. - When the camera is connected. sound SETUP_ 55 Yellow - When using a TV as those indicated on the external monitor, but it . - PAL mode can be NTSC or PAL. ... on the LCD monitor will need to which the camera is connected to centre it is not in the centre of the screen, use the TV controls to an external monitor, some parts of the image may not be a digital noise on the LCD monitor. PAL : Australia, ...
..., Taiwan, Mexico. - Video White - many, U.K., Holland, Italy, Kuwait, Malaysia, New Zealand, Singapore, Spain, Sweden, Switzerland, Thailand, Norway. - When the camera is connected. sound SETUP_ 55 Yellow - When using a TV as those indicated on the external monitor, but it . - PAL mode can be NTSC or PAL. ... on the LCD monitor will need to which the camera is connected to centre it is not in the centre of the screen, use the TV controls to an external monitor, some parts of the image may not be a digital noise on the LCD monitor. PAL : Australia, ...

User Manual Ver.1.0 (English)
Page 61
... p.42 p.17 p.17 p.26 p.39 p.52 p.79 p.79 p.47/57 Thumbnail ( º ) / Enlargement ( í ) button You can use the buttons on full screen, press the thumbnail button. 2. No. The thumbnail display will highlight the image that had been showing at the time the thumbnail mode was selected. 3. Using... the camera buttons to set up the Play mode functions. While an image is displayed on the camera to a desired image. 4. LCD monitor Indicator The LCD monitor displays shooting information about the displayed...
... p.42 p.17 p.17 p.26 p.39 p.52 p.79 p.79 p.47/57 Thumbnail ( º ) / Enlargement ( í ) button You can use the buttons on full screen, press the thumbnail button. 2. No. The thumbnail display will highlight the image that had been showing at the time the thumbnail mode was selected. 3. Using... the camera buttons to set up the Play mode functions. While an image is displayed on the camera to a desired image. 4. LCD monitor Indicator The LCD monitor displays shooting information about the displayed...

User Manual Ver.1.0 (English)
Page 78
... to give a classic feel. [Memories] : Scratches are added to select the desired Music. 3. 04 PLAY Starting the slide show ( ❸ ) Configure slide show effects Unique screen effects can add noise to the image to give an old movie effect. [Rhythmic] : Images are displayed with a special effect. [Delight] : Images are displayed with...
... to give a classic feel. [Memories] : Scratches are added to select the desired Music. 3. 04 PLAY Starting the slide show ( ❸ ) Configure slide show effects Unique screen effects can add noise to the image to give an old movie effect. [Rhythmic] : Images are displayed with a special effect. [Delight] : Images are displayed with...

User Manual Ver.1.0 (English)
Page 79
.... Up/ Down/ Left/ Right : Select an image - T Select OK Delete lect the [Yes] menu and press the OK button to take a picture. After deletion, the screen will be changed to delete all the images are saved on the memory. 1. And then press the Right button. 2. Se- Select Delete All? Remember that... for 10 seconds. - No Yes the [Yes] menu and press the OK button to the play mode screen. å Of all the files stored in the memory card, the unprotected files in the camera's internal memory (i.e., not on the memory card) and it will not be deleted even if you delete all...
.... Up/ Down/ Left/ Right : Select an image - T Select OK Delete lect the [Yes] menu and press the OK button to take a picture. After deletion, the screen will be changed to delete all the images are saved on the memory. 1. And then press the Right button. 2. Se- Select Delete All? Remember that... for 10 seconds. - No Yes the [Yes] menu and press the OK button to the play mode screen. å Of all the files stored in the memory card, the unprotected files in the camera's internal memory (i.e., not on the memory card) and it will not be deleted even if you delete all...

User Manual Ver.1.0 (English)
Page 82
... sub menu by pressing the Up / Down button. Up / Down / Left / Right : Select an image. - W / T button : Select a print size - After copying has been completed, the screen will return to the memory card. 1. And then press the Right button. 2. Select the [Copy To Card] menu tab by pressing the UP / DOWN button...
... sub menu by pressing the Up / Down button. Up / Down / Left / Right : Select an image. - W / T button : Select a print size - After copying has been completed, the screen will return to the memory card. 1. And then press the Right button. 2. Select the [Copy To Card] menu tab by pressing the UP / DOWN button...

User Manual Ver.1.0 (English)
Page 84
... OK Menu PictBridge : Picture Selection You can select images you can set to the [Computer], you can print a picture easily. - A screen where you cannot connect a Pictbridge compatible printer to the camera through USB cable with the printer's default setting. - Press the Print button ( » ) and images will display. 2. After selecting ... Down buttons to Print 1. In this case, remove the cable and do the step 1 and 2 again. Ê Easy printing When you connect the camera to printer in the Play back mode, you want to print. Ê Setting the Number of prints. -
... OK Menu PictBridge : Picture Selection You can select images you can set to the [Computer], you can print a picture easily. - A screen where you cannot connect a Pictbridge compatible printer to the camera through USB cable with the printer's default setting. - Press the Print button ( » ) and images will display. 2. After selecting ... Down buttons to Print 1. In this case, remove the cable and do the step 1 and 2 again. Ê Easy printing When you connect the camera to printer in the Play back mode, you want to print. Ê Setting the Number of prints. -


