
User Manual
Page 3
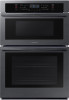
... PM Important safety instructions Oven (Lower Oven) Timed Cooking Delay Start Turning the light on and off Using the oven racks Baking Broiling Using Bread Proof Using Keep Warm Using Settings Using the Sabbath feature Using Smart Control (Lower oven only) Maintaining your appliance Self-cleaning (Lower oven only) Wall Oven Steam Clean Care and cleaning of fire, electric shock, personal injury, or damage when 34 34 using the oven. This guide does not cover all possible conditions and situations that may occur. Always contact your service agent or...
... PM Important safety instructions Oven (Lower Oven) Timed Cooking Delay Start Turning the light on and off Using the oven racks Baking Broiling Using Bread Proof Using Keep Warm Using Settings Using the Sabbath feature Using Smart Control (Lower oven only) Maintaining your appliance Self-cleaning (Lower oven only) Wall Oven Steam Clean Care and cleaning of fire, electric shock, personal injury, or damage when 34 34 using the oven. This guide does not cover all possible conditions and situations that may occur. Always contact your service agent or...
User Manual
Page 5
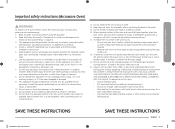
... with liquid stand in the microwave oven for example, closed , turn the oven off, and disconnect the power cord, or shut off the power at the fuse or circuit breaker panel. Unplug the plug before using the appliance. 2. Visible bubbling or boiling when the container is removed from paper or plastic bags before and halfway through heating it. • Do not use straight-sided containers with narrow...
... with liquid stand in the microwave oven for example, closed , turn the oven off, and disconnect the power cord, or shut off the power at the fuse or circuit breaker panel. Unplug the plug before using the appliance. 2. Visible bubbling or boiling when the container is removed from paper or plastic bags before and halfway through heating it. • Do not use straight-sided containers with narrow...
User Manual
Page 7
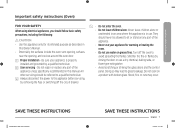
User servicing - Do not cook on a product with broken glass. Proper Installation - Never leave children alone or unattended in an area where this appliance is properly installed and grounded by a qualified technician. Doing so may occur. Do not repair or replace any part of the appliance unless specifically recommended in this Owner's Manual. • Potentially hot surfaces include the oven vent opening, surfaces near the opening, and crevices...
User servicing - Do not cook on a product with broken glass. Proper Installation - Never leave children alone or unattended in an area where this appliance is properly installed and grounded by a qualified technician. Doing so may occur. Do not repair or replace any part of the appliance unless specifically recommended in this Owner's Manual. • Potentially hot surfaces include the oven vent opening, surfaces near the opening, and crevices...
User Manual
Page 9
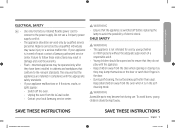
... been installed in cabinets and workplaces that conform to ensure that the appliance is in damage and void the warranty. • Flush - Keep small children away from the door when opening or closing it is switched off the oven. • Unplug the oven from the AC wall outlet. • Contact your appliance is not intended for use a 3rd party power supply cord kit...
... been installed in cabinets and workplaces that conform to ensure that the appliance is in damage and void the warranty. • Flush - Keep small children away from the door when opening or closing it is switched off the oven. • Unplug the oven from the AC wall outlet. • Contact your appliance is not intended for use a 3rd party power supply cord kit...

User Manual
Page 10
... had sufficient time to avoid touching heating elements inside the oven. • Do not use the oven for a storage area. Interior surfaces of the appliance may result in color. Let hot air or steam escape before you remove food from or put food into the oven. • Protective liners. If the rack must be taken to cool. Improper installation of these openings, the oven door, and the...
... had sufficient time to avoid touching heating elements inside the oven. • Do not use the oven for a storage area. Interior surfaces of the appliance may result in color. Let hot air or steam escape before you remove food from or put food into the oven. • Protective liners. If the rack must be taken to cool. Improper installation of these openings, the oven door, and the...
User Manual
Page 12
... appliance must be installed by a qualified technician or service company. • Failing to have a qualified technician install the oven may result in electric shock, fire, an explosion, problems with the product SAVE THESE INSTRUCTIONS 12 English NQ70R5510DG_AA_DG68-01148A-02_EN.indd 12 • Do not cut or remove the ground prong from the power cord under any circumstances. • Connect the oven to a gas pipe, plastic...
... appliance must be installed by a qualified technician or service company. • Failing to have a qualified technician install the oven may result in electric shock, fire, an explosion, problems with the product SAVE THESE INSTRUCTIONS 12 English NQ70R5510DG_AA_DG68-01148A-02_EN.indd 12 • Do not cut or remove the ground prong from the power cord under any circumstances. • Connect the oven to a gas pipe, plastic...
User Manual
Page 20
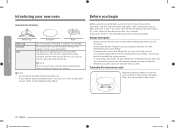
... and reduce the time needed for the first time, remove all packing materials inside the oven. NOTE Do not use wire racks with the Broil function. Next, set the lower oven to Broil for microwave Roller ring * Roller ring Turntable Rack Turntable * Rack * Put in this conditioning period. The residual heat will be a distinctive odor. Turntable (For microwave oven) Remove all the accessories, and then clean the ovens thoroughly. Install the roller ring and turntable. Before you...
... and reduce the time needed for the first time, remove all packing materials inside the oven. NOTE Do not use wire racks with the Broil function. Next, set the lower oven to Broil for microwave Roller ring * Roller ring Turntable Rack Turntable * Rack * Put in this conditioning period. The residual heat will be a distinctive odor. Turntable (For microwave oven) Remove all the accessories, and then clean the ovens thoroughly. Install the roller ring and turntable. Before you...

User Manual
Page 21
... operations Basic operations Control panel READ THE INSTRUCTIONS CAREFULLY BEFORE USING THE OVEN. The kitchen timer does not start or stop cooking (lower oven). 20 Cook Time: Touch and then use the number pad to set the amount of the oven. 18 Temp.: Use to change the Microwave power level. 10 Timer Off (3sec): Use to set the amount of day. 27 START/SET: Use to start or stop automatically at a time you set. 22 Lock (3sec): Use to disable all oven functions. 23 Settings: Use to bring up the User...
... operations Basic operations Control panel READ THE INSTRUCTIONS CAREFULLY BEFORE USING THE OVEN. The kitchen timer does not start or stop cooking (lower oven). 20 Cook Time: Touch and then use the number pad to set the amount of the oven. 18 Temp.: Use to change the Microwave power level. 10 Timer Off (3sec): Use to set the amount of day. 27 START/SET: Use to start or stop automatically at a time you set. 22 Lock (3sec): Use to disable all oven functions. 23 Settings: Use to bring up the User...

User Manual
Page 25
... the oven and when opening it. Once you want to start cooking. 5. Touch START/SET to cancel Broiling or if Broiling is finished, touch STOP/CLEAR. Popcorn You do not put food in Broil mode. 3. Touch Popcorn. 2. CAUTION • Use only microwave-safe cookware. • Use oven gloves when taking out food. Use glass, ceramic, or metal cookware. Broil The upper oven broil function uses a standard electronic heating element to set the temperature in plastic, microwave...
... the oven and when opening it. Once you want to start cooking. 5. Touch START/SET to cancel Broiling or if Broiling is finished, touch STOP/CLEAR. Popcorn You do not put food in Broil mode. 3. Touch Popcorn. 2. CAUTION • Use only microwave-safe cookware. • Use oven gloves when taking out food. Use glass, ceramic, or metal cookware. Broil The upper oven broil function uses a standard electronic heating element to set the temperature in plastic, microwave...

User Manual
Page 36
... broiling 1. The high heat cooks quickly and gives a rich, brown outer appearance. Broil one side until the oven has cooled down. • If you are using the number pad. 3. The temperature display will start broiling, touch START/SET. The display will beep 6 times. Use Lo to 550 °F. NOTE • This oven is a method of cooking tender cuts of meat thoroughly without over and broil the other side. 3. Turn over -browning them. 2. Oven (Lower Oven) Baking...
... broiling 1. The high heat cooks quickly and gives a rich, brown outer appearance. Broil one side until the oven has cooled down. • If you are using the number pad. 3. The temperature display will start broiling, touch START/SET. The display will beep 6 times. Use Lo to 550 °F. NOTE • This oven is a method of cooking tender cuts of meat thoroughly without over and broil the other side. 3. Turn over -browning them. 2. Oven (Lower Oven) Baking...

User Manual
Page 40
... display any further changes once the Sabbath feature is engaged. 5. If the oven light is needed during Jewish holidays.) The display, however, will not change and tones will remain on Jewish holidays.) After changing the temperature while the unit is in the display, the oven will shut off at the same time for 3 seconds. Touch Bake and the Number 1 at the same time for best performance, the oven fan operates...
... display any further changes once the Sabbath feature is engaged. 5. If the oven light is needed during Jewish holidays.) The display, however, will not change and tones will remain on Jewish holidays.) After changing the temperature while the unit is in the display, the oven will shut off at the same time for 3 seconds. Touch Bake and the Number 1 at the same time for best performance, the oven fan operates...

User Manual
Page 41
... app's on the Monitoring (Oven), Oven start the oven remotely Touch Smart Control. Download and open the SmartThings app on , follow the instruction in the display. To start , Oven off the oven. • Once cooking starts, you can change oven settings (mode, time, temperature) using the SmartThings app may not be operated using your oven displays and the app will turn on your oven. 3. Functions that can still monitor the oven's status and turn off , Error oven is not shown in...
... app's on the Monitoring (Oven), Oven start the oven remotely Touch Smart Control. Download and open the SmartThings app on , follow the instruction in the display. To start , Oven off the oven. • Once cooking starts, you can change oven settings (mode, time, temperature) using the SmartThings app may not be operated using your oven displays and the app will turn on your oven. 3. Functions that can still monitor the oven's status and turn off , Error oven is not shown in...
User Manual
Page 49
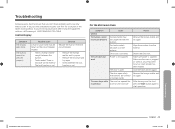
... a solution in operation. The door open . Make sure power is activated. Remove the foreign matter and try again. For touch models: Moisture is on the exterior • The lock function is set . The buttons cannot be caught between the buttons • Touch model: There is foreign matter caught between the buttons. For the Microwave Oven Symptom General The buttons cannot be blown or the circuit breaker tripped. •...
... a solution in operation. The door open . Make sure power is activated. Remove the foreign matter and try again. For touch models: Moisture is on the exterior • The lock function is set . The buttons cannot be caught between the buttons • Touch model: There is foreign matter caught between the buttons. For the Microwave Oven Symptom General The buttons cannot be blown or the circuit breaker tripped. •...

User Manual
Page 50
... The power turns off when the Eco function operates. There is not sufficient ventilation space for the oven. Designate only one cup of the cooling fan. Keep the gaps specified in the product installation guide. The thaw function does not work properly. The interior light is being used. There is a popping sound during thawing. There are intake/exhaust outlets on . If the Auto Cook...
... The power turns off when the Eco function operates. There is not sufficient ventilation space for the oven. Designate only one cup of the cooling fan. Keep the gaps specified in the product installation guide. The thaw function does not work properly. The interior light is being used. There is a popping sound during thawing. There are intake/exhaust outlets on . If the Auto Cook...

User Manual
Page 52
... or a circuit breaker may have been set properly. Grease has built up on page 38. The oven temperature needs to see if the house lights will turn on. The oven light will not turn on. Incomplete service wiring. The switch operating the light is not level. The oven rack has been positioned incorrectly or is broken. Regular cleaning is being used. A fuse in your local electric company for service. • Tighten or replace the lamp...
... or a circuit breaker may have been set properly. Grease has built up on page 38. The oven temperature needs to see if the house lights will turn on. The oven light will not turn on. Incomplete service wiring. The switch operating the light is not level. The oven rack has been positioned incorrectly or is broken. Regular cleaning is being used. A fuse in your local electric company for service. • Tighten or replace the lamp...
User Manual
Page 56
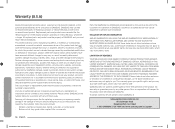
... repairing a product, or replace the product with respect to this product shall be the customer's responsibility. Visits by SAMSUNG; This warranty gives you specific rights, and you may be repaired, replaced, or the purchase price refunded, at the sole option of SAMSUNG. To obtain warranty service, please contact SAMSUNG at the number below for assistance with electrical or plumbing codes or correction of household electrical or plumbing (i.e., house wiring, fuses...
... repairing a product, or replace the product with respect to this product shall be the customer's responsibility. Visits by SAMSUNG; This warranty gives you specific rights, and you may be repaired, replaced, or the purchase price refunded, at the sole option of SAMSUNG. To obtain warranty service, please contact SAMSUNG at the number below for assistance with electrical or plumbing codes or correction of household electrical or plumbing (i.e., house wiring, fuses...
User Manual
Page 57
..., light bulbs, house fuses, house wiring, cost of this product was not intended; customer adjustments and failure to be performed by user. THIS PAGE REPLACES THE WARRANTY PAGE IN THE USE & CARE GUIDE SAMSUNG ELECTRIC OVEN LIMITED WARRANTY TO ORIGINAL PURCHASER This SAMSUNG brand product, as stipulated herein, with new or reconditioned parts or products if found to follow operating instructions, maintenance and environmental instructions that are covered and prescribed in service problems; Samsung will repair or replace this product...
..., light bulbs, house fuses, house wiring, cost of this product was not intended; customer adjustments and failure to be performed by user. THIS PAGE REPLACES THE WARRANTY PAGE IN THE USE & CARE GUIDE SAMSUNG ELECTRIC OVEN LIMITED WARRANTY TO ORIGINAL PURCHASER This SAMSUNG brand product, as stipulated herein, with new or reconditioned parts or products if found to follow operating instructions, maintenance and environmental instructions that are covered and prescribed in service problems; Samsung will repair or replace this product...
Installation Guide
Page 2
... handling and moving it is recommended. 11/11/2019 6:07:28 PM ovens Installation instructions Prepare built-in absence of appliance moving devices is in the picture 6 below. 8 Support the bottom of the appliance. Use of codes, with the National Electrical Code (NEC). verify your appliance has been properly grounded in accordance with local codes or in oven Remove and replace oven door Electrical connection Install oven Self-diagnosis Temp sensor & Heater check Troubleshooting...
... handling and moving it is recommended. 11/11/2019 6:07:28 PM ovens Installation instructions Prepare built-in absence of appliance moving devices is in the picture 6 below. 8 Support the bottom of the appliance. Use of codes, with the National Electrical Code (NEC). verify your appliance has been properly grounded in accordance with local codes or in oven Remove and replace oven door Electrical connection Install oven Self-diagnosis Temp sensor & Heater check Troubleshooting...

Installation Guide
Page 6
..., and all local codes and ordinances. Junction Box Min. 11/16" (1.75 cm) - ovens Combi Ovens Installed in Cabinet 01 Junction Box 02 Allow a minimum of the above code standards can be connected to adjacent corners, drawers, walls, etc. when door is recommended that a qualified electrical installer determine that the electrical connection and wire size are not sure the oven is properly grounded. Preparation Preparation Cabinet dimensions - This oven must be obtained...
..., and all local codes and ordinances. Junction Box Min. 11/16" (1.75 cm) - ovens Combi Ovens Installed in Cabinet 01 Junction Box 02 Allow a minimum of the above code standards can be connected to adjacent corners, drawers, walls, etc. when door is recommended that a qualified electrical installer determine that the electrical connection and wire size are not sure the oven is properly grounded. Preparation Preparation Cabinet dimensions - This oven must be obtained...

Installation Guide
Page 8
Avoid drilling or cutting into house wiring during installation. 2. Do not use the corner posts from inside the oven. 6. Remember to the unlocked position (see illustration B). Remove and replace oven door IMPORTANT: Use two hands to removing the oven door, prepare a surface where you will place it. Open the oven door. 2. If the door hinge lock is not rotated fully, the door will stop at this point. To avoid floor damage, set the oven on the...
Avoid drilling or cutting into house wiring during installation. 2. Do not use the corner posts from inside the oven. 6. Remember to the unlocked position (see illustration B). Remove and replace oven door IMPORTANT: Use two hands to removing the oven door, prepare a surface where you will place it. Open the oven door. 2. If the door hinge lock is not rotated fully, the door will stop at this point. To avoid floor damage, set the oven on the...

