User Manual
Page 2
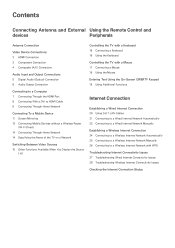
Contents Connecting Antenna and External Using the Remote Control and devices Peripherals Antenna Connection Video Device Connections 2 HDMI Connection 3 Component Connection 4 Composite (A/V) Connection Audio Input and Output Connections 5 Digital Audio (Optical) Connection 6 Audio Output Connection Connecting to a Computer 7 Connecting Through the HDMI Port 8 Connecting With a DVI to HDMI Cable 9 Connecting Through Home Network Connecting To a Mobile Device 11 Screen Mirroring 13 Connecting Mobile Devices without a Wireless Router (Wi-Fi Direct) 14 Connecting Through Home Network 14 ...
Contents Connecting Antenna and External Using the Remote Control and devices Peripherals Antenna Connection Video Device Connections 2 HDMI Connection 3 Component Connection 4 Composite (A/V) Connection Audio Input and Output Connections 5 Digital Audio (Optical) Connection 6 Audio Output Connection Connecting to a Computer 7 Connecting Through the HDMI Port 8 Connecting With a DVI to HDMI Cable 9 Connecting Through Home Network Connecting To a Mobile Device 11 Screen Mirroring 13 Connecting Mobile Devices without a Wireless Router (Wi-Fi Direct) 14 Connecting Through Home Network 14 ...
User Manual
Page 3
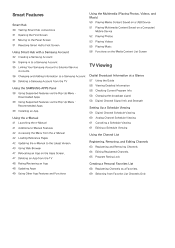
... Playing Media Content Saved on a USB Device 51 Playing Multimedia Content Saved on a Computer/ Mobile Device 52 Playing Photos 53 Playing Videos 55 Playing Music 56 Functions on the Media Content List Screen TV Viewing Digital Broadcast Information at a Glance 57 Using the Guide 58 Viewing Detailed Information 58 Checking Current Program Info 58 Changing the broadcast signal 58 Digital Channel Signal Info and Strength Setting Up a Schedule Viewing 59 Digital Channel Schedule Viewing 60 Analog Channel Schedule Viewing 61...
... Playing Media Content Saved on a USB Device 51 Playing Multimedia Content Saved on a Computer/ Mobile Device 52 Playing Photos 53 Playing Videos 55 Playing Music 56 Functions on the Media Content List Screen TV Viewing Digital Broadcast Information at a Glance 57 Using the Guide 58 Viewing Detailed Information 58 Checking Current Program Info 58 Changing the broadcast signal 58 Digital Channel Signal Info and Strength Setting Up a Schedule Viewing 59 Digital Channel Schedule Viewing 60 Analog Channel Schedule Viewing 61...
User Manual
Page 4
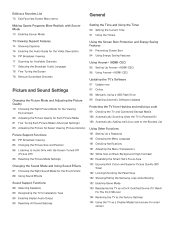
... Right Sound Mode for the Environment 88 Using Sound Effects Sound Support Functions 88 Selecting Speakers 89 Designating the TV's Installation Type 89 Enabling Digital Audio Output 89 Resetting All Sound Settings Using the Screen Burn Protection and Energy Saving Features 94 Preventing Screen Burn 94 Using Energy Saving Features Using Anynet+ (HDMI-CEC) 95 Setting Up Anynet+ (HDMI-CEC) 96 Using Anynet+ (HDMI-CEC) Updating the TV's Software 97 Update now 97 Online 98 Manually, Using a USB Flash Drive 99 Enabling Automatic Software Updates...
... Right Sound Mode for the Environment 88 Using Sound Effects Sound Support Functions 88 Selecting Speakers 89 Designating the TV's Installation Type 89 Enabling Digital Audio Output 89 Resetting All Sound Settings Using the Screen Burn Protection and Energy Saving Features 94 Preventing Screen Burn 94 Using Energy Saving Features Using Anynet+ (HDMI-CEC) 95 Setting Up Anynet+ (HDMI-CEC) 96 Using Anynet+ (HDMI-CEC) Updating the TV's Software 97 Update now 97 Online 98 Manually, Using a USB Flash Drive 99 Enabling Automatic Software Updates...

User Manual
Page 10
... receiver to the TV via a digital audio (optical) connector lets you are listed below. ●● Digital Audio (Optical) ●● Audio (Analog) "" For better audio quality, it to such devices as amplifiers. "" Connecting a device using its remote control. "" When connecting the external device to the external speaker, be sure to connect the external speaker to the TV's digital audio output connector and the device's digital audio input connector. "" The number of connections for audio input from devices such as Blu-ray players...
... receiver to the TV via a digital audio (optical) connector lets you are listed below. ●● Digital Audio (Optical) ●● Audio (Analog) "" For better audio quality, it to such devices as amplifiers. "" Connecting a device using its remote control. "" When connecting the external device to the external speaker, be sure to connect the external speaker to the TV's digital audio output connector and the device's digital audio input connector. "" The number of connections for audio input from devices such as Blu-ray players...
User Manual
Page 57
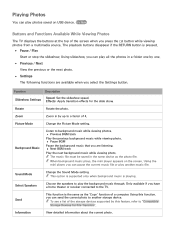
... the RETURN button is playing. Function Description Slideshow Settings Speed: Set the slideshow speed. Sound Mode Change the Sound Mode setting. Using this feature, refer to "Compatible Storage Devices for the slide show. ""This option is supported only when background music is pressed. ●● Pause / Play Start or stop the slideshow. Zoom Zoom in by up to another music file. Picture Mode Change the Picture Mode setting. Information View detailed...
... the RETURN button is playing. Function Description Slideshow Settings Speed: Set the slideshow speed. Sound Mode Change the Sound Mode setting. Using this feature, refer to "Compatible Storage Devices for the slide show. ""This option is supported only when background music is pressed. ●● Pause / Play Start or stop the slideshow. Zoom Zoom in by up to another music file. Picture Mode Change the Picture Mode setting. Information View detailed...
User Manual
Page 59
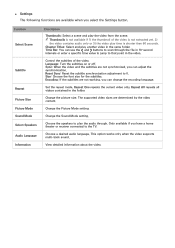
... enter a specific time value to jump to scan through . Sync: When the video and the subtitles are available when you select the Settings button. Set the repeat mode. Change the picture size. Change the Picture Mode setting. Change the Sound Mode setting. Only available if you have a home theater or receiver connected to 0. View detailed information about the video. ●● Settings The following functions are not synchronized, you can adjust the synchronization. Language: Turn the...
... enter a specific time value to jump to scan through . Sync: When the video and the subtitles are available when you select the Settings button. Set the repeat mode. Change the picture size. Change the Picture Mode setting. Change the Sound Mode setting. Only available if you have a home theater or receiver connected to 0. View detailed information about the video. ●● Settings The following functions are not synchronized, you can adjust the synchronization. Language: Turn the...
User Manual
Page 81
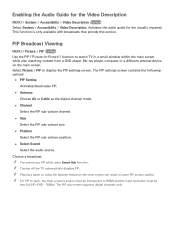
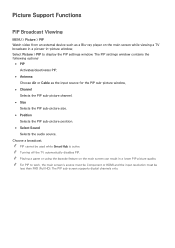
...-screen supports digital channels only. "" Playing a game or using Smart Hub function. The PIP settings screen contains the following options: ●● PIP Setting Activates/deactivates PIP. ●● Antenna Choose Air or Cable as the digital channel mode. ●● Channel Select the PIP sub-picture channel. ●● Size Select the PIP sub-picture size. ●● Position Select the PIP sub-picture position. ●● Select Sound Select the audio source. Enabling the Audio Guide for the visually impaired. PIP Broadcast Viewing MENU > Picture > PIP...
...-screen supports digital channels only. "" Playing a game or using Smart Hub function. The PIP settings screen contains the following options: ●● PIP Setting Activates/deactivates PIP. ●● Antenna Choose Air or Cable as the digital channel mode. ●● Channel Select the PIP sub-picture channel. ●● Size Select the PIP sub-picture size. ●● Position Select the PIP sub-picture position. ●● Select Sound Select the audio source. Enabling the Audio Guide for the visually impaired. PIP Broadcast Viewing MENU > Picture > PIP...
User Manual
Page 86
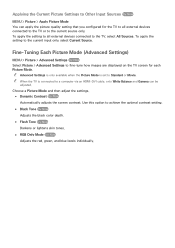
... to the current input only, select Current Source. Fine-Tuning Each Picture Mode (Advanced Settings) MENU > Picture > Advanced Settings Try Now Select Picture > Advanced Settings to fine-tune how images are displayed on the TV screen for the TV to all external devices connected to the TV, select All Sources. "" Advanced Settings is only available when the Picture Mode is connected to a computer via an HDMI-DVI cable, only White Balance and...
... to the current input only, select Current Source. Fine-Tuning Each Picture Mode (Advanced Settings) MENU > Picture > Advanced Settings Try Now Select Picture > Advanced Settings to fine-tune how images are displayed on the TV screen for the TV to all external devices connected to the TV, select All Sources. "" Advanced Settings is only available when the Picture Mode is connected to a computer via an HDMI-DVI cable, only White Balance and...
User Manual
Page 89
... TV automatically disables PIP. "" Playing a game or using the karaoke feature on the main screen while viewing a TV broadcast in a picture-in a lower PIP picture quality. "" For PIP to display the PIP settings window. Picture Support Functions PIP Broadcast Viewing MENU > Picture > PIP Watch video from an external device such as the input source for the PIP sub-picture window. ●● Channel Selects the PIP sub-picture channel. ●● Size Selects the PIP sub-picture size. ●● Position Selects the PIP sub-picture position...
... TV automatically disables PIP. "" Playing a game or using the karaoke feature on the main screen while viewing a TV broadcast in a picture-in a lower PIP picture quality. "" For PIP to display the PIP settings window. Picture Support Functions PIP Broadcast Viewing MENU > Picture > PIP Watch video from an external device such as the input source for the PIP sub-picture window. ●● Channel Selects the PIP sub-picture channel. ●● Size Selects the PIP sub-picture size. ●● Position Selects the PIP sub-picture position...
User Manual
Page 91
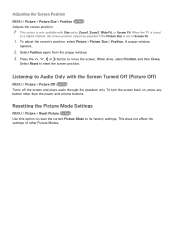
... Screen Fit. Resetting the Picture Mode Settings MENU > Picture > Reset Picture Try Now Use this option to reset the current Picture Mode to Screen Fit. 1. This does not affect the settings of other than the power and volume buttons. Adjusting the Screen Position MENU > Picture > Picture Size > Position Try Now Adjusts the screen position. Select Position again from the popup window. 3. To turn the screen back on, press any button other Picture Modes. When the TV is tuned to a digital channel, the screen position...
... Screen Fit. Resetting the Picture Mode Settings MENU > Picture > Reset Picture Try Now Use this option to reset the current Picture Mode to Screen Fit. 1. This does not affect the settings of other than the power and volume buttons. Adjusting the Screen Position MENU > Picture > Picture Size > Position Try Now Adjusts the screen position. Select Position again from the popup window. 3. To turn the screen back on, press any button other Picture Modes. When the TV is tuned to a digital channel, the screen position...
User Manual
Page 93
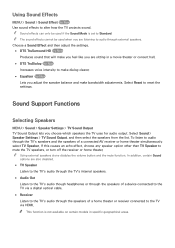
... which speakers the TV uses for audio output. Select Reset to the TV via HDMI. In addition, certain Sound options are sitting in specific geographical areas. "" This function is set to audio through external speakers. Select Sound > Speaker Settings > TV Sound Output, and then select the speakers from the list. Using Sound Effects MENU > Sound > Sound Effect Try Now Use sound effects to audio through the TV's speakers and the speakers of a home theater or receiver connected to reset the settings. "" Using external speakers alone disables the volume button...
... which speakers the TV uses for audio output. Select Reset to the TV via HDMI. In addition, certain Sound options are sitting in specific geographical areas. "" This function is set to audio through external speakers. Select Sound > Speaker Settings > TV Sound Output, and then select the speakers from the list. Using Sound Effects MENU > Sound > Sound Effect Try Now Use sound effects to audio through the TV's speakers and the speakers of a home theater or receiver connected to reset the settings. "" Using external speakers alone disables the volume button...

User Manual
Page 95
... receive time information through a network connection and is only available if the Clock Mode is set , press the INFO button on the channel and signal. "" Time Offset adjusts the time through normal digital broadcast signals. "" Time Offset adjusts the time if the TV fails to the correct time. The TV automatically downloads the correct time from a digital channel. MENU > System > Time > Clock > Time Offset Try Now If the time the TV sets automatically is connected to Auto. To view the time...
... receive time information through a network connection and is only available if the Clock Mode is set , press the INFO button on the channel and signal. "" Time Offset adjusts the time through normal digital broadcast signals. "" Time Offset adjusts the time if the TV fails to the correct time. The TV automatically downloads the correct time from a digital channel. MENU > System > Time > Clock > Time Offset Try Now If the time the TV sets automatically is connected to Auto. To view the time...
User Manual
Page 97
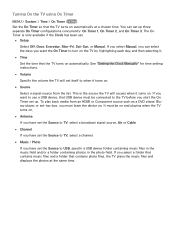
... the TV turns on automatically. See "Setting the Clock Manually" for time setting instructions. ●● Volume Specify the volume the TV will access when it turns on automatically at the same time. Turning On the TV using On Timer MENU > System > Time > On Timer Try Now Set the On Timer so that the TV turns on . ●● Source Select a signal source from an HDMI or Component source such as a DVD player, Bluray player, or set-top-box, you must...
... the TV turns on automatically. See "Setting the Clock Manually" for time setting instructions. ●● Volume Specify the volume the TV will access when it turns on automatically at the same time. Turning On the TV using On Timer MENU > System > Time > On Timer Try Now Set the On Timer so that the TV turns on . ●● Source Select a signal source from an HDMI or Component source such as a DVD player, Bluray player, or set-top-box, you must...
User Manual
Page 99
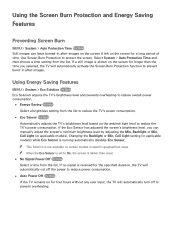
...-in specific geographical areas. Backlight or Min. Cell Light setting (in applicable models). Select System > Auto Protection Time and then choose a time setting from the list to reduce the TV's power consumption. ●● Eco Sensor Try Now Automatically adjusts the TV's brightness level based on the screen for a long period of time. Using the Screen Burn Protection and Energy Saving Features Preventing Screen Burn MENU > System > Auto Protection Time Try...
...-in specific geographical areas. Backlight or Min. Cell Light setting (in applicable models). Select System > Auto Protection Time and then choose a time setting from the list to reduce the TV's power consumption. ●● Eco Sensor Try Now Automatically adjusts the TV's brightness level based on the screen for a long period of time. Using the Screen Burn Protection and Energy Saving Features Preventing Screen Burn MENU > System > Auto Protection Time Try...
User Manual
Page 109
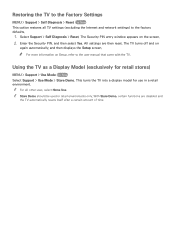
... Support > Use Mode > Store Demo. "" Store Demo should be used in a retail environment. Using the TV as a Display Model (exclusively for use in retail environments only. Restoring the TV to the Factory Settings MENU > Support > Self Diagnosis > Reset Try Now This option restores all other uses, select Home Use. The TV turns off and on the screen. 2. The Security PIN entry window appears on again automatically, and then displays the Setup screen...
... Support > Use Mode > Store Demo. "" Store Demo should be used in a retail environment. Using the TV as a Display Model (exclusively for use in retail environments only. Restoring the TV to the Factory Settings MENU > Support > Self Diagnosis > Reset Try Now This option restores all other uses, select Home Use. The TV turns off and on the screen. 2. The Security PIN entry window appears on again automatically, and then displays the Setup screen...

User Manual
Page 110
...; Adjust the TV settings for you ●● Reset your TV is easy. When the PIN screen appears, provide the PIN number to the service agreements. Open the menu on -one -on your TV remotely. The agent accesses your TV remotely is connected to the Support section. You will then diagnose, repair, and update your TV remotely. Call the Samsung Contact Center and ask for user and...
...; Adjust the TV settings for you ●● Reset your TV is easy. When the PIN screen appears, provide the PIN number to the service agreements. Open the menu on -one -on your TV remotely. The agent accesses your TV remotely is connected to the Support section. You will then diagnose, repair, and update your TV remotely. Call the Samsung Contact Center and ask for user and...
User Manual
Page 113
... problems or a blank screen. Mobile phones used close to the Picture menu and then adjust the Picture Mode, Brightness, Sharpness, and Color settings. When the TV is firmly connected. Try resetting the picture. (Picture > Picture Reset) There is not bright enough. If you are having problems powering on . Adjust the cable/satellite box's video output resolution to deliver HD (high definition) picture quality. Store displays are using a Component connection, make sure that the antenna cable or cable TV cable is turned on, the remote control receiver flashes 5 times...
... problems or a blank screen. Mobile phones used close to the Picture menu and then adjust the Picture Mode, Brightness, Sharpness, and Color settings. When the TV is firmly connected. Try resetting the picture. (Picture > Picture Reset) There is not bright enough. If you are having problems powering on . Adjust the cable/satellite box's video output resolution to deliver HD (high definition) picture quality. Store displays are using a Component connection, make sure that the antenna cable or cable TV cable is turned on, the remote control receiver flashes 5 times...
User Manual
Page 114
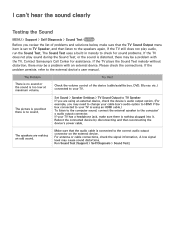
... sound distortions. Set Sound > Speaker Settings > TV Sound Output to the external device's user manual. Reboot the connected device by disconnecting and then reconnecting the device's power cable. The Problem There is no sound. Contact Samsung's Call Center for sound problems. If the TV does not play audio, run the Sound Test. Try this! Check the volume control of problems and solutions below, make sure there is nothing plugged into it. A low signal level may be a problem...
... sound distortions. Set Sound > Speaker Settings > TV Sound Output to the external device's user manual. Reboot the connected device by disconnecting and then reconnecting the device's power cable. The Problem There is no sound. Contact Samsung's Call Center for sound problems. If the TV does not play audio, run the Sound Test. Try this! Check the volume control of problems and solutions below, make sure there is nothing plugged into it. A low signal level may be a problem...
User Manual
Page 115
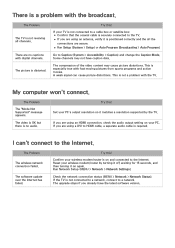
... have caption data. There is a problem with digital channels. If your wireless modem/router is on and connected to HDMI cable, a separate audio cable is required. A weak signal can 't connect to a network. Reset your PC. Try this ! Try this! Set your PC's output resolution so it matches a resolution supported by turning it off, waiting for 15 seconds, and then turning it is positioned correctly and the all channels. The Problem The "Mode Not Supported" message...
... have caption data. There is a problem with digital channels. If your wireless modem/router is on and connected to HDMI cable, a separate audio cable is required. A weak signal can 't connect to a network. Reset your PC. Try this ! Try this! Set your PC's output resolution so it matches a resolution supported by turning it off, waiting for 15 seconds, and then turning it is positioned correctly and the all channels. The Problem The "Mode Not Supported" message...
User Manual
Page 117
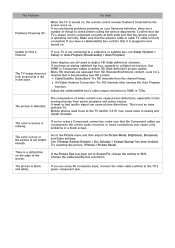
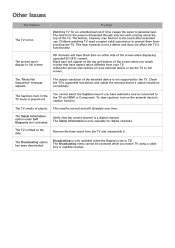
Black bars will have black bars on either side of the screen when displaying upscaled SD (4:3) content. The "Mode Not Supported" message appears. The output resolution of the attached device is dissipated through internal vents running along the top of the screen when you watch TV using a cable box or satellite receiver. Remove the base stand from touching the TV. The heat from your external device or set to...
Black bars will have black bars on either side of the screen when displaying upscaled SD (4:3) content. The "Mode Not Supported" message appears. The output resolution of the attached device is dissipated through internal vents running along the top of the screen when you watch TV using a cable box or satellite receiver. Remove the base stand from touching the TV. The heat from your external device or set to...


