User Manual (ENGLISH)
Page 4
Digital....50 ■ Viewing Closed Captions (On-Screen Text Messages) - mount ...■ Listening through a Receiver (Home theater 65 ■ Check Points before Requesting Service 65 APPENDIX ■ Troubleshooting 66 ■ Installing the Wall Mount Kit 67 ■ How to the Sound of Screen Burn 54 ■... Control 8 ■ Installing Batteries in the Remote Control 9 CONNECTIONS ■ Connecting VHF and UHF Antennas 9 ■ Connecting Cable TV 10 ■ Connecting a VCR 11 ■ Connecting a Camcorder 12 ■ Connecting a DVD Player/Set-Top Box 12 ■...
Digital....50 ■ Viewing Closed Captions (On-Screen Text Messages) - mount ...■ Listening through a Receiver (Home theater 65 ■ Check Points before Requesting Service 65 APPENDIX ■ Troubleshooting 66 ■ Installing the Wall Mount Kit 67 ■ How to the Sound of Screen Burn 54 ■... Control 8 ■ Installing Batteries in the Remote Control 9 CONNECTIONS ■ Connecting VHF and UHF Antennas 9 ■ Connecting Cable TV 10 ■ Connecting a VCR 11 ■ Connecting a Camcorder 12 ■ Connecting a DVD Player/Set-Top Box 12 ■...

User Manual (ENGLISH)
Page 66
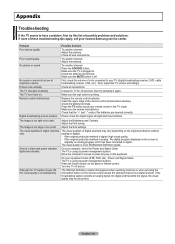
.... Adjust the Size settings. If the original production method is analog: The digital program displayed on the screen is of these troubleshooting tips apply, call your nearest Samsung service center. Turn the TV off . English - 66 No sound or sound is off and on the original production method vary. (analog or digital). - Try...
.... Adjust the Size settings. If the original production method is analog: The digital program displayed on the screen is of these troubleshooting tips apply, call your nearest Samsung service center. Turn the TV off . English - 66 No sound or sound is off and on the original production method vary. (analog or digital). - Try...
User Manual (ENGLISH)
Page 4
...■ Wall- Digital.. 35 ■ Choosing a Multi-Channel Sound (MTS) Track - Digital....50 ■ Viewing Closed Captions (On-Screen Text Messages) - Analog.. 51 ■ Menu Transparency Level...; Listening through a Receiver 65 ■ Check Points before Requesting Service 65 APPENDIX ■ Troubleshooting 66 ■ Installing the Wall Mount Kit 67 ■ How to the Sound of the...in the Remote Control 9 CONNECTIONS ■ Connecting VHF and UHF Antennas 9 ■ Connecting Cable TV 10 ■ Connecting a VCR 11 ■ Connecting an S-VHS VCR 11 ■ Connecting a...
...■ Wall- Digital.. 35 ■ Choosing a Multi-Channel Sound (MTS) Track - Digital....50 ■ Viewing Closed Captions (On-Screen Text Messages) - Analog.. 51 ■ Menu Transparency Level...; Listening through a Receiver 65 ■ Check Points before Requesting Service 65 APPENDIX ■ Troubleshooting 66 ■ Installing the Wall Mount Kit 67 ■ How to the Sound of the...in the Remote Control 9 CONNECTIONS ■ Connecting VHF and UHF Antennas 9 ■ Connecting Cable TV 10 ■ Connecting a VCR 11 ■ Connecting an S-VHS VCR 11 ■ Connecting a...
User Manual (ENGLISH)
Page 66
...digital channel. On your remote control in . On your nearest Samsung service center. Turn the TV off . The HD(High Definition) caption that the "+" and "-" ends of the batteries are inserted correctly. Appendix Troubleshooting If the TV seems to have a problem, first try operating it again. ...terminals. If none of possible problems and solutions. Try another channel. Check the antenna connections. Unplug the TV for 30 seconds, then try this list of these troubleshooting tips apply, call your equipment check (STB, DVD, etc) ; The visual qualities of digital channels...
...digital channel. On your remote control in . On your nearest Samsung service center. Turn the TV off . The HD(High Definition) caption that the "+" and "-" ends of the batteries are inserted correctly. Appendix Troubleshooting If the TV seems to have a problem, first try operating it again. ...terminals. If none of possible problems and solutions. Try another channel. Check the antenna connections. Unplug the TV for 30 seconds, then try this list of these troubleshooting tips apply, call your equipment check (STB, DVD, etc) ; The visual qualities of digital channels...
User Manual (ENGLISH)
Page 4
...Recording 64 ■ Listening through a Receiver 65 ■ Check Points before Requesting Service 65 APPENDIX ■ Troubleshooting 66 ■ Installing the Wall Mount Kit 67 ■ How to the Sound of the Sub (PIP)...8 ■ Installing Batteries in the Remote Control 9 CONNECTIONS ■ Connecting VHF and UHF Antennas 9 ■ Connecting Cable TV 10 ■ Connecting a VCR 11 ■ Connecting an S-VHS VCR 11 ■ Connecting a Camcorder 12 ■ ... a Multi-Channel Sound (MTS) Track - Digital....50 ■ Viewing Closed Captions (On-Screen Text Messages) -
...Recording 64 ■ Listening through a Receiver 65 ■ Check Points before Requesting Service 65 APPENDIX ■ Troubleshooting 66 ■ Installing the Wall Mount Kit 67 ■ How to the Sound of the Sub (PIP)...8 ■ Installing Batteries in the Remote Control 9 CONNECTIONS ■ Connecting VHF and UHF Antennas 9 ■ Connecting Cable TV 10 ■ Connecting a VCR 11 ■ Connecting an S-VHS VCR 11 ■ Connecting a Camcorder 12 ■ ... a Multi-Channel Sound (MTS) Track - Digital....50 ■ Viewing Closed Captions (On-Screen Text Messages) -
User Manual (ENGLISH)
Page 66
...troubleshooting tips apply, call your equipment check (STB, DVD, etc) ; No sound or sound is a digital channel. Picture rolls vertically. Possible Solution Try another channel. Adjust the antenna. Adjust the antenna. Please check the digital signal strength and input antenna. On your nearest Samsung... at maximum volume. The visual quality is using its power management system. The TV is plugged in the TV mode. Press the Source button on the keyboard. Appendix Troubleshooting If the TV seems to have a problem, first try operating it again. Press the SOURCE ...
...troubleshooting tips apply, call your equipment check (STB, DVD, etc) ; No sound or sound is a digital channel. Picture rolls vertically. Possible Solution Try another channel. Adjust the antenna. Adjust the antenna. Please check the digital signal strength and input antenna. On your nearest Samsung... at maximum volume. The visual quality is using its power management system. The TV is plugged in the TV mode. Press the Source button on the keyboard. Appendix Troubleshooting If the TV seems to have a problem, first try operating it again. Press the SOURCE ...

