
Instruction Manual
Page 2
Table of Contents Your New Wide TV 6 Replacing the Lamp 6 List of Features ...8 Accessories ...8 Side Panel Buttons 9 Side Panel Jacks 9 Front Panel LED Indicators 10 Rear Panel Jacks 11 Remote Control ...12 Installing Batteries in the Remote Control 13 Connections ...16 Connecting VHF and UHF Antennas 16 Antennas with 300-ohm ...
Table of Contents Your New Wide TV 6 Replacing the Lamp 6 List of Features ...8 Accessories ...8 Side Panel Buttons 9 Side Panel Jacks 9 Front Panel LED Indicators 10 Rear Panel Jacks 11 Remote Control ...12 Installing Batteries in the Remote Control 13 Connections ...16 Connecting VHF and UHF Antennas 16 Antennas with 300-ohm ...
Instruction Manual
Page 6
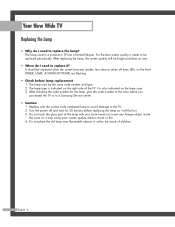
... be hot. 3. Turn the power off and wait for the lamp, give the code number to the store where you purchased the TV or to a Samsung Service center. • Caution 1. English - 6 For the best screen quality it will be replaced periodically. It should be replaced when the screen becomes ...clear or when all three LEDs on the front (TIMER, LAMP, & STAND BY/TEMP) are flashing. • Check before replacing the lamp as it needs to be bright and clear as it ? It is indicated on the lamp case. 3. The lamp used in a projection TV has a limited lifespan. Do not touch the glass part ...
... be hot. 3. Turn the power off and wait for the lamp, give the code number to the store where you purchased the TV or to a Samsung Service center. • Caution 1. English - 6 For the best screen quality it will be replaced periodically. It should be replaced when the screen becomes ...clear or when all three LEDs on the front (TIMER, LAMP, & STAND BY/TEMP) are flashing. • Check before replacing the lamp as it needs to be bright and clear as it ? It is indicated on the lamp case. 3. The lamp used in a projection TV has a limited lifespan. Do not touch the glass part ...

Instruction Manual
Page 7
... When the screws have been completely unfastened, they will still be connected to the body of the Lamp. 4 Separate the Lamp from the engine by holding the handle and pulling it out. 5 To reinstall the Lamp, follow these steps in the picture. (Remove the rubber cap and unscrew the screw. ) 2... Remove the Lamp cover. (Exert a bit of gloves. 1 Unplug TV, then use a screwdriver to remove the screws securing the Lamp. • For replacement, you will need a 5.91 Inches-long Phillips screwdriver and a pair of force to ...
... When the screws have been completely unfastened, they will still be connected to the body of the Lamp. 4 Separate the Lamp from the engine by holding the handle and pulling it out. 5 To reinstall the Lamp, follow these steps in the picture. (Remove the rubber cap and unscrew the screw. ) 2... Remove the Lamp cover. (Exert a bit of gloves. 1 Unplug TV, then use a screwdriver to remove the screws securing the Lamp. • For replacement, you will need a 5.91 Inches-long Phillips screwdriver and a pair of force to ...

Instruction Manual
Page 10
...hear it working. English - 10 Lamp may not appear immediately. • The TV has a fan to keep the inside the set is not operating normally. A cooling fan inside lamp from overheating. Your New Wide TV Front Panel LED Indicators The three lights on rear of the set is not properly... shut. Lamp cover on the front panel indicate the status of your TV. Check if the ventilation hole on in about...
...hear it working. English - 10 Lamp may not appear immediately. • The TV has a fan to keep the inside the set is not operating normally. A cooling fan inside lamp from overheating. Your New Wide TV Front Panel LED Indicators The three lights on rear of the set is not properly... shut. Lamp cover on the front panel indicate the status of your TV. Check if the ventilation hole on in about...


