

User Manual
Page 2
... What you need to know about the safety instructions Important safety symbols CALIFORNIA PROPOSITION 65 WARNING Important safety precautions Warnings Cautions Installation requirements Key installation requirements Location considerations Ducting requirements Exhausting requirements Gas requirements Electrical requirements Installation What's included Step-by-step installation Vent blockage test Exhaust ducting guide Door reversal Before you start Sort and load Functional prerequisite Operations Control panel Simple steps to start Cycle overview Cycle chart Drying guide Special features...
... What you need to know about the safety instructions Important safety symbols CALIFORNIA PROPOSITION 65 WARNING Important safety precautions Warnings Cautions Installation requirements Key installation requirements Location considerations Ducting requirements Exhausting requirements Gas requirements Electrical requirements Installation What's included Step-by-step installation Vent blockage test Exhaust ducting guide Door reversal Before you start Sort and load Functional prerequisite Operations Control panel Simple steps to start Cycle overview Cycle chart Drying guide Special features...
User Manual
Page 5
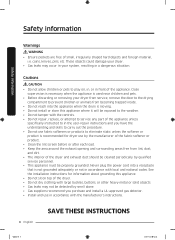
...-07-14 3:22:12 If flexible metal (foil type) duct is installed, it must be easily crushed, and trap lint. www.P65Warnings.ca.gov. Safety information These warning signs are known to the manufacturer's instructions and local codes. • Do not install a clothes dryer with its operation and exercise care when using it. Flexible venting materials are here to prevent injury to persons when...
...-07-14 3:22:12 If flexible metal (foil type) duct is installed, it must be easily crushed, and trap lint. www.P65Warnings.ca.gov. Safety information These warning signs are known to the manufacturer's instructions and local codes. • Do not install a clothes dryer with its operation and exercise care when using it. Flexible venting materials are here to prevent injury to persons when...

User Manual
Page 6
... the drying compartment. 7. See "Electrical requirements" and "Grounding" in "Installation" section. 18.Do not allow children to contaminated loads, the final part of any part of the appliance and exhaust duct should be cleaned periodically by qualified service personnel. 16.Do not place items exposed to cooking oils in published userrepair instructions that you understand and have traces of a tumble dryer cycle occurs without heat (cool...
... the drying compartment. 7. See "Electrical requirements" and "Grounding" in "Installation" section. 18.Do not allow children to contaminated loads, the final part of any part of the appliance and exhaust duct should be cleaned periodically by qualified service personnel. 16.Do not place items exposed to cooking oils in published userrepair instructions that you understand and have traces of a tumble dryer cycle occurs without heat (cool...
User Manual
Page 7
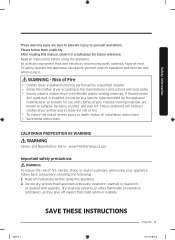
... in injury. 21.The control board and inlet valve are many highly flammable items used in the dryer until all occupants. • Immediately call the fire department. • Installation and service must not be performed by a qualified installer, service agency, or the gas supplier. To reduce the risk of electric shock only during servicing. - Follow the gas supplier's instructions. • If you smell...
... in injury. 21.The control board and inlet valve are many highly flammable items used in the dryer until all occupants. • Immediately call the fire department. • Installation and service must not be performed by a qualified installer, service agency, or the gas supplier. To reduce the risk of electric shock only during servicing. - Follow the gas supplier's instructions. • If you smell...
User Manual
Page 8
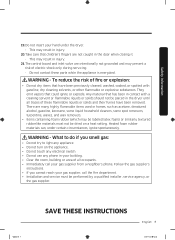
...; Do not tamper with the controls. • Do not repair, replace, or attempt to service any part of the appliance unless specifically instructed to in the user-repair instructions and you purchase and install a UL-approved gas detector. • Install and use fabric softeners or products to play on top of the dryer. • Do not dry clothing with large buckles, buttons, or other heavy metal or solid...
...; Do not tamper with the controls. • Do not repair, replace, or attempt to service any part of the appliance unless specifically instructed to in the user-repair instructions and you purchase and install a UL-approved gas detector. • Install and use fabric softeners or products to play on top of the dryer. • Do not dry clothing with large buckles, buttons, or other heavy metal or solid...
User Manual
Page 10
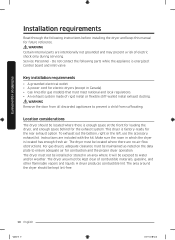
... the kit. Key installation requirements • A grounded electrical outlet. • A power cord for gas models) that must meet national and local regulations. • An exhaust system made of electric shock only during servicing. WARNING Remove the door from all discarded appliances to ensure adequate air for the rear exhaust option. The dryer area must be located where there is factory-ready for combustion and the proper dryer operation. A dryer produces combustible lint. The dryer...
... the kit. Key installation requirements • A grounded electrical outlet. • A power cord for gas models) that must meet national and local regulations. • An exhaust system made of electric shock only during servicing. WARNING Remove the door from all discarded appliances to ensure adequate air for the rear exhaust option. The dryer area must be located where there is factory-ready for combustion and the proper dryer operation. A dryer produces combustible lint. The dryer...
User Manual
Page 17
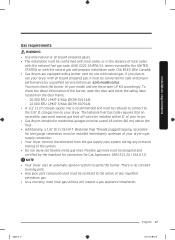
... Pipe Thread) plugged tapping, accessible for Gas Appliances, ANSI Z21.24 • CSA 6.10. To check the detail information of your model and use your dryer's gas supply connection. • Your dryer must be designed and certified by a qualified service technician. (LNG models only) You must check the burner of the burner, open the door and check the rating label location on the door frame. - 20,000 BTU: LPKIT-4/XAA (DC98...
... Pipe Thread) plugged tapping, accessible for Gas Appliances, ANSI Z21.24 • CSA 6.10. To check the detail information of your model and use your dryer's gas supply connection. • Your dryer must be designed and certified by a qualified service technician. (LNG models only) You must check the burner of the burner, open the door and check the rating label location on the door frame. - 20,000 BTU: LPKIT-4/XAA (DC98...

User Manual
Page 18
...:13 Installation requirements Installation requirements Commonwealth of Massachusetts installation instructions Your dryer must be installed by smell alone. • Gas suppliers recommend you are in doubt as to install your dryer is properly grounded. It is located on the plate under the control panel or rear frame. WARNING • Gas leaks may not be done in accordance with local codes, or in the absence of fire, electrical shock...
...:13 Installation requirements Installation requirements Commonwealth of Massachusetts installation instructions Your dryer must be installed by smell alone. • Gas suppliers recommend you are in doubt as to install your dryer is properly grounded. It is located on the plate under the control panel or rear frame. WARNING • Gas leaks may not be done in accordance with local codes, or in the absence of fire, electrical shock...

User Manual
Page 20
.... (Use a 4-prong plug for use an extension cord. and Canada A 120 volt, 60 Hz AC approved electrical service with the power cord attached. Do not use with U.S. Gas models - Risk of the line is required. • If a power cord is required. A 30-ampere fuse or circuit breaker on both sides of 120 / 240 volts, 30-amperes with three No. 10 copper wire conductors terminated with closed loop terminals, open-end spade lugs with turned up...
.... (Use a 4-prong plug for use an extension cord. and Canada A 120 volt, 60 Hz AC approved electrical service with the power cord attached. Do not use with U.S. Gas models - Risk of the line is required. • If a power cord is required. A 30-ampere fuse or circuit breaker on both sides of 120 / 240 volts, 30-amperes with three No. 10 copper wire conductors terminated with closed loop terminals, open-end spade lugs with turned up...

User Manual
Page 23
To change the door direction, see "Door reversal" on page 32. 3. Install the exhaust system as your dryer, remove the packing in the "Exhaust ducting guide" section. Connect the gas supply to the 3/8" (1 cm) male threaded end on the dryer. Tighten up the fitting over all threaded connections. 3. Do not use an open . Untitled-10 23 English 23 2020-07-14 3:22:15 If you have read the "Gas requirements" section...
To change the door direction, see "Door reversal" on page 32. 3. Install the exhaust system as your dryer, remove the packing in the "Exhaust ducting guide" section. Connect the gas supply to the 3/8" (1 cm) male threaded end on the dryer. Tighten up the fitting over all threaded connections. 3. Do not use an open . Untitled-10 23 English 23 2020-07-14 3:22:15 If you have read the "Gas requirements" section...
User Manual
Page 29
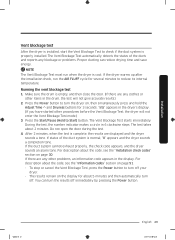
... the duct system is normal, "0" appears and the dryer sounds a completion tone. If there are displayed and the dryer sounds a tone. The results remain on page 30. You can reduce drying time and save energy. The Vent Blockage Test starts immediately. Running the vent blockage test 1. Installation Vent blockage test After the dryer is installed, start the Vent Blockage Test to Start) button. To stop or cancel the Vent Blockage Test, press the Power button to turn...
... the duct system is normal, "0" appears and the dryer sounds a completion tone. If there are displayed and the dryer sounds a tone. The results remain on page 30. You can reduce drying time and save energy. The Vent Blockage Test starts immediately. Running the vent blockage test 1. Installation Vent blockage test After the dryer is installed, start the Vent Blockage Test to Start) button. To stop or cancel the Vent Blockage Test, press the Power button to turn...

User Manual
Page 30
... and check again. Check your vent condition. (Refer to the installation instructions in incorrect results. Leave the dryer at room temperature (41~95 °F (5~35 °C)) for the first time. • If the test result displays check code (the duct system is blocked ), refer to the "Ducting requirements" section on the dry sensor. Temperature sensor error. Remove items from the drum and check again. Close the door properly and check again. If the problem continues, contact a service...
... and check again. Check your vent condition. (Refer to the installation instructions in incorrect results. Leave the dryer at room temperature (41~95 °F (5~35 °C)) for the first time. • If the test result displays check code (the duct system is blocked ), refer to the "Ducting requirements" section on the dry sensor. Temperature sensor error. Remove items from the drum and check again. Close the door properly and check again. If the problem continues, contact a service...

User Manual
Page 31
... dryer is installed properly so the air exhausts freely. 2. To facilitate the exhaust, keep the ducts as straight as possible. Use 4-inch rigid metal ducts. Check code Meaning 9C1 Abnormal voltage detected. Never use crushed or clogged venting or ducts. Installation Untitled-10 31 English 31 2020-07-14 3:22:16 Solution Check the power connection. (Refer to the "Connect the electrical wiring (for electric models)" section) If the problem continues, contact a service center. Exhaust ducting guide Ducting...
... dryer is installed properly so the air exhausts freely. 2. To facilitate the exhaust, keep the ducts as straight as possible. Use 4-inch rigid metal ducts. Check code Meaning 9C1 Abnormal voltage detected. Never use crushed or clogged venting or ducts. Installation Untitled-10 31 English 31 2020-07-14 3:22:16 Solution Check the power connection. (Refer to the "Connect the electrical wiring (for electric models)" section) If the problem continues, contact a service center. Exhaust ducting guide Ducting...

User Manual
Page 39
... Sensor Dry Filter Check Child Lock Alarm Off This icon appears when the dryer operates the cycle which senses the internal humidity to clean the lint filter. Operations Untitled-10 39 English 39 2020-07-14 3:22:18 This icon indicates that the alarm is on . 2. Change the cycle settings (Dryness, Temp., and Time) as necessary. 5. Clean the lint filter before every cycle and make sure the filter is properly inserted before starting a cycle...
... Sensor Dry Filter Check Child Lock Alarm Off This icon appears when the dryer operates the cycle which senses the internal humidity to clean the lint filter. Operations Untitled-10 39 English 39 2020-07-14 3:22:18 This icon indicates that the alarm is on . 2. Change the cycle settings (Dryness, Temp., and Time) as necessary. 5. Clean the lint filter before every cycle and make sure the filter is properly inserted before starting a cycle...

User Manual
Page 40
... clothing. Use this cycle to your bedding and curtains clean through sanitization. For drying wrinkle-free cottons, synthetic fabrics, knits, and permanent press fabrics automatically. For heat-sensitive items at a low drying temperature. If TIME DRY is selected, the Eco Dry function is enabled by infusing high temperature heat deep into the fabric during the drying cycle. For more information, see Eco Dry in minutes. You can change the drying settings manually...
... clothing. Use this cycle to your bedding and curtains clean through sanitization. For drying wrinkle-free cottons, synthetic fabrics, knits, and permanent press fabrics automatically. For heat-sensitive items at a low drying temperature. If TIME DRY is selected, the Eco Dry function is enabled by infusing high temperature heat deep into the fabric during the drying cycle. For more information, see Eco Dry in minutes. You can change the drying settings manually...
User Manual
Page 47
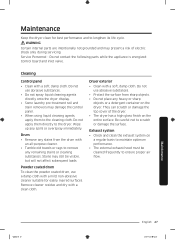
... inlet valve. Cleaning Control panel • Clean with an all-purpose cleaner. • Tumble old towels or rags to the cleaning cloth. Do not use abrasive substances. • Protect the surface from the drum with a soft, damp cloth. Exhaust system • Check and clean the exhaust system on a regular basis to ensure proper air flow. Service Personnel - Wipe up any remaining stains or cleaning substances. Dryer exterior • Clean with a clean cloth...
... inlet valve. Cleaning Control panel • Clean with an all-purpose cleaner. • Tumble old towels or rags to the cleaning cloth. Do not use abrasive substances. • Protect the surface from the drum with a soft, damp cloth. Exhaust system • Check and clean the exhaust system on a regular basis to ensure proper air flow. Service Personnel - Wipe up any remaining stains or cleaning substances. Dryer exterior • Clean with a clean cloth...

User Manual
Page 49
... dryer gas valve or heating element cycle on and off during the drying cycle. • Make sure the dryer is normal for lint buildup. Troubleshooting Untitled-10 49 English 49 2020-07-14 3:22:20 Problem Does not dry. Remove some items and restart the dryer. • Clean the lint filter. • Check the load for objects such as outlined in the installation instructions. • It is leveled properly as coins, loose buttons...
... dryer gas valve or heating element cycle on and off during the drying cycle. • Make sure the dryer is normal for lint buildup. Troubleshooting Untitled-10 49 English 49 2020-07-14 3:22:20 Problem Does not dry. Remove some items and restart the dryer. • Clean the lint filter. • Check the load for objects such as outlined in the installation instructions. • It is leveled properly as coins, loose buttons...

User Manual
Page 51
... lint screen. • Check if the vent system is restricted. • If this information code remains, contact a Samsung service center. Incorrect door switch. • Contact a Samsung service center. High temperature heating check. • Clean the lint filter. • If this information code remains, contact a Samsung service center. Invalid power source frequency. • Try restarting the cycle. • If this information code remains, contact a Samsung service center. The electronic control needs to be checked. • Unplug the power plug and contact a Samsung service...
... lint screen. • Check if the vent system is restricted. • If this information code remains, contact a Samsung service center. Incorrect door switch. • Contact a Samsung service center. High temperature heating check. • Clean the lint filter. • If this information code remains, contact a Samsung service center. Invalid power source frequency. • Try restarting the cycle. • If this information code remains, contact a Samsung service center. The electronic control needs to be checked. • Unplug the power plug and contact a Samsung service...
User Manual
Page 56
... product was not intended; in-home instruction on how to use of these excluded circumstances shall be readily determined; product where the original factory serial numbers have been removed, defaced, changed in accordance with any of equipment, utilities, services, parts, supplies, accessories, applications, installations, repairs, external wiring or connectors not supplied or authorized by failure to operate and maintain the product according to...
... product was not intended; in-home instruction on how to use of these excluded circumstances shall be readily determined; product where the original factory serial numbers have been removed, defaced, changed in accordance with any of equipment, utilities, services, parts, supplies, accessories, applications, installations, repairs, external wiring or connectors not supplied or authorized by failure to operate and maintain the product according to...
User Manual
Page 59
... serial numbers; problems caused by SAMSUNG that occurs in shipment; SAMSUNG does not warrant uninterrupted or error-free operation of a service call for which this product and shall not apply to follow operating instructions, maintenance and environmental instructions that are covered and prescribed in the instruction book; delivery and installation; accidents, abuse, neglect, fire, water, lightning, or other acts of products, equipment, systems, utilities, services, parts, supplies, accessories, applications, installations, repairs...
... serial numbers; problems caused by SAMSUNG that occurs in shipment; SAMSUNG does not warrant uninterrupted or error-free operation of a service call for which this product and shall not apply to follow operating instructions, maintenance and environmental instructions that are covered and prescribed in the instruction book; delivery and installation; accidents, abuse, neglect, fire, water, lightning, or other acts of products, equipment, systems, utilities, services, parts, supplies, accessories, applications, installations, repairs...


