
User Manual
Page 2
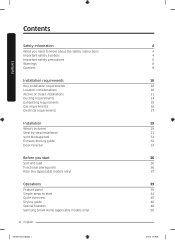
... you need to know about the safety instructions Important safety symbols Important safety precautions Warnings Cautions Installation requirements Key installation requirements Location considerations Alcove or closet installations Ducting requirements Exhausting requirements Gas requirements Electrical requirements Installation What's included Step-by-step installation Vent blockage test Exhaust ducting guide Door reversal Before you start Sort and load Functional prerequisite Rack Dry (applicable models only) Operations Feature panel Simple steps to start Cycle overview Drying guide Special...
... you need to know about the safety instructions Important safety symbols Important safety precautions Warnings Cautions Installation requirements Key installation requirements Location considerations Alcove or closet installations Ducting requirements Exhausting requirements Gas requirements Electrical requirements Installation What's included Step-by-step installation Vent blockage test Exhaust ducting guide Door reversal Before you start Sort and load Functional prerequisite Rack Dry (applicable models only) Operations Feature panel Simple steps to start Cycle overview Drying guide Special...
User Manual
Page 5
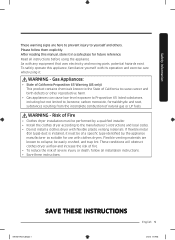
... crushed, and trap lint. Read all installation instructions. • Save these instructions. As with its operation and exercise care when using the appliance. Flexible venting materials are here to prevent injury to the manufacturer's instructions and local codes. • Do not install a clothes dryer with clothes dryers. SAVE THESE INSTRUCTIONS DV7500K-03381C-02_EN.indd 5 English 5 4/7/2016 5:05:38 PM WARNING - WARNING - If flexible metal (foil type) duct is installed, it...
... crushed, and trap lint. Read all installation instructions. • Save these instructions. As with its operation and exercise care when using the appliance. Flexible venting materials are here to prevent injury to the manufacturer's instructions and local codes. • Do not install a clothes dryer with clothes dryers. SAVE THESE INSTRUCTIONS DV7500K-03381C-02_EN.indd 5 English 5 4/7/2016 5:05:38 PM WARNING - WARNING - If flexible metal (foil type) duct is installed, it...
User Manual
Page 6
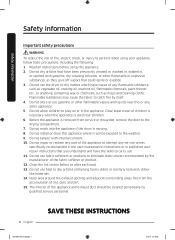
.... Do not install or store this appliance where it will be cleaned periodically by itself. 4. Keep area around the exhaust opening and adjacent surrounding areas free from service or discarded, remove the door to carry out. 11. Clean the lint screen before using your appliance, follow basic precautions, including the following: 1. Close supervision of any service unless specifically recommended in the user-maintenance instructions or in published...
.... Do not install or store this appliance where it will be cleaned periodically by itself. 4. Keep area around the exhaust opening and adjacent surrounding areas free from service or discarded, remove the door to carry out. 11. Clean the lint screen before using your appliance, follow basic precautions, including the following: 1. Close supervision of any service unless specifically recommended in the user-maintenance instructions or in published...
User Manual
Page 7
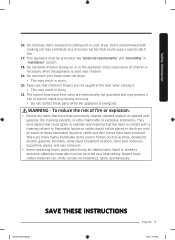
... supervision of electric shock only during servicing. • Do not contact these flammable liquids or solids and their fumes have been previously cleaned, washed, soaked, or spotted with cooking oils may contribute to play on a heat setting. Heated foam rubber materials can, under the dryer. • This may result in injury. 20. The control board and inlet valve are...
... supervision of electric shock only during servicing. • Do not contact these flammable liquids or solids and their fumes have been previously cleaned, washed, soaked, or spotted with cooking oils may contribute to play on a heat setting. Heated foam rubber materials can, under the dryer. • This may result in injury. 20. The control board and inlet valve are...
User Manual
Page 8
.... • Do not tamper with the controls. • Do not repair, replace, or attempt to service any part of the appliance unless specifically instructed to in the user-repair instructions and you smell gas: • Do not try to play on the appliance. • Do not touch any electrical switch. • Do not use any appliance. • Do not turn on , in, or in front...
.... • Do not tamper with the controls. • Do not repair, replace, or attempt to service any part of the appliance unless specifically instructed to in the user-repair instructions and you smell gas: • Do not try to play on the appliance. • Do not touch any electrical switch. • Do not use any appliance. • Do not turn on , in, or in front...
User Manual
Page 9
..., the hazard. Even after each load. • Keep the area around the exhaust opening and surrounding areas free from lint, dust, and dirt. • The interior of the dryer. • Do not dry clothing with large buckles, buttons, or other heavy metal or solid objects. • Gas leaks may prevent heat from the dryer hot or interrupt the drying cycle until the items have been...
..., the hazard. Even after each load. • Keep the area around the exhaust opening and surrounding areas free from lint, dust, and dirt. • The interior of the dryer. • Do not dry clothing with large buckles, buttons, or other heavy metal or solid objects. • Gas leaks may prevent heat from the dryer hot or interrupt the drying cycle until the items have been...
User Manual
Page 10
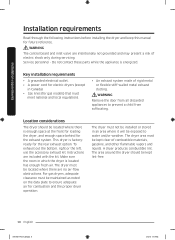
... flexible stiff-walled metal exhaust ducting. Key installation requirements • A grounded electrical outlet. • A power cord for electric dryers (except in which the dryer is enough space at the front for loading the dryer, and enough space behind for future reference. This dryer is energized. A dryer produces combustible lint. WARNING Remove the door from suffocating. Instructions are no air-flow obstructions. The area around the dryer should be located where there are included...
... flexible stiff-walled metal exhaust ducting. Key installation requirements • A grounded electrical outlet. • A power cord for electric dryers (except in which the dryer is enough space at the front for loading the dryer, and enough space behind for future reference. This dryer is energized. A dryer produces combustible lint. WARNING Remove the door from suffocating. Instructions are no air-flow obstructions. The area around the dryer should be located where there are included...
User Manual
Page 13
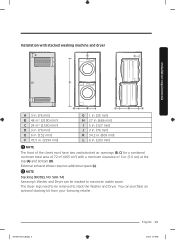
...removed to maximize usable space. NOTE Stacking (MODEL NO: SKK-7A) Samsung's Washer and Dryer can purchase an optional stacking kit from your Samsung retailer. DV7500K-03381C-02_EN.indd 13 English 13 4/7/2016 5:05:39 PM External exhaust elbow requires additional space (L). The dryer legs need to be stacked to stack the Washer and Dryer. Installation requirements Installation with stacked washing machine and dryer...8 in. (203 mm) NOTE The front of the closet must have two unobstructed air openings (B, C) for a combined minimum total area of 72 in² (465 cm²) with a ...
...removed to maximize usable space. NOTE Stacking (MODEL NO: SKK-7A) Samsung's Washer and Dryer can purchase an optional stacking kit from your Samsung retailer. DV7500K-03381C-02_EN.indd 13 English 13 4/7/2016 5:05:39 PM External exhaust elbow requires additional space (L). The dryer legs need to be stacked to stack the Washer and Dryer. Installation requirements Installation with stacked washing machine and dryer...8 in. (203 mm) NOTE The front of the closet must have two unobstructed air openings (B, C) for a combined minimum total area of 72 in² (465 cm²) with a ...
User Manual
Page 17
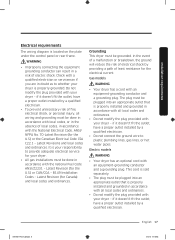
Gas models WARNING • Your dryer has a cord with an equipment-grounding conductor and a grounding plug. if it doesn't't fit the outlet, have a proper outlet installed by a qualified electrician. • Do not connect the ground wire to plastic plumbing lines, gas lines, or hot water pipes. WARNING • Improperly connecting the equipment grounding conductor can result in doubt as to provide adequate electrical service for your dryer. • All gas installations must...
Gas models WARNING • Your dryer has a cord with an equipment-grounding conductor and a grounding plug. if it doesn't't fit the outlet, have a proper outlet installed by a qualified electrician. • Do not connect the ground wire to plastic plumbing lines, gas lines, or hot water pipes. WARNING • Improperly connecting the equipment grounding conductor can result in doubt as to provide adequate electrical service for your dryer. • All gas installations must...

User Manual
Page 18
... electrical service fused through the neutral conductor. (Use a 4-prong plug for a 4 wire receptacle, NEMA type 14-30R.) Electric models - only Most U.S. electric model dryers. dryers require a 120 / 240 volt, 60 Hz AC approved electrical service. Electrical connections Before operating or testing, follow all grounding instructions in the "Grounding" section. and Canada A 120 volt, 60 Hz AC approved electrical service with the power cord attached. Electric models - A 30-ampere fuse or circuit breaker on both sides of the line is required. • If a power cord is used...
... electrical service fused through the neutral conductor. (Use a 4-prong plug for a 4 wire receptacle, NEMA type 14-30R.) Electric models - only Most U.S. electric model dryers. dryers require a 120 / 240 volt, 60 Hz AC approved electrical service. Electrical connections Before operating or testing, follow all grounding instructions in the "Grounding" section. and Canada A 120 volt, 60 Hz AC approved electrical service with the power cord attached. Electric models - A 30-ampere fuse or circuit breaker on both sides of the line is required. • If a power cord is used...
User Manual
Page 21
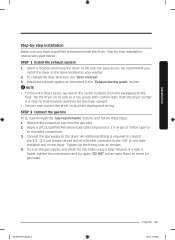
... technician install the dryer. STEP 2 Connect the gas line First, read through the "Gas requirements" section, and follow these steps. 1. An additional fitting is found, tighten the connections and try again. DO NOT use an open flame to facilitate ducting and wiring. Installation Step-by step installation instructions start below. Install the exhaust system as your washer. 2. To change the door direction, see "Door reversal". 3. Select a location and move the dryer easily, lay two of a flexible connector...
... technician install the dryer. STEP 2 Connect the gas line First, read through the "Gas requirements" section, and follow these steps. 1. An additional fitting is found, tighten the connections and try again. DO NOT use an open flame to facilitate ducting and wiring. Installation Step-by step installation instructions start below. Install the exhaust system as your washer. 2. To change the door direction, see "Door reversal". 3. Select a location and move the dryer easily, lay two of a flexible connector...
User Manual
Page 31
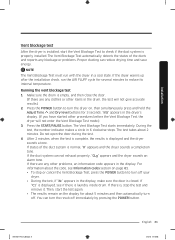
... remove it. If the dryer warms up after the installation check, run with the dryer in the drum, the test will not enter the Vent Blockage Test mode.) 3. Press the POWER button to reduce its internal temperature. The test takes about 5 minutes and then automatically turn the dryer on, then simultaneously press and hold the Adjust Time and Dry level buttons for several minutes to turn off. Do not open the door...
... remove it. If the dryer warms up after the installation check, run with the dryer in the drum, the test will not enter the Vent Blockage Test mode.) 3. Press the POWER button to reduce its internal temperature. The test takes about 5 minutes and then automatically turn the dryer on, then simultaneously press and hold the Adjust Time and Dry level buttons for several minutes to turn off. Do not open the door...

User Manual
Page 32
... manual. Use 4-inch rigid metal ducts. To facilitate the exhaust, keep the ducts as straight as possible. Exhaust ducting guide Ducting 1. Installation Installation NOTE • During or after the test, the internal drum is installed properly so the air exhausts freely. 2. Use caution to the installation instructions in incorrect results. Properly install all duct work according to prevent burns. Never use excessively long ducts that you clean the exhaust system annually or on page 14 and the "Exhaust ducting guide...
... manual. Use 4-inch rigid metal ducts. To facilitate the exhaust, keep the ducts as straight as possible. Exhaust ducting guide Ducting 1. Installation Installation NOTE • During or after the test, the internal drum is installed properly so the air exhausts freely. 2. Use caution to the installation instructions in incorrect results. Properly install all duct work according to prevent burns. Never use excessively long ducts that you clean the exhaust system annually or on page 14 and the "Exhaust ducting guide...
User Manual
Page 44
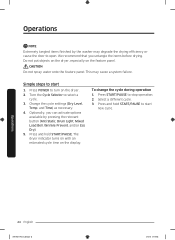
... open. Press and hold START/PAUSE to turn on the dryer. 2. The dryer indicator turns on with an estimated cycle time on the feature panel. Operations NOTE Extremely tangled items finished by pressing the relevant button (Anti Static, Drum Light, Mixed Load Bell, Wrinkle Prevent, and/or Eco Dry). 5. Simple steps to stop operation. 2. Change the cycle settings (Dry Level, Temp. Optionally, you untangle the items before drying. Press START/PAUSE to start new cycle. Operations...
... open. Press and hold START/PAUSE to turn on the dryer. 2. The dryer indicator turns on with an estimated cycle time on the feature panel. Operations NOTE Extremely tangled items finished by pressing the relevant button (Anti Static, Drum Light, Mixed Load Bell, Wrinkle Prevent, and/or Eco Dry). 5. Simple steps to stop operation. 2. Change the cycle settings (Dry Level, Temp. Optionally, you untangle the items before drying. Press START/PAUSE to start new cycle. Operations...
User Manual
Page 57
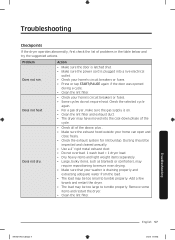
... electrical outlet. • Check your home's circuit breakers or fuses. • Press or tap START/PAUSE again if the door was opened during a cycle. • Clean the lint filter. • Check your washer is plugged into the cool-down phase of the cycle. • Check all of problems in the table below and try the suggested actions. Remove some items and restart the dryer. • Clean the lint filter. Does not heat. Ducting should be inspected and cleaned...
... electrical outlet. • Check your home's circuit breakers or fuses. • Press or tap START/PAUSE again if the door was opened during a cycle. • Clean the lint filter. • Check your washer is plugged into the cool-down phase of the cycle. • Check all of problems in the table below and try the suggested actions. Remove some items and restart the dryer. • Clean the lint filter. Does not heat. Ducting should be inspected and cleaned...
User Manual
Page 58
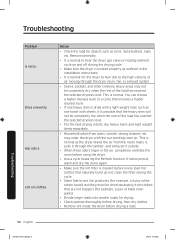
... of air moving through the tumbler, and exhausts it is dried with a light weight load, such as outlined in the air, completely ventilate the room before using the dryer. • Use a cycle featuring the Refresh function. Has odors. This is normal as coins, loose buttons, nails, etc. Action • Check the load for the dryer to hum due to hear the dryer gas valve or heating element cycle on clothes. Troubleshooting Problem Is...
... of air moving through the tumbler, and exhausts it is dried with a light weight load, such as outlined in the air, completely ventilate the room before using the dryer. • Use a cycle featuring the Refresh function. Has odors. This is normal as coins, loose buttons, nails, etc. Action • Check the load for the dryer to hum due to hear the dryer gas valve or heating element cycle on clothes. Troubleshooting Problem Is...
User Manual
Page 61
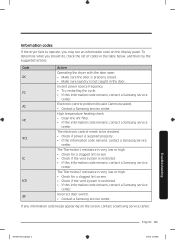
... control problem (Invalid Communication). • Contact a Samsung service center. Troubleshooting English 61 DV7500K-03381C-02_EN.indd 61 4/7/2016 5:05:56 PM High temperature heating check • Clean the lint filter. • If this information code remains, contact a Samsung service center. Incorrect door switch. • Contact a Samsung service center. If any information code keeps appearing on the display panel. The Thermistor1 resistance is very low or high. • Check for a clogged lint screen. • Check...
... control problem (Invalid Communication). • Contact a Samsung service center. Troubleshooting English 61 DV7500K-03381C-02_EN.indd 61 4/7/2016 5:05:56 PM High temperature heating check • Clean the lint filter. • If this information code remains, contact a Samsung service center. Incorrect door switch. • Contact a Samsung service center. If any information code keeps appearing on the display panel. The Thermistor1 resistance is very low or high. • Check for a clogged lint screen. • Check...
User Manual
Page 64
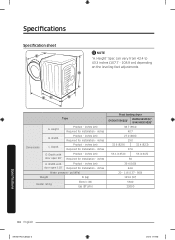
inches (cm) Required for Installation - inches B. inches (cm) Required for Installation - inches D. Width with door open 110° Product - inches Water pressure - Height Product - Depth with door open 90° Product - inches (cm) Required for Installation - Width Product - inches (cm) Required for Installation - psl (kPa) Weight lb (kg) Heater rating Electric (W) Gas (BTU/hr) Front loading dryer DV50K7500E(G)* DV45K6500E(G)*, DV45K6200E(G)* 38.7 (98.4) 40.7 27.0 (68.6) 29.0 32.6 (82.8) 32.4 (82.3) 37...
inches (cm) Required for Installation - inches B. inches (cm) Required for Installation - inches D. Width with door open 110° Product - inches Water pressure - Height Product - Depth with door open 90° Product - inches (cm) Required for Installation - Width Product - inches (cm) Required for Installation - psl (kPa) Weight lb (kg) Heater rating Electric (W) Gas (BTU/hr) Front loading dryer DV50K7500E(G)* DV45K6500E(G)*, DV45K6200E(G)* 38.7 (98.4) 40.7 27.0 (68.6) 29.0 32.6 (82.8) 32.4 (82.3) 37...

User Manual
Page 69
... SUCH DAMAGES. problems caused by SAMSUNG that occurs in shipment; This limited warranty covers manufacturing defects in materials and workmanship encountered in normal, noncommercial use of products, equipment, systems, utilities, services, parts, supplies, accessories, applications, installations, repairs, external wiring or connectors not supplied or authorized by pest infestations. cosmetic damage or exterior finish; SAMSUNG does not warrant uninterrupted or error-free operation of nature or God...
... SUCH DAMAGES. problems caused by SAMSUNG that occurs in shipment; This limited warranty covers manufacturing defects in materials and workmanship encountered in normal, noncommercial use of products, equipment, systems, utilities, services, parts, supplies, accessories, applications, installations, repairs, external wiring or connectors not supplied or authorized by pest infestations. cosmetic damage or exterior finish; SAMSUNG does not warrant uninterrupted or error-free operation of nature or God...

User Manual
Page 72
... to the following: damage that are covered and prescribed in the instruction book; This limited warranty does not cover problems resulting from incorrect electric current, voltage or supply, light bulbs, house fuses, house wiring, cost of a service call for which this product and shall not apply to follow operating instructions, maintenance and environmental instructions that occurs in shipment; use of this product was not intended; WITHOUT...
... to the following: damage that are covered and prescribed in the instruction book; This limited warranty does not cover problems resulting from incorrect electric current, voltage or supply, light bulbs, house fuses, house wiring, cost of a service call for which this product and shall not apply to follow operating instructions, maintenance and environmental instructions that occurs in shipment; use of this product was not intended; WITHOUT...


