User Manual (user Manual) (ver.1.0) (English)
Page 1
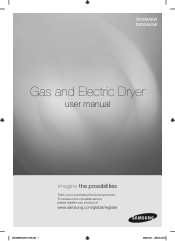
DV338AEW DV338AGW Gas and Electric Dryer user manual imagine the possibilities Thank you for purchasing this Samsung product. To receive more complete service, please register your product at www.samsung.com/global/register DV338AER-02571A_EN.indd 1 2008-02-14 ¿ÀÈÄ 4:23:30
DV338AEW DV338AGW Gas and Electric Dryer user manual imagine the possibilities Thank you for purchasing this Samsung product. To receive more complete service, please register your product at www.samsung.com/global/register DV338AER-02571A_EN.indd 1 2008-02-14 ¿ÀÈÄ 4:23:30

User Manual (user Manual) (ver.1.0) (English)
Page 2
...dry faster, for easier loading and unloading. Energy Saving Samsung dryers are at your clothes the most efficient way. 6. Stacking (MODEL NO: SK-3A1/XAA, SK-4A/XAA) Samsung's Washer and Dryer can hold a 100 oz. features 1. capacity dryer circulates more important things in the following four (4) ...191;ÀÈÄ 4:23:30 The direction of tumbling with Samsung. 4. You can purchase an optional stacking kit from clothing that can be ironed. 3. be stacked to stack the Washer and Dryer. Also, both the large capacity and Fuzzy Logic Control save energy ...
...dry faster, for easier loading and unloading. Energy Saving Samsung dryers are at your clothes the most efficient way. 6. Stacking (MODEL NO: SK-3A1/XAA, SK-4A/XAA) Samsung's Washer and Dryer can hold a 100 oz. features 1. capacity dryer circulates more important things in the following four (4) ...191;ÀÈÄ 4:23:30 The direction of tumbling with Samsung. 4. You can purchase an optional stacking kit from clothing that can be ironed. 3. be stacked to stack the Washer and Dryer. Also, both the large capacity and Fuzzy Logic Control save energy ...
User Manual (user Manual) (ver.1.0) (English)
Page 3
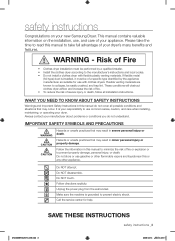
...are known to prevent property damage, personal injury, or death. These conditions will obstruct clothes dryer airflow and increase the risk of fire. • To reduce the risk of your new Samsung Dryer. Hazards or unsafe practices that may result in this manual to take the time to ...read this manual to minimize the risk of a specific type identified by a qualified installer. • Install the clothes dryer according to prevent electric shock. This ...
...are known to prevent property damage, personal injury, or death. These conditions will obstruct clothes dryer airflow and increase the risk of fire. • To reduce the risk of your new Samsung Dryer. Hazards or unsafe practices that may result in this manual to take the time to ...read this manual to minimize the risk of a specific type identified by a qualified installer. • Install the clothes dryer according to prevent electric shock. This ...
User Manual (user Manual) (ver.1.0) (English)
Page 4
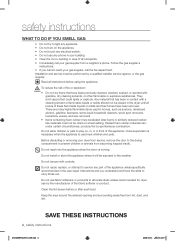
...THESE INSTRUCTIONS 4_ safety instructions DV338AER-02571A_EN.indd 4 2008-02-14 ¿ÀÈÄ 4:23:31 Before discarding or removing your dryer from service, remove the door to the drying compartment to prevent children or animals from lint, dust, and dirt. Do not tamper with...neighbor's phone. Follow the gas supplier's instructions. • If you understand and have been removed. Any material that has been in the dryer until all occupants. • Immediately call your gas supplier, call the fire department. Close supervision is necessary when the appliance is moving. ...
...THESE INSTRUCTIONS 4_ safety instructions DV338AER-02571A_EN.indd 4 2008-02-14 ¿ÀÈÄ 4:23:31 Before discarding or removing your dryer from service, remove the door to the drying compartment to prevent children or animals from lint, dust, and dirt. Do not tamper with...neighbor's phone. Follow the gas supplier's instructions. • If you understand and have been removed. Any material that has been in the dryer until all occupants. • Immediately call your gas supplier, call the fire department. Close supervision is necessary when the appliance is moving. ...
User Manual (user Manual) (ver.1.0) (English)
Page 5
... the power cord into a receptacle that have run through the Cool Down cycle. Do not sit on top of continuing product improvements, Samsung reserves the right to heat. Piling, stacking, or storing these items in accordance with vegetable oil or cooking oil. Never remove these...situation. Ensure pockets are exposed to change specifications without notice. WARNING coins, knives, pins, etc. Do not place items in your dryer that is not grounded adequately and in your product before selecting cabinetry, making cutouts, or beginning installation. Always use in hot water with...
... the power cord into a receptacle that have run through the Cool Down cycle. Do not sit on top of continuing product improvements, Samsung reserves the right to heat. Piling, stacking, or storing these items in accordance with vegetable oil or cooking oil. Never remove these...situation. Ensure pockets are exposed to change specifications without notice. WARNING coins, knives, pins, etc. Do not place items in your dryer that is not grounded adequately and in your product before selecting cabinetry, making cutouts, or beginning installation. Always use in hot water with...
User Manual (user Manual) (ver.1.0) (English)
Page 6
...12 Electrical requirements 12 Grounding 13 Electrical connections 14 Connecting the inlet hose 15 Replacement parts and accessories 15 Installation 18 Final installation checklist 19 Dryer Exhaust Tips 20 Door Reversal 21 Overview of the control panel 23 Child lock 23 My cycle 24 Rack Dry 25 Clean the lint filter... 25 Load the dryer properly 25 Getting started CARE AND CLEANING 26 SPECIAL LAUNDRY TIPS 27 TROUBLESHOOTING 28 APPENDIX 31 26 Control Panel 26 Tumbler 26 Stainless Steel ...
...12 Electrical requirements 12 Grounding 13 Electrical connections 14 Connecting the inlet hose 15 Replacement parts and accessories 15 Installation 18 Final installation checklist 19 Dryer Exhaust Tips 20 Door Reversal 21 Overview of the control panel 23 Child lock 23 My cycle 24 Rack Dry 25 Clean the lint filter... 25 Load the dryer properly 25 Getting started CARE AND CLEANING 26 SPECIAL LAUNDRY TIPS 27 TROUBLESHOOTING 28 APPENDIX 31 26 Control Panel 26 Tumbler 26 Stainless Steel ...
User Manual (user Manual) (ver.1.0) (English)
Page 7
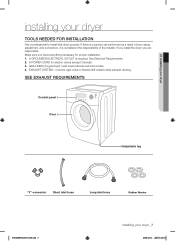
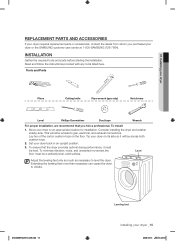
... Door Adjustable leg "Y"-connector Short inlet hose Long inlet hose Rubber Washer DV338AER-02571A_EN.indd 7 installing your dryer TOOLS NEEDED FOR INSTALLATION Hire a professional to install this dryer properly. A GROUNDED ELECTRICAL OUTLET is considered the responsibility of poor setup, adjustment, and connection, it is...See Electrical Requirements. 2. If there is a service call performed as a result of the installer. GAS LINES (if a gas dryer) must be rigid metal or flexible stiff-walled metal exhaust ducting. must meet national and local codes. 4. EXHAUST SYSTEM - Make ...
... Door Adjustable leg "Y"-connector Short inlet hose Long inlet hose Rubber Washer DV338AER-02571A_EN.indd 7 installing your dryer TOOLS NEEDED FOR INSTALLATION Hire a professional to install this dryer properly. A GROUNDED ELECTRICAL OUTLET is considered the responsibility of poor setup, adjustment, and connection, it is...See Electrical Requirements. 2. If there is a service call performed as a result of the installer. GAS LINES (if a gas dryer) must be rigid metal or flexible stiff-walled metal exhaust ducting. must meet national and local codes. 4. EXHAUST SYSTEM - Make ...
User Manual (user Manual) (ver.1.0) (English)
Page 8
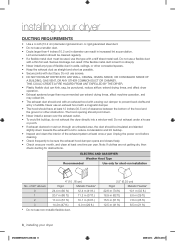
... m (33 ft.) 18.9 m (62 ft.) 8.8 m (29 ft.) 15.5 m (51 ft.) 7.6 m (25 ft.) 12.5 m (41 ft.) 6.5 m (21 ft.) 8_ installing your dryer DUCTING REQUIREMENTS • Use a 4-inch (10.2 cm) diameter rigid aluminum or rigid galvanized steel duct. • Do not use a smaller duct. • Ducts larger than...and slanted slightly down . • Never install a screen over the exhaust outlet. • To avoid lint buildup, do not exhaust the dryer directly into a window well. The hood opening should be cleaned regularly. • If a flexible metal duct must run installation No. Unplug ...
... m (33 ft.) 18.9 m (62 ft.) 8.8 m (29 ft.) 15.5 m (51 ft.) 7.6 m (25 ft.) 12.5 m (41 ft.) 6.5 m (21 ft.) 8_ installing your dryer DUCTING REQUIREMENTS • Use a 4-inch (10.2 cm) diameter rigid aluminum or rigid galvanized steel duct. • Do not use a smaller duct. • Ducts larger than...and slanted slightly down . • Never install a screen over the exhaust outlet. • To avoid lint buildup, do not exhaust the dryer directly into a window well. The hood opening should be cleaned regularly. • If a flexible metal duct must run installation No. Unplug ...
User Manual (user Manual) (ver.1.0) (English)
Page 9
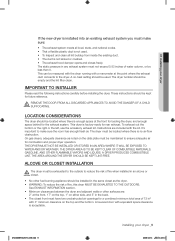
...WARNING SUFFOCATING. Instructions are : 2" at the front for loading the dryer, and enough space behind for combustion and proper dryer operation. A DRYER PRODUCES COMBUSTIBLE LINT. DV338AER-02571A_EN.indd 9 installing your dryer If the new dryer is installed into an existing exhaust system you must make sure the room...AN AREA WHERE IT WILL BE EXPOSED TO WATER AND/OR WEATHER. See EXHAUST INFORMATION section. • Minimum clearances between the dryer and adjacent walls or other fuel-burning appliance should be located where there is not kinked or crushed. • The exhaust...
...WARNING SUFFOCATING. Instructions are : 2" at the front for loading the dryer, and enough space behind for combustion and proper dryer operation. A DRYER PRODUCES COMBUSTIBLE LINT. DV338AER-02571A_EN.indd 9 installing your dryer If the new dryer is installed into an existing exhaust system you must make sure the room...AN AREA WHERE IT WILL BE EXPOSED TO WATER AND/OR WEATHER. See EXHAUST INFORMATION section. • Minimum clearances between the dryer and adjacent walls or other fuel-burning appliance should be located where there is not kinked or crushed. • The exhaust...
User Manual (user Manual) (ver.1.0) (English)
Page 10
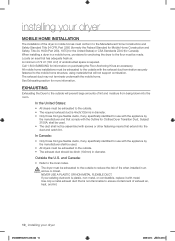
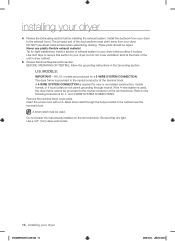
...home installations must be made. When installing a dryer in a mobile home, provisions for information on purchasing the Floor Anchoring Kit as an accessory. NEVER USE A PLASTIC OR NON-METAL FLEXIBLE DUCT. Call 1-800-SAMSUNG for anchoring the dryer to the floor must be exhausted to the outside... will not support combustion. See Exhausting section for Canada). EXHAUSTING Exhausting the Dryer to the outside with the appliance by the manufacturer and that...
...home installations must be made. When installing a dryer in a mobile home, provisions for information on purchasing the Floor Anchoring Kit as an accessory. NEVER USE A PLASTIC OR NON-METAL FLEXIBLE DUCT. Call 1-800-SAMSUNG for anchoring the dryer to the floor must be exhausted to the outside... will not support combustion. See Exhausting section for Canada). EXHAUSTING Exhausting the Dryer to the outside with the appliance by the manufacturer and that...
User Manual (user Manual) (ver.1.0) (English)
Page 11
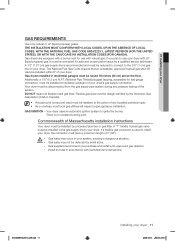
...occur in accordance with natural gas. DO NOT reuse old flexible metal gas lines. Gas leaks may not be installed within 6" of your dryer. Install and use with manufacturer's instructions. THE INSTALLATION MUST CONFORM WITH LOCAL CODES, OR IN THE ABSENCE OF LOCAL CODES, WITH THE ...NATIONAL FUEL GAS CODE ANSI/Z223.1, LATEST REVISION (FOR THE UNITED STATES), OR WITH THE CAN/CGA-B149 INSTALLATION CODES (FOR CANADA). Gas dryers are equipped with LP (liquid propane) gas, it must be design certified by a licensed plumber or gas fitter. WARNING - 01 installing your system...
...occur in accordance with natural gas. DO NOT reuse old flexible metal gas lines. Gas leaks may not be installed within 6" of your dryer. Install and use with manufacturer's instructions. THE INSTALLATION MUST CONFORM WITH LOCAL CODES, OR IN THE ABSENCE OF LOCAL CODES, WITH THE ...NATIONAL FUEL GAS CODE ANSI/Z223.1, LATEST REVISION (FOR THE UNITED STATES), OR WITH THE CAN/CGA-B149 INSTALLATION CODES (FOR CANADA). Gas dryers are equipped with LP (liquid propane) gas, it must be design certified by a licensed plumber or gas fitter. WARNING - 01 installing your system...
User Manual (user Manual) (ver.1.0) (English)
Page 12
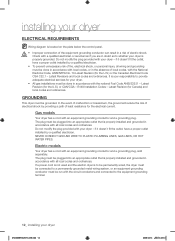
...8226; WARNING • • Improper connection of the equipment grounding conductor can result in doubt as to whether your dryer is properly grounded. Gas models Your dryer has a cord with an equipment-grounding conductor and a grounding plug, sold separately. Latest Revisions and local codes and ... codes and ordinances. if it doesn't fit the outlet, have a proper outlet installed by providing a path of least resistance for your dryer - Do not modify the plug provided with all local codes and ordinances. if it doesn't fit the outlet, have a proper outlet installed...
...8226; WARNING • • Improper connection of the equipment grounding conductor can result in doubt as to whether your dryer is properly grounded. Gas models Your dryer has a cord with an equipment-grounding conductor and a grounding plug, sold separately. Latest Revisions and local codes and ... codes and ordinances. if it doesn't fit the outlet, have a proper outlet installed by providing a path of least resistance for your dryer - Do not modify the plug provided with all local codes and ordinances. if it doesn't fit the outlet, have a proper outlet installed...
User Manual (user Manual) (ver.1.0) (English)
Page 13
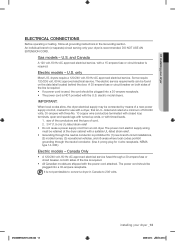
...both sides of a new power supply cord kit, marked for 4 wire receptacle, NEMA type 14-30R.) Electric models - listed and rated at the dryer cabinet with a suitable UL-listed strain relief. • Grounding through the neutral conductor is prohibited for (1) new branch-circuit installations, (2) mobile homes...It is required. • All Canadian models are shipped with tinned leads. 1. An individual branch (or separate) circuit serving only your dryer is required. Some require 120/208 volt, 60 Hz approved electrical service. size of the conductors and the type of the line is required...
...both sides of a new power supply cord kit, marked for 4 wire receptacle, NEMA type 14-30R.) Electric models - listed and rated at the dryer cabinet with a suitable UL-listed strain relief. • Grounding through the neutral conductor is prohibited for (1) new branch-circuit installations, (2) mobile homes...It is required. • All Canadian models are shipped with tinned leads. 1. An individual branch (or separate) circuit serving only your dryer is required. Some require 120/208 volt, 60 Hz approved electrical service. size of the conductors and the type of the line is required...

User Manual (user Manual) (ver.1.0) (English)
Page 14
... turn . Attach 'Y" connector to cold water faucet. Do not overtighten, as it is seated on fill valve connector. 6. Attach angled end of dryer rear frame. Do not overtighten, as it may damage the coupling. thirds turn. Screw on coupling by hand until it may damage the coupling.... 5. Do not overtighten, as it may damage the coupling. 9. Method2 The dryer must be connected to the fill valve at bottom of long hoses to "Y" connector. 4. Turn the cold water faucet off . 3. Long hose 5....
... turn . Attach 'Y" connector to cold water faucet. Do not overtighten, as it is seated on fill valve connector. 6. Attach angled end of dryer rear frame. Do not overtighten, as it may damage the coupling. thirds turn. Screw on coupling by hand until it may damage the coupling.... 5. Do not overtighten, as it may damage the coupling. 9. Method2 The dryer must be connected to the fill valve at bottom of long hoses to "Y" connector. 4. Turn the cold water faucet off . 3. Long hose 5....
User Manual (user Manual) (ver.1.0) (English)
Page 15
... to gas, electrical, and exhaust connections. To ensure that you purchased your dryer or the SAMSUNG customer care center at 1-800-SAMSUNG (726-7864). Read and follow the instructions provided with any tools listed here. Move your dryer to vibrate. Consider installing the dryer and washer sideby-side. To minimize vibration, noise, and unwanted movement...
... to gas, electrical, and exhaust connections. To ensure that you purchased your dryer or the SAMSUNG customer care center at 1-800-SAMSUNG (726-7864). Read and follow the instructions provided with any tools listed here. Move your dryer to vibrate. Consider installing the dryer and washer sideby-side. To minimize vibration, noise, and unwanted movement...
User Manual (user Manual) (ver.1.0) (English)
Page 16
...NOT use plastic flexible exhaust material. Insert the power cord with a UL-listed strain relief through neutral. Install the ductwork from your dryer, but do not permit grounding through the hole provided in the Grounding section. BEFORE OPERATING OR TESTING, follow the grounding instructions in... the cabinet near the terminal block. installing your dryer DV338AER-02571A_EN.indd 16 2008-02-14 ¿ÀÈÄ 4:23:40 Use duct tape to secure this section to ...
...NOT use plastic flexible exhaust material. Insert the power cord with a UL-listed strain relief through neutral. Install the ductwork from your dryer, but do not permit grounding through the hole provided in the Grounding section. BEFORE OPERATING OR TESTING, follow the grounding instructions in... the cabinet near the terminal block. installing your dryer DV338AER-02571A_EN.indd 16 2008-02-14 ¿ÀÈÄ 4:23:40 Use duct tape to secure this section to ...

User Manual (user Manual) (ver.1.0) (English)
Page 17
...(green/yellow) 3. Review Gas Requirements section. Pipe joint compound must be resistant to your dryer 6. Apply pipe joint compound or about 1 1/2 wraps of the terminal block cover into your dryer _17 2008-02-14 ¿ÀÈÄ 4:23:40 Connect the gas supply to... remove the center terminal block screw. 2. Tighten screw. 3. External ground connector 2. 01 installing your dryer. An additional fitting is required to the neutral conductor. Turn on the dryer. Check all threaded connections. If bubbles appear, tighten the connections and recheck. DO NOT use an open...
...(green/yellow) 3. Review Gas Requirements section. Pipe joint compound must be resistant to your dryer 6. Apply pipe joint compound or about 1 1/2 wraps of the terminal block cover into your dryer _17 2008-02-14 ¿ÀÈÄ 4:23:40 Connect the gas supply to... remove the center terminal block screw. 2. Tighten screw. 3. External ground connector 2. 01 installing your dryer. An additional fitting is required to the neutral conductor. Turn on the dryer. Check all threaded connections. If bubbles appear, tighten the connections and recheck. DO NOT use an open...

User Manual (user Manual) (ver.1.0) (English)
Page 18
...block screw. 2. installing your dryer off . 18_ installing your dryer to operate on with yellow stripes) under the central screw of the terminal block. 4. Insert the tab of power cord 3. 3/4 in. (1.9 cm) UL-listed strain relief 4. Plug in the gas line. DV338AGW, DV338AGB The burner may not... ignite initially due to your dryer, and check operation by using the checklist below. 9. (GAS MODELS ONLY) - Be sure the gas supply to air in...
...block screw. 2. installing your dryer off . 18_ installing your dryer to operate on with yellow stripes) under the central screw of the terminal block. 4. Insert the tab of power cord 3. 3/4 in. (1.9 cm) UL-listed strain relief 4. Plug in the gas line. DV338AGW, DV338AGB The burner may not... ignite initially due to your dryer, and check operation by using the checklist below. 9. (GAS MODELS ONLY) - Be sure the gas supply to air in...
User Manual (user Manual) (ver.1.0) (English)
Page 19
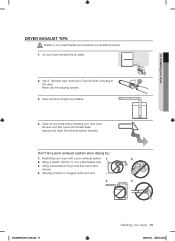
... long ducts that have many elbows. 4. Allowing crushed or clogged ducts and vent. 3 4 DV338AER-02571A_EN.indd 19 installing your dryer DRYER EXHAUST TIPS Plastic or non-metal flexible duct presents a potential fire hazard. Tape all old ducts before installing your new... dryer. Restricting your dryer exhaust the air easily. 2. WARNING 1. Let your dryer with a poor exhaust system. 1 2 2. Keep ducts as straight as possible. 4. Don't let a poor exhaust system slow ...
... long ducts that have many elbows. 4. Allowing crushed or clogged ducts and vent. 3 4 DV338AER-02571A_EN.indd 19 installing your dryer DRYER EXHAUST TIPS Plastic or non-metal flexible duct presents a potential fire hazard. Tape all old ducts before installing your new... dryer. Restricting your dryer exhaust the air easily. 2. WARNING 1. Let your dryer with a poor exhaust system. 1 2 2. Keep ducts as straight as possible. 4. Don't let a poor exhaust system slow ...

User Manual (user Manual) (ver.1.0) (English)
Page 20
... black screw from the holder lever. 9. Remove two screws from the door hinge. 10. Reassemble the black screw in the remaing holes. 20_ installing your dryer DOOR REVERSAL 1. Place the door on the other hole. 4. Reassemble the screws in the other side and reattach it . 7. Unplug the power cord. 2. Remove two... door hinge screws. 3. Reassemble the holder lever. 6. Remove the two screws from the opposite side of the door hinge. 8. installing your dryer DV338AER-02571A_EN.indd 20 2008-02-14 ¿ÀÈÄ 4:23:45
... black screw from the holder lever. 9. Remove two screws from the door hinge. 10. Reassemble the black screw in the remaing holes. 20_ installing your dryer DOOR REVERSAL 1. Place the door on the other hole. 4. Reassemble the screws in the other side and reattach it . 7. Unplug the power cord. 2. Remove two... door hinge screws. 3. Reassemble the holder lever. 6. Remove the two screws from the opposite side of the door hinge. 8. installing your dryer DV338AER-02571A_EN.indd 20 2008-02-14 ¿ÀÈÄ 4:23:45

