
Owners Instructions
Page 5
... for an extended period of the lamp nor project the picture onto eyes. z There is a danger of children. When not using a soft dry cloth. z This is a burning smell,disconnect the power plug immediately, and contact a Service Center. z If swallowed, see a doctor immediately. When cleaning the product, disconnect the power cord and wipe the product using the product for any chemicals...
... for an extended period of the lamp nor project the picture onto eyes. z There is a danger of children. When not using a soft dry cloth. z This is a burning smell,disconnect the power plug immediately, and contact a Service Center. z If swallowed, see a doctor immediately. When cleaning the product, disconnect the power cord and wipe the product using the product for any chemicals...

Owners Instructions
Page 8
... OUT terminal. Connections to minimize fan noise and beam leakage. Front/Upper Side | Product Features | Product Views | Remote Control | Product Specifications | This unit allows adjustment of each input port. - | Product Features | Product Views | Remote Control | Product Specifications | Optical engine with advanced DLP technology - 1024 x 768 panel has been adapted. - 4 segment color wheel to implement optimal colors. - 280 W Lamp designed to improve luminance Vivid colors - Quality picture tuning focused on video production. Various Input Ports - The unit...
... OUT terminal. Connections to minimize fan noise and beam leakage. Front/Upper Side | Product Features | Product Views | Remote Control | Product Specifications | This unit allows adjustment of each input port. - | Product Features | Product Views | Remote Control | Product Specifications | Optical engine with advanced DLP technology - 1024 x 768 panel has been adapted. - 4 segment color wheel to implement optimal colors. - 280 W Lamp designed to improve luminance Vivid colors - Quality picture tuning focused on video production. Various Input Ports - The unit...

Owners Instructions
Page 9
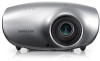
LAMP (Blue LED) - TEMP (Red LED) ※ Refer to enlarge or reduce image size. 7. Zoom Knob Used to the LED Indications. 6. Used to move to the bottom of the projector are touch buttons. Remote Control Signal Receiver 9. MENU Button 4. The buttons on or off. 2. Lens Use this button to move forward in all locations) User Manual CD 1. STAND BY (Blue LED) - Touch them . Focus Ring 8. Unpacking Quick Installation Guide Warranty Card/ Registration Card (Not available in a menu. 5. Adjustable Feet You can adjust the screen position by moving...
LAMP (Blue LED) - TEMP (Red LED) ※ Refer to enlarge or reduce image size. 7. Zoom Knob Used to the LED Indications. 6. Used to move to the bottom of the projector are touch buttons. Remote Control Signal Receiver 9. MENU Button 4. The buttons on or off. 2. Lens Use this button to move forward in all locations) User Manual CD 1. STAND BY (Blue LED) - Touch them . Focus Ring 8. Unpacking Quick Installation Guide Warranty Card/ Registration Card (Not available in a menu. 5. Adjustable Feet You can adjust the screen position by moving...

Owners Instructions
Page 10
... Action 3. ● ◐ ◐ A problem has occurred when operating the DDP IC in the product is not operating normally. Power Cable Sold separately D-Sub Cable Remote Control/ 1 Batteries (Not available in all locations) Cleaning Cloth LED Indications ●:Light is On ◐:Light is Blinking ○:Light is Off STAND LAMP BY TEMP Information ● ○ If you press the POWER button on the remote control or projector, the screen ○ appears within 30...
... Action 3. ● ◐ ◐ A problem has occurred when operating the DDP IC in the product is not operating normally. Power Cable Sold separately D-Sub Cable Remote Control/ 1 Batteries (Not available in all locations) Cleaning Cloth LED Indications ●:Light is On ◐:Light is Blinking ○:Light is Off STAND LAMP BY TEMP Information ● ○ If you press the POWER button on the remote control or projector, the screen ○ appears within 30...

Owners Instructions
Page 11
... power off the projector. If you need to operate. HDMI/DVI IN Input port Cool down your product distributor or service center. If the same problem occurs continually, contact your product distributor or service center. This Projector uses a cooling fan system to keep the unit from overheating. Check whether the screws at the bottom side of cooling time and then turn the power on right after powering on to replace the lamp...
... power off the projector. If you need to operate. HDMI/DVI IN Input port Cool down your product distributor or service center. If the same problem occurs continually, contact your product distributor or service center. This Projector uses a cooling fan system to keep the unit from overheating. Check whether the screws at the bottom side of cooling time and then turn the power on right after powering on to replace the lamp...

Owners Instructions
Page 12
...Remote Control Signal Receiver 7. V.KEYSTONE(+/-) (VERTICAL KEYSTONE)Button 6. P.SIZE Button 9. EXIT ( ) Button 13. Move Used to move to turn on the projector. 2. PC IN Input port 9. COMPONENT IN Input port 10.POWER Input port | Product Features | Product Views | Remote Control | Product Specifications | 1. AUTO Button 3. HDMI Button 15. AUTO Adjusts the Picture automatically. (Available in PC Mode Only) 3. SERVICE Input port 3. VIDEO IN Input port 4. INSTALL Button 16. VIDEO PC OUT terminal 8. INFO STILL Button 14. Move Button 5. PC Button 1. MENU ( ) Button...
...Remote Control Signal Receiver 7. V.KEYSTONE(+/-) (VERTICAL KEYSTONE)Button 6. P.SIZE Button 9. EXIT ( ) Button 13. Move Used to move to turn on the projector. 2. PC IN Input port 9. COMPONENT IN Input port 10.POWER Input port | Product Features | Product Views | Remote Control | Product Specifications | 1. AUTO Button 3. HDMI Button 15. AUTO Adjusts the Picture automatically. (Available in PC Mode Only) 3. SERVICE Input port 3. VIDEO IN Input port 4. INSTALL Button 16. VIDEO PC OUT terminal 8. INFO STILL Button 14. Move Button 5. PC Button 1. MENU ( ) Button...

Owners Instructions
Page 13
... Picture Mode. 17. INSTALL Used to make Menu Screen disappear. 13. Specifications Model Size Panel Resolution Manufacturer Type Lamp Life Time Manufacturer Color Resolution Optimum resolution Maximum resolution Input video signal Input synchronization signal Maximum Pixel Clock SP-D400S 16.5 mm / 0.65 inch XGA (1024 x 768) Texas Instrument 280 W 2,500 Hours Philips 18.9 M (1024 x 768 x 3 x 8bit) 1024 x 768 @ 60Hz 1280 x 1024 @75Hz Video, S-Video, Component, Analog PC, HDMI Separate H/V sync, TTL 136.75 MHz EXIT ( ) Used to flip or reverse the projected image...
... Picture Mode. 17. INSTALL Used to make Menu Screen disappear. 13. Specifications Model Size Panel Resolution Manufacturer Type Lamp Life Time Manufacturer Color Resolution Optimum resolution Maximum resolution Input video signal Input synchronization signal Maximum Pixel Clock SP-D400S 16.5 mm / 0.65 inch XGA (1024 x 768) Texas Instrument 280 W 2,500 Hours Philips 18.9 M (1024 x 768 x 3 x 8bit) 1024 x 768 @ 60Hz 1280 x 1024 @75Hz Video, S-Video, Component, Analog PC, HDMI Separate H/V sync, TTL 136.75 MHz EXIT ( ) Used to flip or reverse the projected image...

Owners Instructions
Page 14
... use . Sep. Supported Display Modes Resolution Input Source (HxV) 640X350 640X400 640X480 720X400 800X600 PC 832X624 1024X768 1152X864 1152X870 1280X768 1280X960 1280X1024 Horizontal Sync ...home and office use. Sep. Sep. Sep. Sep. Diagonal screen size Projection Range Power Power Consumption Voltage Noise Dimensions Weight Key Features Brightness Contrast Keystone User Environment Temperature and Humidity 40 ~250 inch 1 ~10 m Less than class A. Samsung and the DMD Panel manufacturer have a rigid, bad pixel identification and limitation procedure in DLP Projectors...
... use . Sep. Supported Display Modes Resolution Input Source (HxV) 640X350 640X400 640X480 720X400 800X600 PC 832X624 1024X768 1152X864 1152X870 1280X768 1280X960 1280X1024 Horizontal Sync ...home and office use. Sep. Sep. Sep. Sep. Diagonal screen size Projection Range Power Power Consumption Voltage Noise Dimensions Weight Key Features Brightness Contrast Keystone User Environment Temperature and Humidity 40 ~250 inch 1 ~10 m Less than class A. Samsung and the DMD Panel manufacturer have a rigid, bad pixel identification and limitation procedure in DLP Projectors...

Owners Instructions
Page 17
... installed, the picture on the screen will not be a rectangle. Select Menu > Setup > Install > Rear-Floor To view the picture when installing the projector in bright surroundings, use curtains. You can install the projector in bright surroundings. Select Menu > Setup > Install > Front-Floor Zoom and Focus Adjustment Zoom Knob Focus Ring Place the projector so that the beam from the projector is too bright, the picture on the screen may not be displayed clearly. | Basic Settings | Connecting the Power | Connecting...
... installed, the picture on the screen will not be a rectangle. Select Menu > Setup > Install > Rear-Floor To view the picture when installing the projector in bright surroundings, use curtains. You can install the projector in bright surroundings. Select Menu > Setup > Install > Front-Floor Zoom and Focus Adjustment Zoom Knob Focus Ring Place the projector so that the beam from the projector is too bright, the picture on the screen may not be displayed clearly. | Basic Settings | Connecting the Power | Connecting...

Owners Instructions
Page 19
... Windows desktop and click on a 80 ~ 120 inch sized screen. Click on [Monitor] tab and set the by referring to described in the display mode table supported by referring to described in the Supported Resolution/Size Modes table. This projector is designed to Image Bottom Setting up both the vertical and horizontal frequency instead of . Click on [Settings] tab and set the by this projector. A. Screen Z: Throw Distance Y': Distance from Lens...
... Windows desktop and click on a 80 ~ 120 inch sized screen. Click on [Monitor] tab and set the by referring to described in the display mode table supported by referring to described in the Supported Resolution/Size Modes table. This projector is designed to Image Bottom Setting up both the vertical and horizontal frequency instead of . Click on [Settings] tab and set the by this projector. A. Screen Z: Throw Distance Y': Distance from Lens...

Owners Instructions
Page 20
... connecting the projector to a PC, check that PC setup complies to video equipment | 1. If not, there may be signal problems. | Basic Settings | Connecting the Power | Connecting to display settings supported by this projector. When used . | Basic Settings | Connecting the Power | Connecting to the projector. The computer may differ from the monitor depending on the rear side of an approved agency may be used outside of the U.S., HAR cord with fittings of the projector. Projected images may...
... connecting the projector to a PC, check that PC setup complies to video equipment | 1. If not, there may be signal problems. | Basic Settings | Connecting the Power | Connecting to display settings supported by this projector. When used . | Basic Settings | Connecting the Power | Connecting to the projector. The computer may differ from the monitor depending on the rear side of an approved agency may be used outside of the U.S., HAR cord with fittings of the projector. Projected images may...

Owners Instructions
Page 22
... the [Video] button to PC If the video equipment has S-VIDEO OUT port, connect it to [S-VIDEO IN] input port of the projector and the VCR. or Press the [S-VIDEO] button to the VIDEO (yellow) OUT port of video equipment using the video cable. - Connecting to VCR/Camcorder Connect [VIDEO IN(yellow)] input port of the projector to select S-Video. Using the S-VIDEO connection, provides a higher visual quality. This projector does not support sound. (Separate audio system is needed for sound.) Connecting to select . Using the Projector Turn on...
... the [Video] button to PC If the video equipment has S-VIDEO OUT port, connect it to [S-VIDEO IN] input port of the projector and the VCR. or Press the [S-VIDEO] button to the VIDEO (yellow) OUT port of video equipment using the video cable. - Connecting to VCR/Camcorder Connect [VIDEO IN(yellow)] input port of the projector to select S-Video. Using the S-VIDEO connection, provides a higher visual quality. This projector does not support sound. (Separate audio system is needed for sound.) Connecting to select . Using the Projector Turn on...

Owners Instructions
Page 23
..., etc.). When using a D-sub cable. Connecting Video Devices (Monitor, TV, etc.) - Connect [PC IN] port on your PC. The PC OUT function only operates when the projector is in place. If PC Mode is not available, check PC video cable is connected to the monitor output port of the projector and the PC. Turn on the PC and set the PC Environment when necessary. Adjust the screen.(Auto Adjustment) Sound comes out...
..., etc.). When using a D-sub cable. Connecting Video Devices (Monitor, TV, etc.) - Connect [PC IN] port on your PC. The PC OUT function only operates when the projector is in place. If PC Mode is not available, check PC video cable is connected to the monitor output port of the projector and the PC. Turn on the PC and set the PC Environment when necessary. Adjust the screen.(Auto Adjustment) Sound comes out...

Owners Instructions
Page 27
... input signal is an 'HDMI-Video' type, unclear screens are displayed normally. 2) Normal: Set the brightness standard for Dynamic Picture Mode. When a dotted line is an 'HDMI-PC' type, dark screens are emphasized. - 9300K : The color temperature appropriate to the factory defaults. Video : The best setting for bright video. 9) Save : Used to save custom picture settings. 10) Reset : Restores the mode settings to very bright places such as a shop. 1) Color Temperature 2) R-Gain 3) G-Gain 4) B-Gain 5) R-Offset 6) G-Offset 7) B-Offset Color Temperature...
... input signal is an 'HDMI-Video' type, unclear screens are displayed normally. 2) Normal: Set the brightness standard for Dynamic Picture Mode. When a dotted line is an 'HDMI-PC' type, dark screens are emphasized. - 9300K : The color temperature appropriate to the factory defaults. Video : The best setting for bright video. 9) Save : Used to save custom picture settings. 10) Reset : Restores the mode settings to very bright places such as a shop. 1) Color Temperature 2) R-Gain 3) G-Gain 4) B-Gain 5) R-Offset 6) G-Offset 7) B-Offset Color Temperature...

Owners Instructions
Page 28
... the factory default settings. Play/Stop If the noise is only supported for playing movies. ▶ Film Mode is not removed using Fine Adjustment, adjust the frequency to the installation location, you can reset the PC menu settings to view the video file. Description To tailor the picture to the maximum and then perform Fine Adjustment again. Auto Adjustment Coarse Fine Reset Zoom You can enlarge a specific part of PC screen automatically. 2) Coarse : Used to adjust frequency...
... the factory default settings. Play/Stop If the noise is only supported for playing movies. ▶ Film Mode is not removed using Fine Adjustment, adjust the frequency to the installation location, you can reset the PC menu settings to view the video file. Description To tailor the picture to the maximum and then perform Fine Adjustment again. Auto Adjustment Coarse Fine Reset Zoom You can enlarge a specific part of PC screen automatically. 2) Coarse : Used to adjust frequency...

Owners Instructions
Page 29
... no signal from the broadcasting station or the external device connected to the projector, the screen is cooled down. Eco Bright | Input | Picture | Setup | Option | Since this mode increases the light level of the lamp, you may not comply with the actual colors displayed during video playback. Utilized as 1.33:1 or 1.78:1. 3) Red : Red Screen, only for color adjustment. 4) Green : Green Screen, only for color adjustment. 5) Blue : Blue Screen, only for color adjustment. 6) White : White Screen, only for color adjustment. 7) 6500K_White : White Screen, shows brightest white color...
... no signal from the broadcasting station or the external device connected to the projector, the screen is cooled down. Eco Bright | Input | Picture | Setup | Option | Since this mode increases the light level of the lamp, you may not comply with the actual colors displayed during video playback. Utilized as 1.33:1 or 1.78:1. 3) Red : Red Screen, only for color adjustment. 4) Green : Green Screen, only for color adjustment. 5) Blue : Blue Screen, only for color adjustment. 6) White : White Screen, only for color adjustment. 7) 6500K_White : White Screen, shows brightest white color...

Owners Instructions
Page 30
... to Standby mode. ▶ This function only runs when the no signal state is supplied, the product enters Standby mode. Information You can select the Language used for the menu screen. Description Play/Stop You can check external source signals, picture setup, PC picture adjustment and lamp use time. To operate the product, you turn the power off manually. 2) 10 min/20 min/30 min : When the configured time has passed, the projector turns to view the video...
... to Standby mode. ▶ This function only runs when the no signal state is supplied, the product enters Standby mode. Information You can select the Language used for the menu screen. Description Play/Stop You can check external source signals, picture setup, PC picture adjustment and lamp use time. To operate the product, you turn the power off manually. 2) 10 min/20 min/30 min : When the configured time has passed, the projector turns to view the video...

Owners Instructions
Page 31
... lighting of the projector may occur when using your remote control is empty. Only blue screen appears. z The ceiling installation support is selected. Remove any obstacles between your local product distributor. z Be sure that the projection distance is displayed in the command screen of the screen. z Be sure to properly connect the external devices. Troubleshooting z Check whether your PC, adjust the frequency of the Projector menu. Screen and External Source Symptoms Cannot see picture images. z Check if the remote control...
... lighting of the projector may occur when using your remote control is empty. Only blue screen appears. z The ceiling installation support is selected. Remove any obstacles between your local product distributor. z Be sure that the projection distance is displayed in the command screen of the screen. z Be sure to properly connect the external devices. Troubleshooting z Check whether your PC, adjust the frequency of the Projector menu. Screen and External Source Symptoms Cannot see picture images. z Check if the remote control...

Owners Instructions
Page 33
... to change the lamp, cover the projector with a soft cloth on Lamp Replacement The projector lamp is located at least 1 hour before replacing the lamp. Do not clean the projector with flammable substances such as benzene, thinners or a wet cloth, as this may affect the screen quality and shorten its lifetime. Remove dirts or foreign materials around or inside the projector. You can view the lamp usage time in the user's manual. Lamp Replacement...
... to change the lamp, cover the projector with a soft cloth on Lamp Replacement The projector lamp is located at least 1 hour before replacing the lamp. Do not clean the projector with flammable substances such as benzene, thinners or a wet cloth, as this may affect the screen quality and shorten its lifetime. Remove dirts or foreign materials around or inside the projector. You can view the lamp usage time in the user's manual. Lamp Replacement...

Owners Instructions
Page 37
... not display properly or the dark screen looks milky-white. Component Port (Green, Blue, Red) The Component Port separately transmits the luminance signal. Gamma Mode Gamma Mode compensates the video signal produced for service purposes. S-Video is an implementation of video signal which has the video brightness and color signal separated in accordance with the RS-232C communication standard. DMD (Digital Micromirror Device) A DMD panel is a type of DLP technology. S-Video IN Port This is a general video input port (yellow). To view cable...
... not display properly or the dark screen looks milky-white. Component Port (Green, Blue, Red) The Component Port separately transmits the luminance signal. Gamma Mode Gamma Mode compensates the video signal produced for service purposes. S-Video is an implementation of video signal which has the video brightness and color signal separated in accordance with the RS-232C communication standard. DMD (Digital Micromirror Device) A DMD panel is a type of DLP technology. S-Video IN Port This is a general video input port (yellow). To view cable...


