
User Guide
Page 39
... system to change without prior notice for reasons of the product may vary depending on Samsung Monitor homepage. Follow the directions appropriate for the monitor driver, insert the CD-ROM included with this installation doesn't damage your monitor model in ..." button. Select Language Main Page Safety Instructions Introduction Connections Using the Software Monitor Driver Installation MagicInfor MDC IRTOUCH Adjusting the LCD Display Troubleshooting Specifications Information Appendix Model SyncMaster 700TSn, 820TSn The color and appearance of performance enhancement.
... system to change without prior notice for reasons of the product may vary depending on Samsung Monitor homepage. Follow the directions appropriate for the monitor driver, insert the CD-ROM included with this installation doesn't damage your monitor model in ..." button. Select Language Main Page Safety Instructions Introduction Connections Using the Software Monitor Driver Installation MagicInfor MDC IRTOUCH Adjusting the LCD Display Troubleshooting Specifications Information Appendix Model SyncMaster 700TSn, 820TSn The color and appearance of performance enhancement.

User Guide
Page 40
...below, click "Continue". in the "Monitor" tab. Click (Start) and "Control Panel". Click "Properties" in the "Driver" tab. Note • This monitor driver is completed. If the "Properties" button is deactivated, it means the configuration for your monitor is under certifying MS logo... this installation doesn't damage your CD-ROM drive. 2. If the message "Windows needs..." Click "Update Driver..." Click "Personalization" and then "Display Settings". 4. is . Then, double-click on Samsung Monitor homepage. 6. Microsoft® Windows Vista™, Operating System 1.
...below, click "Continue". in the "Monitor" tab. Click (Start) and "Control Panel". Click "Properties" in the "Driver" tab. Note • This monitor driver is completed. If the "Properties" button is deactivated, it means the configuration for your monitor is under certifying MS logo... this installation doesn't damage your CD-ROM drive. 2. If the message "Windows needs..." Click "Update Driver..." Click "Personalization" and then "Display Settings". 4. is . Then, double-click on Samsung Monitor homepage. 6. Microsoft® Windows Vista™, Operating System 1.

User Guide
Page 41
Check the "Browse my computer for example, D:\Drive) where the driver setup file is located, and click "OK". 9. and select the folder (for driver software" checkbox and click "Let me pick from the list of device drivers on the screen, and click "Next". 10. Click "Have Disk..." Select the model that matches your monitor from a list of monitor models on my computer". 8. Click "Close" → "Close" → "OK" → "OK" on the following screens displayed in sequence. 7.
Check the "Browse my computer for example, D:\Drive) where the driver setup file is located, and click "OK". 9. and select the folder (for driver software" checkbox and click "Let me pick from the list of device drivers on the screen, and click "Next". 10. Click "Have Disk..." Select the model that matches your monitor from a list of monitor models on my computer". 8. Click "Close" → "Close" → "OK" → "OK" on the following screens displayed in sequence. 7.

User Guide
Page 42
then click "Next" button. 6. Click the "Properties" button on the "Monitor" tab and select "Driver" tab. 5. Microsoft® Windows® XP Operating System 1. Click "Start" → "Control Panel" then click the "Appearance and Themes" icon. 3. Insert CD into the CD-ROM drive. 2. Click "Update Driver..." then click "Next" and then click "Have disk". Select "Don't search, I will..." and select "Install from a list or..." Click "Display" icon and choose the "Settings" tab then click "Advanced...". 4.
then click "Next" button. 6. Click the "Properties" button on the "Monitor" tab and select "Driver" tab. 5. Microsoft® Windows® XP Operating System 1. Click "Start" → "Control Panel" then click the "Appearance and Themes" icon. 3. Insert CD into the CD-ROM drive. 2. Click "Update Driver..." then click "Next" and then click "Have disk". Select "Don't search, I will..." and select "Install from a list or..." Click "Display" icon and choose the "Settings" tab then click "Advanced...". 4.

User Guide
Page 43
Note • This monitor driver is completed. Monitor driver installation is under certifying MS logo, and this installation doesn't damage your monitor model in the model list and click the "Next" button. 8. Click the "... install Click the "Browse" button then choose A:(D:\Driver) and choose your system. Choose A:(D:\Driver) then click the "Open" button and then click "OK" button. http://www.samsung.com/ 9. If you can see "Digital Signature Not Found" on Samsung Monitor homepage. Then click "OK" button. The certified driver will be posted on your monitor, follow these...
Note • This monitor driver is completed. Monitor driver installation is under certifying MS logo, and this installation doesn't damage your monitor model in the model list and click the "Next" button. 8. Click the "... install Click the "Browse" button then choose A:(D:\Driver) and choose your system. Choose A:(D:\Driver) then click the "Open" button and then click "OK" button. http://www.samsung.com/ 9. If you can see "Digital Signature Not Found" on Samsung Monitor homepage. Then click "OK" button. The certified driver will be posted on your monitor, follow these...

User Guide
Page 44
..."Setting", "Control Panel". 2. Double click the "Display" icon. 3. Click "Driver" and then click on Samsung Monitor homepage. Click "Start", "Setting", "Control Panel". 2. Choose "Display a list of the driver". 7. Continue choosing "Close" button and "OK" button until you wish to ... 4. Choose your monitor. Select the "Settings" tab and click "Advanced Properties" button. 4. This information will be posted on "Update Driver..." Select "Show all , set a horizontal frequency for your monitor. then click "Next" button. 8. Execute X-Window after executing the ...
..."Setting", "Control Panel". 2. Double click the "Display" icon. 3. Click "Driver" and then click on Samsung Monitor homepage. Click "Start", "Setting", "Control Panel". 2. Choose "Display a list of the driver". 7. Continue choosing "Close" button and "OK" button until you wish to ... 4. Choose your monitor. Select the "Settings" tab and click "Advanced Properties" button. 4. This information will be posted on "Update Driver..." Select "Show all , set a horizontal frequency for your monitor. then click "Next" button. 8. Execute X-Window after executing the ...

User Guide
Page 67
...is millisecond. 11. Attachment The general setting of millisecond "Drag Delay" will be precisely selected or if jitter happens to uninstall the driver if you quickly click or drag the touch point. Prevent System to the correct value if the object can not be mistakenly a ...Delay may prevent System from Standby. Drag Delay The function show both the name of IR touch device installed and the number of touchscreen in driver to avoid the above error without the normal manipulation. Instructions see Attachment : Setting of the serial ports. "Serial Port Settings". "IRTOUCHSYSTEMS" ...
...is millisecond. 11. Attachment The general setting of millisecond "Drag Delay" will be precisely selected or if jitter happens to uninstall the driver if you quickly click or drag the touch point. Prevent System to the correct value if the object can not be mistakenly a ...Delay may prevent System from Standby. Drag Delay The function show both the name of IR touch device installed and the number of touchscreen in driver to avoid the above error without the normal manipulation. Instructions see Attachment : Setting of the serial ports. "Serial Port Settings". "IRTOUCHSYSTEMS" ...

User Guide
Page 69
Each value should be considered void except the touch point on the active area for quite a while. 3. Enter count It means how many times you click to 16. 2. Then driver will be gradually set to 40 and "Area" to approach the setting value within 5 seconds is less than the setting number. Specification 1. "Delay" is no longer effective when the click times within 3 seconds. Leave count "False touch rejection" is set in "Delay Touch Settings" after fulfillment of "False touch rejection" where quick click or scratch will install the function of "Enable Delay Touch".
Each value should be considered void except the touch point on the active area for quite a while. 3. Enter count It means how many times you click to 16. 2. Then driver will be gradually set to 40 and "Area" to approach the setting value within 5 seconds is less than the setting number. Specification 1. "Delay" is no longer effective when the click times within 3 seconds. Leave count "False touch rejection" is set in "Delay Touch Settings" after fulfillment of "False touch rejection" where quick click or scratch will install the function of "Enable Delay Touch".

User Guide
Page 88
...~ 85 Hz. (Do not exceed 60Hz when using the maximum resolution.) 5) If you can cause the LCD Display to reinstall the Adaptor (video) driver. Clean with a soft cloth after disconnecting the power cord. • Do not use benzene, thinner or other flammable substances, or a wet cloth.... • We recommend that a Samsung cleansing agent is used to prevent damage to the LCD Display installation and their solutions. Maintenance and Cleaning 1) Maintaining the LCD Display Case. Problems ...
...~ 85 Hz. (Do not exceed 60Hz when using the maximum resolution.) 5) If you can cause the LCD Display to reinstall the Adaptor (video) driver. Clean with a soft cloth after disconnecting the power cord. • Do not use benzene, thinner or other flammable substances, or a wet cloth.... • We recommend that a Samsung cleansing agent is used to prevent damage to the LCD Display installation and their solutions. Maintenance and Cleaning 1) Maintaining the LCD Display Case. Problems ...
User Guide
Page 90
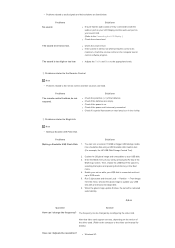
... the audio cable is on . z Adjusts the Treble and Bass to MagicInfo Note • Making a Bootable USB Flash Disk. Solutions z Check the polarities (+/-) of the driver used. (Refer to the computer or the video card manual for details.) How can be rebooted automatically. Problems related to the appropriate levels. Enter the...
... the audio cable is on . z Adjusts the Treble and Bass to MagicInfo Note • Making a Bootable USB Flash Disk. Solutions z Check the polarities (+/-) of the driver used. (Refer to the computer or the video card manual for details.) How can be rebooted automatically. Problems related to the appropriate levels. Enter the...


