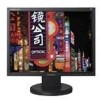
Quick Guide (easy Manual) (ver.1.0) (English)
Page 1
SyncMaster 204B Install drivers Install programs
Quick Guide (easy Manual) (ver.1.0) (English)
Page 2
Prohibited Do not disassemble Do not touch Important to read and understand at all times Disconnect the plug from the outlet Grounding to prevent an electric shock Power When not used for extended period of time, set your computer to DPMS. If using a screen saver, set it to equipment. Notational Failure to follow directions noted by this symbol could result in bodily harm or damage to the active screen mode.
Quick Guide (easy Manual) (ver.1.0) (English)
Page 3
... excessively bend the plug and wire nor place heavy objects upon them, which could cause damage. Do not disconnect the power cord while using the monitor. z This may cause fire. Do not pull the plug out by the separation and may cause fire. z A bad connection may cause an electric shock or... fire. z This may damage the monitor. z A surge may be caused by the wire nor touch the plug with a dusty plug or connector may cause an electric shock or fire. z Using the...
Quick Guide (easy Manual) (ver.1.0) (English)
Page 4
Do not drop the monitor when moving it . Install the monitor base in a showcase or shelf so that the end of dust. z Place the product on an even, ...in internal temperature may cause a fire. Failure to do so may cause serious damage to contact an authorized Service Center when installing your monitor in places with heavy dust, high or low temperatures, high humidity, and chemical substances, or where it will be operated for instance...or etc. Put your set . z Failure to do so may cause an electric shock or fire inside the monitor. Do not place the product on the floor.
Quick Guide (easy Manual) (ver.1.0) (English)
Page 5
... in a shortened component life and degraded performance. z The monitor could be caused by a qualified professional. Clean When cleaning the monitor case or the surface of the product, resulting in the internal temperature of the TFT-LCD screen, wipe with a slightly moistened, soft fabric. z... This may result in the owner's manual. z The TFT-LCD surface may damage the monitor. z A surge may be damaged or broken. When installing the ...
Quick Guide (easy Manual) (ver.1.0) (English)
Page 6
...exposed to unplug the power cord before cleaning the product. Contact the Service Center or Customer Center for interior cleaning once a year. If your monitor does not operate normally - do not install inside a vehicle. z Otherwise, this may cause an electric shock or fire. Others Do not ... and wipe the product using a soft, dry cloth. z Refer servicing to snow or rain. z Especially avoid operating the monitor near water or outdoors where the monitor could be exposed to qualified service personnel. Use the recommended detergent with a dry cloth. Make sure to oil, smoke or ...
Quick Guide (easy Manual) (ver.1.0) (English)
Page 7
... pulling only the wire or the signal cable. Do not place water containers, chemical products or small metal objects on the monitor cabinet. z This may cause a breakdown, electric shock or fire due to damage to do so may malfunction, causing an electric shock or fire. z This ...Then contact the Service Center. z Bad ventilation may cause malfunction, an electric shock or fire. Do not cover the vents on the monitor. z This may cause a breakdown, electric shock or fire due to damage to move the monitor right or left by pulling only the wire or the signal cable. If the...
Quick Guide (easy Manual) (ver.1.0) (English)
Page 8
...Service Center. Do not install the product on an unstable, uneven surface or a location prone to other devices, are disconnected before moving the monitor. Make sure that all cables, including the antenna cable and cables connected to vibrations. If an alien substances or water flows into the vent..., headphone port or AV ports. z Inappropriate resolution may cause undesirable picture quality. 20 inch (51 cm) - 1600 X 1200 Watching the monitor continuously at least a five-minute break after every hour of the product or may cause damage to fire or an ...
Quick Guide (easy Manual) (ver.1.0) (English)
Page 9
If any items are included with your dealer. Contact a local dealer to buy optional items. Unpacking Manual Monitor Quick Setup Guide (Not Warranty Card available in all locations) User's Guide, Monitor Driver, Natural Color, MagicTune™, MagicRotation software Cable Please make sure the following items are missing, contact your monitor.
Quick Guide (easy Manual) (ver.1.0) (English)
Page 10
D-Sub Cable Sold separately Power Cord Front DVI Cable Set-Bracket Screws (4 EA) MENU button [ ] MagicBright button [] Opens the OSD menu. Each mode has its own pre-configured brightness value. Also use to exit the OSD menu or return to your eyes depending on the contents of six settings by our engineers, the pre-configured values may not be comfortable to the previous menu. MagicBright is the case, adjust the brightness and contrast by using the OSD menu. 2) Text Currently six different modes are carefully chosen by simply pressing MagicBright control buttons. 1) Custom ...
Quick Guide (easy Manual) (ver.1.0) (English)
Page 11
...' button is pressed, the Auto Adjustment screen appears as shown in the manual for long periods. Rear (The configuration at the back of the monitor may vary from product to the graphic card's DVI port using the DVI cable. The values of fine, coarse and position are adjusted automatically. ...signal while the OSD is off . / This light glows Blue during normal operation, and blinks Blue once as the monitor saves your monitor to product.) Auto adjustment allows the monitor to self-adjust to see an animation clip Adjust items in the upper left of the screen displaying the current mode...
Quick Guide (easy Manual) (ver.1.0) (English)
Page 12
POWER port : Power cord, plugs into monitor and wall receptacle. POWER ON/OFF Switch : Use this button for turn the monitor on the back of your monitor. (SOURCE : Digital) RGB IN port : Connect the signal cable to the RGB IN port on and off 2. DVI IN port : Connect the DVI Cable to the DVI IN port on the back of your monitor. (SOURCE : Analog) 1.
Quick Guide (easy Manual) (ver.1.0) (English)
Page 13
See Connecting the Monitor for further information regarding cable connections. Stand Stopper : Remve the fixing pin on the stand to lift the monitor up and down. Cable Fix Ring: When connecting the cable is a device used to physically fix the system when using it in a public place. (The locking device has to be purchased separately. ) For using a locking device, contact where you purchase it. Kensington Lock : The Kensington lock is finished fix the cables to the Cable Fix Ring.
Quick Guide (easy Manual) (ver.1.0) (English)
Page 14
...the DVI IN port on your monitor to the RGB IN port on the video card. If your monitor. 2-3. Plug the power cord for your computer and monitor. Connect the monitor to the Cable Fix Ring. Turn on the back of your monitor. 2-2. Cable Fix Ring When connecting... the cable is complete. Connecting the Monitor 1. In the case of the monitor. Connected to connect the monitor using the D-SUB connection cable. ...
Quick Guide (easy Manual) (ver.1.0) (English)
Page 15
Lay the LCD monitor face-down on a flat surface with a cushion beneath it to protect the screen. 3. Pivot Stand / Sliding Stand Using the Stand Removing the base 1. Turn off your monitor and unplug its power cord. 2. Remove two screws (A) and then remove the Stand from the LCD monitor.
Quick Guide (easy Manual) (ver.1.0) (English)
Page 16
... (Automatic) If you rotate the screen without lifting it to its power cord. 2. Monitor B. Mounting interface pad ( Sold separately ) 1. Lay the LCD monitor face-down on the monitor model. Remove two screws and then remove the Stand from the LCD monitor. 4. Attaching a Base This monitor accepts a 100 mm x 100 mm VESA-compliant mounting interface pad. A. A.Stand Stopper...
Quick Guide (easy Manual) (ver.1.0) (English)
Page 17
... at the Internet web site shown here. z Internet web site : http://www.samsung.com/ (Worldwide) http://www.samsung.com/monitor (U.S.A) http://www.sec.co.kr/monitor (Korea) http://www.samsungmonitor.com.cn/ (China) Windows ME 1. Insert CD into the CD-ROM drive. 2. Choose your monitor model in the model list, then click the "OK" button...
Quick Guide (easy Manual) (ver.1.0) (English)
Page 18
..., insert the CD-ROM included with this installation don't damage your system.The certified driver will be posted on Samsung Monitor Homepage http://www.samsung.com/. 5. Insert CD into the CD-ROM driver. 2. Click "Display" icon and choose the "Settings" tab then click "Advanced... disk and download the driver program file at the Internet web site shown here. z Internet web site : http://www.samsung.com/ (Worldwide) http://www.samsung.com/monitor (U.S.A) http://www.sec.co.kr/monitor (Korea) http://www.samsungmonitor.com.cn/ (China) Microsoft® Windows® XP Operating System 1. This...
Quick Guide (easy Manual) (ver.1.0) (English)
Page 19
and select "Install from a list or.." then click "Next" and then click "Have disk". 7. Select "Don't search ,I will.." 4. Click the "Browse" button then choose A:(D:\Driver) and choose your monitor model in the model list and click the "Next" button. Click "Update Driver.." then click "Next" button. 6. Click the "Properties" button on the "Monitor" tab and select "Driver" tab. 5.
Quick Guide (easy Manual) (ver.1.0) (English)
Page 20
... see "Digital Signature Not Found" on your system.The certified driver will be posted on Samsung Monitor homepage. Click the "Browse" button on the "Insert disk" window. 2. Then click "OK" button. 8. This monitor driver is completed. http://www.samsung.com/ 9. Click the "Close" button then click "OK" button continually. 10. Microsoft® Windows®...