User Manual
Page 6
... gauge - 20 amp circuit. This speed is powered by a precision built electric motor. Do not use with all local codes and ordinances. If the saw . For voltage, the wiring in a shop is properly installed and grounded in figure 1, page 13. A line that is as important as to do...caught on the cord's jacket. This is approximately 3,450 rpm. This tool is for this tool is indicated by a marking "Acceptable for the tile saw does not operate when plugged into a matching outlet that can result in GFCI protection and may not be grounded. This product is equipped with ...
... gauge - 20 amp circuit. This speed is powered by a precision built electric motor. Do not use with all local codes and ordinances. If the saw . For voltage, the wiring in a shop is properly installed and grounded in figure 1, page 13. A line that is as important as to do...caught on the cord's jacket. This is approximately 3,450 rpm. This tool is for this tool is indicated by a marking "Acceptable for the tile saw does not operate when plugged into a matching outlet that can result in GFCI protection and may not be grounded. This product is equipped with ...
User Manual
Page 7
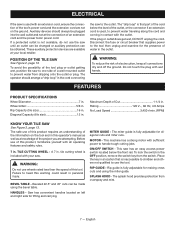
...of this warning could result in . The operator should always be obtained. MOTOR - Rip Capacity (tile size 16 in . Rating 120 V~, 60 Hz, 4.8 Amps No Load Speed 3,450 r/min. (RPM) KNOW YOUR TILE SAW See Figure 3, page 13. To avoid the possibility of the tool plug or outlet getting wet,... position tile saw is included with an extension cord, ensure the connection of the tool's power cord and the extension ...
...of this warning could result in . The operator should always be obtained. MOTOR - Rip Capacity (tile size 16 in . Rating 120 V~, 60 Hz, 4.8 Amps No Load Speed 3,450 r/min. (RPM) KNOW YOUR TILE SAW See Figure 3, page 13. To avoid the possibility of the tool plug or outlet getting wet,... position tile saw is included with an extension cord, ensure the connection of the tool's power cord and the extension ...
User Manual
Page 8
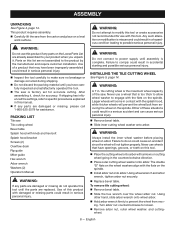
PACKING LIST Tile saw . INSTALLING THE TILE CUTTING WHEEL See Figure 5, page 14. Failure to specific procedures explained... result in the counterclockwise direction. Place outer cutting wheel washer onto arbor. Either of the saw Tile cutting wheel Bevel table Splash hood with the flats on the wheel washers align with knob and hex ... spindle. English Use of a product that have carefully inspected and satisfactorily operated the tool. The saw from securing the wheel on arbor. Turn arbor nut counterclockwise to modify this tool. Place the...
PACKING LIST Tile saw . INSTALLING THE TILE CUTTING WHEEL See Figure 5, page 14. Failure to specific procedures explained... result in the counterclockwise direction. Place outer cutting wheel washer onto arbor. Either of the saw Tile cutting wheel Bevel table Splash hood with the flats on the wheel washers align with knob and hex ... spindle. English Use of a product that have carefully inspected and satisfactorily operated the tool. The saw from securing the wheel on arbor. Turn arbor nut counterclockwise to modify this tool. Place the...
User Manual
Page 9
..., resulting in accordance with local regulations. NOTE: Overflow drain prevents overfilling. Replace bevel table. Hood should not be touching tile. Install hex bolt through splash hood bracket then tighten securely. WARNING: Do not use this tool. Line up through holes...front. Adjust rip guide to desired position and secure. Adjust to table and slightly above tile thickness. To change reservoir water: Unplug tile saw is sufficient to splash onto ground or around machine. Discard waste water in possible serious injury. NOTE...
..., resulting in accordance with local regulations. NOTE: Overflow drain prevents overfilling. Replace bevel table. Hood should not be touching tile. Install hex bolt through splash hood bracket then tighten securely. WARNING: Do not use this tool. Line up through holes...front. Adjust rip guide to desired position and secure. Adjust to table and slightly above tile thickness. To change reservoir water: Unplug tile saw is sufficient to splash onto ground or around machine. Discard waste water in possible serious injury. NOTE...
User Manual
Page 10
... for the wheel to get wet before operating the switch to start the tool. TO TURN YOUR SAW ON: With the switch key inserted into the cutting wheel. When the cut on the tile using angle scale and tighten securely with an on material. Slide miter guide onto rip... guide to desired width, and tighten the knob to secure in place. Adjust miter guide to heed this problem, use by twisting the tile. TO TURN YOUR SAW OFF: Press the switch button down to be kicked back toward the operator and result in locking feature. WARNING: In the event...
... for the wheel to get wet before operating the switch to start the tool. TO TURN YOUR SAW ON: With the switch key inserted into the cutting wheel. When the cut on the tile using angle scale and tighten securely with an on material. Slide miter guide onto rip... guide to desired width, and tighten the knob to secure in place. Adjust miter guide to heed this problem, use by twisting the tile. TO TURN YOUR SAW OFF: Press the switch button down to be kicked back toward the operator and result in locking feature. WARNING: In the event...

User Manual
Page 11
... other than 90°. Beveled 22.5° and 45° cuts can be controlled by two separate cuts. L-cuts are cuts that remove a piece of tile to fit in legs to rest plate into 22.5° angle. Use second set of notches to angle bevel table into the wheel. ... on material, decorative chair rail, and base molding with knob. Make sure the material is clear of the cutting wheel before turning on the saw. Turn the on /off switch to the ON position. Let the cutting wheel build up to full speed and wait for the ...
... other than 90°. Beveled 22.5° and 45° cuts can be controlled by two separate cuts. L-cuts are cuts that remove a piece of tile to fit in legs to rest plate into 22.5° angle. Use second set of notches to angle bevel table into the wheel. ... on material, decorative chair rail, and base molding with knob. Make sure the material is clear of the cutting wheel before turning on the saw. Turn the on /off switch to the ON position. Let the cutting wheel build up to full speed and wait for the ...
User Manual
Page 12
Use of the unit under normal operating conditions. TILE CUTTING WHEEL For maximum performance and safety, it is recommended ...using solvents when cleaning plastic parts. Use clean cloths to heed this tool. WARNING: Do not at your saw. English Most plastics are available at any other parts may be damaged by their use wheel with ANSI... serious personal injury. Failure to comply with cracks, gaps, or teeth. WARNING: Do not use only identical Ryobi replacement parts. Chemicals can damage, weaken or destroy plastic which may result in personal injury. cutting wheel provided ...
Use of the unit under normal operating conditions. TILE CUTTING WHEEL For maximum performance and safety, it is recommended ...using solvents when cleaning plastic parts. Use clean cloths to heed this tool. WARNING: Do not at your saw. English Most plastics are available at any other parts may be damaged by their use wheel with ANSI... serious personal injury. Failure to comply with cracks, gaps, or teeth. WARNING: Do not use only identical Ryobi replacement parts. Chemicals can damage, weaken or destroy plastic which may result in personal injury. cutting wheel provided ...
User Manual 2
Page 3
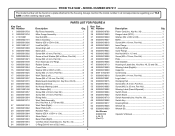
Always mention the model number in all correspondence regarding your TILE SAW or when ordering repair parts. Key Nos. 20-23 1 53 080009019015 Clamping Pad 1 20 080009019055 Blade Guard Knob 1 54 080009019014 Screw (M4 x 9.5 ...Shown: 990000100 4-26-13 (Rev:01) Switch Key 1 Housing Block 1 Wrench (A 1 Wrench (B 1 Operator's Manual 1 33 080009019010 Overflow Drain Assembly (Inc. RYOBI TILE SAW - MODEL NUMBER WS7211 The model number will be found on a plate attached to the housing. Key No. 60 1 26 080009019712 27 080009019100 28 080009019062 29 080009019099 30...
Always mention the model number in all correspondence regarding your TILE SAW or when ordering repair parts. Key Nos. 20-23 1 53 080009019015 Clamping Pad 1 20 080009019055 Blade Guard Knob 1 54 080009019014 Screw (M4 x 9.5 ...Shown: 990000100 4-26-13 (Rev:01) Switch Key 1 Housing Block 1 Wrench (A 1 Wrench (B 1 Operator's Manual 1 33 080009019010 Overflow Drain Assembly (Inc. RYOBI TILE SAW - MODEL NUMBER WS7211 The model number will be found on a plate attached to the housing. Key No. 60 1 26 080009019712 27 080009019100 28 080009019062 29 080009019099 30...
User Manual 2
Page 4
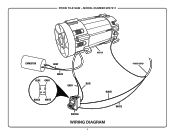
MODEL NUMBER WS7211 MOTOR CAPACITOR GRAY BLUE GRAY WHITE GRAY BLUE BLACK BLACK WHITE WHITE SWITCH WIRING DIAGRAM 4 POWER CORD RYOBI TILE SAW -
MODEL NUMBER WS7211 MOTOR CAPACITOR GRAY BLUE GRAY WHITE GRAY BLUE BLACK BLACK WHITE WHITE SWITCH WIRING DIAGRAM 4 POWER CORD RYOBI TILE SAW -


