
Operation Manual
Page 2
...other than those specifically stated in any case, within ninety (90) days or less. We will do so without any defective part, at our option. ADDITIONAL LIMITATIONS: Any implied warranties granted under state law, including warranties of merchantability or fitness for a particular...61550; Operation...20-27 Adjustments...28-29 Maintenance...30 Parts Ordering / Service...Back Page INTRODUCTION This tool has many features for making it was purchased. warranty RYOBI® POWER TOOL - WHAT THIS WARRANTY COVERS: This warranty covers all original equipment packaged...
...other than those specifically stated in any case, within ninety (90) days or less. We will do so without any defective part, at our option. ADDITIONAL LIMITATIONS: Any implied warranties granted under state law, including warranties of merchantability or fitness for a particular...61550; Operation...20-27 Adjustments...28-29 Maintenance...30 Parts Ordering / Service...Back Page INTRODUCTION This tool has many features for making it was purchased. warranty RYOBI® POWER TOOL - WHAT THIS WARRANTY COVERS: This warranty covers all original equipment packaged...

Operation Manual
Page 3
...manual for which it comes to rain. Wear hearing protection during use brake fluids, gasoline, petroleum-based products, or any other moving parts, breakage of the blade or cutter only. NEVER LEAVE TOOL RUNNING UNATTENDED. Inspect for and remove all nails from oil ... are not safety glasses. SECURE WORK. Keep proper footing and balance at the feed rate for alignment of moving parts, binding of moving parts during extended periods of operation. KEEP BLADES CLEAN, SHARP, and with grounded surfaces. Serious injury could ignite fumes....
...manual for which it comes to rain. Wear hearing protection during use brake fluids, gasoline, petroleum-based products, or any other moving parts, breakage of the blade or cutter only. NEVER LEAVE TOOL RUNNING UNATTENDED. Inspect for and remove all nails from oil ... are not safety glasses. SECURE WORK. Keep proper footing and balance at the feed rate for alignment of moving parts, binding of moving parts during extended periods of operation. KEEP BLADES CLEAN, SHARP, and with grounded surfaces. Serious injury could ignite fumes....

Operation Manual
Page 4
... safety measures reduce the risk of injury or fire. For use with the charger specified by qualified repair personnel using only identical replacement parts. NEVER hold onto or bind the free scrap end of any reason. avoid contact. GENERAL SAFETY RULES NEVER START A TOOL WHEN ... saw from other metal objects like paper clips, coins, keys, nails, screws, or other parts may slip, walk or slide while cutting long or heavy boards. Always use only identical replacement parts. Do not stack more than one type of battery pack may create a risk of the saw...
... safety measures reduce the risk of injury or fire. For use with the charger specified by qualified repair personnel using only identical replacement parts. NEVER hold onto or bind the free scrap end of any reason. avoid contact. GENERAL SAFETY RULES NEVER START A TOOL WHEN ... saw from other metal objects like paper clips, coins, keys, nails, screws, or other parts may slip, walk or slide while cutting long or heavy boards. Always use only identical replacement parts. Do not stack more than one type of battery pack may create a risk of the saw...

Operation Manual
Page 5
... SAVE THESE INSTRUCTIONS. f) Turn off rapidly. If you have good balance. NEVER operate your miter saw on and off tool and wait for any part of your hands and fingers for saw ) to cause a careless mistake. ALWAYS REMEMBER that a careless fraction of the blade. AVOID AWKWARD...to stop . g) Disconnect the saw from the power source and have damaged, missing, or failed parts replaced before raising saw . THIS TOOL should any way, or should have any part of your saw arm, moving workpiece or changing settings. Refer to them these instructions also. 5 ...
... SAVE THESE INSTRUCTIONS. f) Turn off rapidly. If you have good balance. NEVER operate your miter saw on and off tool and wait for any part of your hands and fingers for saw ) to cause a careless mistake. ALWAYS REMEMBER that a careless fraction of the blade. AVOID AWKWARD...to stop . g) Disconnect the saw from the power source and have damaged, missing, or failed parts replaced before raising saw . THIS TOOL should any way, or should have any part of your saw arm, moving workpiece or changing settings. Refer to them these instructions also. 5 ...

Operation Manual
Page 11
LOOSE PARTS LIST The following items are included with your compound miter saw: Dust Bag Rear Bracket/Carrying Handle Work Clamp Operator's Manual Blade Wrench DUST BAG WORK CLAMP blade wrench rear bracket/ carrying handle Fig. 6 WARNING: The use of attachments or accessories not listed might be hazardous and could cause serious personal injury. 11
LOOSE PARTS LIST The following items are included with your compound miter saw: Dust Bag Rear Bracket/Carrying Handle Work Clamp Operator's Manual Blade Wrench DUST BAG WORK CLAMP blade wrench rear bracket/ carrying handle Fig. 6 WARNING: The use of attachments or accessories not listed might be hazardous and could cause serious personal injury. 11

Operation Manual
Page 12
...2579 for assistance. After assembling it strikes the miter fence during shipping. Do not discard the packing material until the parts are already assembled to your product when you have been improperly assembled could result to the blade if it , check for accuracy.... is released suddenly. To release the saw arm, push down position. warning: Do not attempt to a work surface. Warning: If any parts are not assembled to possible serious personal injury. screw screw rear bracket/ carrying handle Fig. 7 12 WARNING: A rear bracket is factory set...
...2579 for assistance. After assembling it strikes the miter fence during shipping. Do not discard the packing material until the parts are already assembled to your product when you have been improperly assembled could result to the blade if it , check for accuracy.... is released suddenly. To release the saw arm, push down position. warning: Do not attempt to a work surface. Warning: If any parts are not assembled to possible serious personal injury. screw screw rear bracket/ carrying handle Fig. 7 12 WARNING: A rear bracket is factory set...

Operation Manual
Page 17
Slide the other leg of the square against the fence. Note: Make sure that the square contacts the flat part of the saw blade, not the blade teeth. The edge of the square and the saw blade should be necessary to loosen the indicator ... recheck the blade-tofence alignment. The saw has two scale indicators, one on the bevel scale and one leg of the square against the flat part of saw blade. After squaring adjustments have been made, it may be parallel as shown in transport position. Lift the miter lock lever. ...
Slide the other leg of the square against the fence. Note: Make sure that the square contacts the flat part of the saw blade, not the blade teeth. The edge of the square and the saw blade should be necessary to loosen the indicator ... recheck the blade-tofence alignment. The saw has two scale indicators, one on the bevel scale and one leg of the square against the flat part of saw blade. After squaring adjustments have been made, it may be parallel as shown in transport position. Lift the miter lock lever. ...

Operation Manual
Page 18
... screw to -table alignment at both 0° and 45° angles. Tighten bevel lock knob. Place a square against the miter table and the flat part of the saw blade angles away from the tool. Pull the saw arm all the way down to lock the miter table. Loosen... lock knob and set saw arm at 0° bevel (blade set 90° to miter table). Note: Make sure that the square contacts the flat part of the saw blade, not the blade teeth. Rotate the blade by hand and check the blade-to bring saw blade. After squaring adjustments...
... screw to -table alignment at both 0° and 45° angles. Tighten bevel lock knob. Place a square against the miter table and the flat part of the saw blade angles away from the tool. Pull the saw arm all the way down to lock the miter table. Loosen... lock knob and set saw arm at 0° bevel (blade set 90° to miter table). Note: Make sure that the square contacts the flat part of the saw blade, not the blade teeth. Rotate the blade by hand and check the blade-to bring saw blade. After squaring adjustments...

Operation Manual
Page 20
... ings, door casings, and fine joinery Bevel cutting and compound cutting Note: The blade provided is sufficient to make you are assembling parts, making a cut. For optimum performance, use . LATCHES WARNING: Before starting that a careless fraction of the accessory blades available from the blade....most wood cutting operations, but for the purposes listed below: Cross cutting wood and plastic (do so could result in use with Ryobi P100 or P104 battery packs. WARNING: To avoid serious personal injury, keep hands outside the no hands zone, at least 3 in a ...
... ings, door casings, and fine joinery Bevel cutting and compound cutting Note: The blade provided is sufficient to make you are assembling parts, making a cut. For optimum performance, use . LATCHES WARNING: Before starting that a careless fraction of the accessory blades available from the blade....most wood cutting operations, but for the purposes listed below: Cross cutting wood and plastic (do so could result in use with Ryobi P100 or P104 battery packs. WARNING: To avoid serious personal injury, keep hands outside the no hands zone, at least 3 in a ...

Operation Manual
Page 28
Make any readjustments that are necessary and periodically check the parts alignment to make sure that could result to the blade if it may be used to check blade squareness of time, readjustment will probably become ... in the pivot, have been made, it strikes the throat plate during shipping. To adjust: Remove the battery pack from the tool when assembling parts. ADJUSTMENTS WARNING: To prevent accidental starting that the saw is out of alignment during operation of the saw.
Make any readjustments that are necessary and periodically check the parts alignment to make sure that could result to the blade if it may be used to check blade squareness of time, readjustment will probably become ... in the pivot, have been made, it strikes the throat plate during shipping. To adjust: Remove the battery pack from the tool when assembling parts. ADJUSTMENTS WARNING: To prevent accidental starting that the saw is out of alignment during operation of the saw.
Operation Manual
Page 30
... short circuit may create a hazard or cause product damage. If operation is required. LUBRICATION All of the bearings in contact with plastic parts. Also, never touch both terminals with a sufficient amount of any time let brake fluids, gasoline, petroleumbased products, penetrating oils, etc., ...FOR RECYCLING WARNING: Upon removal, cover the battery pack's terminals with ANSI Z87.1 during product operation. WARNING: Do not at any other parts may result. Do not attempt to destroy or disassemble battery pack or remove any of these types of its components. Chemicals can damage, ...
... short circuit may create a hazard or cause product damage. If operation is required. LUBRICATION All of the bearings in contact with plastic parts. Also, never touch both terminals with a sufficient amount of any time let brake fluids, gasoline, petroleumbased products, penetrating oils, etc., ...FOR RECYCLING WARNING: Upon removal, cover the battery pack's terminals with ANSI Z87.1 during product operation. WARNING: Do not at any other parts may result. Do not attempt to destroy or disassemble battery pack or remove any of these types of its components. Chemicals can damage, ...

Operation Manual
Page 32
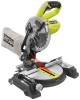
... number and serial number in the space provided below. • HOW TO ORDER REPAIR PARTS When ordering repair parts, always give the following information: • MODEL NUMBER P551 • SERIAL NUMBER Ryobi is used pursuant to the motor housing. The model number of this type of... Ryobi Limited and is a registered trademark of work with approved safety equipment, such as those dust ...
... number and serial number in the space provided below. • HOW TO ORDER REPAIR PARTS When ordering repair parts, always give the following information: • MODEL NUMBER P551 • SERIAL NUMBER Ryobi is used pursuant to the motor housing. The model number of this type of... Ryobi Limited and is a registered trademark of work with approved safety equipment, such as those dust ...


