Ryobi P2660 Support and Manuals
Get Help and Manuals for this Ryobi item
Popular Ryobi P2660 Manual Pages
Operation Manual 9 - Page 2

... serviceman when service or repair is wet or has been wet or exposed to prevent misuse of fire, electric shock, or injury to wet or damp conditions. Incorrect reassembly may result in vehicles.
Do not abuse cord or charger. If you loan someone this manual, on charger. SAVE THESE INSTRUCTIONS - This manual contains important...
Operation Manual 9 - Page 3

...ASSEMBLY
WARNING:
Do not use this product if it is not completely assembled or if any parts are intended to modify this product or create accessories or attachments not recommended for assistance. ...associated with side shields marked to property damage). If any parts appear to possible serious personal injury. Read Operator's Manual
To reduce the risk of these symbols will result in ...
Operation Manual 9 - Page 4
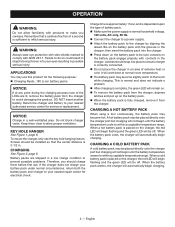
...repair center for electrical check. Return the charger and battery to allow familiarity with ANSI Z87.1. KEY HOLE HANGER
See Figure 1, page 6.
Latches should be installed...charge condition to your nearest authorized service center for the following purpose: Charging Ryobi™ 18V Li-ion battery ...for service or replacement.
This is normal and does not indicate a problem.
...
Operation Manual 9 - Page 5
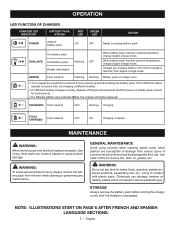
... your battery pack manual for instructions).
• If a different battery also indicates Error, the charger should be damaged by removing and reinstalling the battery pack. GENERAL MAINTENANCE
Avoid using solvents when cleaning plastic parts.
ERROR
Pack inserted
Flashing Flashing Battery pack or charger error.
• Try to damage from the tool when cleaning or performing any...
Operation Manual 2 - Page 4
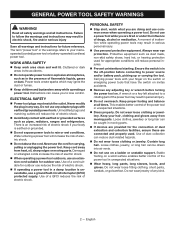
...energising power tools that have the switch on a ladder or unstable support. This enables better control of the power tool may result in ... and gloves away from heat, oil, sharp edges or moving parts. Carrying power tools with your mainsoperated (corded) power tool or... fire and/or serious injury
Save all warnings and instructions for outdoor use reduces the risk of flammable liquids,...
Operation Manual 2 - Page 5
...instructions, taking into account the working conditions and the work to operate the power tool. If contact accidentally occurs, flush with sharp cutting edges are less likely to bind and are caused by a qualified repair person using only identical replacement parts.
Liquid ejected from the battery; This will do not allow persons unfamiliar with specifically... When servicing a ...
Operation Manual 2 - Page 6

..., wire, or loose string which can become lodged in the cutting blades.
If hedge trimmer is delayed or when walking from the unit, or when not in use.
Never use this tool, loan them to instruct others who may make sure the blade is off when clearing jammed material. Be aware...
Operation Manual 2 - Page 7
...Parts
Keep hands away from the blade will result in serious personal injury.
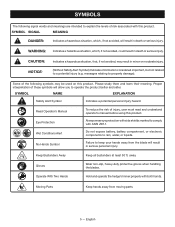
SYMBOL SIGNAL
MEANING
DANGER:
Indicates a hazardous situation, which , if not avoided, could result in death or serious injury.
Operate With Two Hands
Hold and operate the hedge trimmer... the product better and safer. Read Operator's Manual
Eye Protection
Wet Conditions Alert
No Hands Symbol
To...
Operation Manual 2 - Page 9
...or damage occurred during shipping.
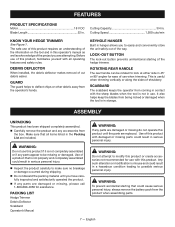
DEBRIS DEFLECTOR
When installed, the debris deflector makes removal of the hedge trimmer.
Use of a product that is misuse and could result in use. PACKING LIST
Hedge Trimmer Debris Deflector Scabbard Operator's Manual
WARNING:
If any accessories from the operator's hands. English FEATURES
PRODUCT SPECIFICATIONS
Motor 18 V DC
Blade Length 22 in...
Operation Manual 2 - Page 10

... damaged parts are replaced. The use this product. TO INSTALL / REMOVE BATTERY PACK
See Figure 3. Always keep both hands on the side of the deflector rests beneath the guard. To remove: Locate the latches on the hedge trimmer handles. Remember that could cause the battery pack to hold or guide the hedge trimmer by the manufacturer of hedge trimmer...
Operation Manual 2 - Page 11
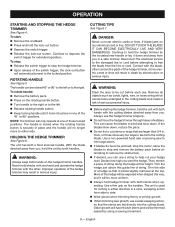
... or prickly growth. When trimming new growth, use the hedge trimmer properly.
Do not force the hedge trimmer through heavy shrubbery.
Never hold hedge trimmer with the other conductive parts of the hedge trimmer may result in death by using a sawing movement.
9 - Improper operation of the hedge trimmer, or live electric cords or lines will no longer move to...
Operation Manual 2 - Page 12
... blade tooth with an 8 in contact with plastic parts. or 7/32 in diameter. in .
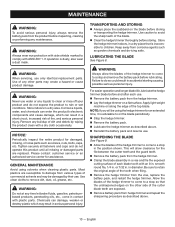
GENERAL MAINTENANCE
Avoid using the hedge trimmer for assistance. TRANSPORTING AND STORING
Always place the scabbard on a flat surface. Keep away from the vise, replace the battery pack, and restart the hedge trimmer. NOTE: If you will allow the blades of...
Operation Manual 2 - Page 13

...com or call the RYOBI Help Line! They can cause a shock hazard. Wipe off any moisture with a soft dry cloth.
Use a small brush or the air discharge of the hedge trimmer, using a damp ...salts.
Always place the scabbard on the plastic housing or the handle.
Store the hedge trimmer in a dry, well-ventilated place that is inaccessible to clear dust or debris from the...
Parts Diagram - Page 3
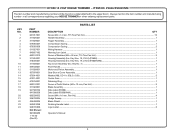
...correspondence regarding your HEDGE TRIMMER or when ordering replacement parts.
PART NUMBER
1
...Manual
3 Key Nos. 19, 23-24) (P2606VNM 1
Top Cover Assembly (Inc. P2606/P2606VNM
The item number and manufacturing number will be found on a label attached to the upper boom. PARTS LIST
KEY NO. Key Nos. 19, 23-24) (P2606)...1 Housing Assembly (Inc.
RYOBI 18 VOLT HEDGE TRIMMER...
Parts Diagram - Page 4
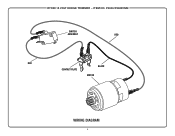
P2606/P2606VNM
SWITCH
ASSEMBLY
RED
RED BLACK
CONTACT PLATE
MOTOR
WIRING DIAGRAM
4 RYOBI 18 VOLT HEDGE TRIMMER − ITEM NO.
Ryobi P2660 Reviews
We have not received any reviews for Ryobi yet.