

English Manual
Page 1
WARNING: To reduce the risk of operation, and operator safety. OPERATOR'S MANUAL BELT SANDER BE318 DOUBLE INSULATED Your new sander has been engineered and manufactured to Ryobi's high standard for buying a Ryobi belt sander. SAVE THIS MANUAL FOR FUTURE REFERENCE Thank you years of rugged, trouble-free performance. Properly cared for, it will give you for dependability, ease of injury, the user must read and understand the operator's manual.
WARNING: To reduce the risk of operation, and operator safety. OPERATOR'S MANUAL BELT SANDER BE318 DOUBLE INSULATED Your new sander has been engineered and manufactured to Ryobi's high standard for buying a Ryobi belt sander. SAVE THIS MANUAL FOR FUTURE REFERENCE Thank you years of rugged, trouble-free performance. Properly cared for, it will give you for dependability, ease of injury, the user must read and understand the operator's manual.

English Manual
Page 2
... CONTENTS Introduction ...2 General Safety Rules ...3-4 Specific Safety Rules ...4 Symbols ...5 Specifications ...6 Unpacking ...6 Applications ...6 Features ...7-8 Operation ...9-14 Maintenance ...14-15 Parts, Ordering, and Service ...16 INTRODUCTION Your sander has many features for making the use of this sander making it is intended, you have been given top priority in severe eye damage.
... CONTENTS Introduction ...2 General Safety Rules ...3-4 Specific Safety Rules ...4 Symbols ...5 Specifications ...6 Unpacking ...6 Applications ...6 Features ...7-8 Operation ...9-14 Maintenance ...14-15 Parts, Ordering, and Service ...16 INTRODUCTION Your sander has many features for making the use of this sander making it is intended, you have been given top priority in severe eye damage.

English Manual
Page 6
... in possible serious personal injury. Inspect the tool carefully to do not operate your sander for assistance. Failure to make sure no breakage or damage occurred during shipping. PACKING LIST Belt Sander Sanding Belt Dust Collection Bag Operator's Manual WARNING: If any parts are included. .... (96.8 square cm) 700 surface ft./min.* 120 Volts, 60 Hz, AC only, 5 amps 6.3 lbs. (2.8 kg) UNPACKING INSTRUCTIONS Your sander has been shipped completely assembled. Do not discard the packing material until the missing parts are missing do so could result in . X 18 in. ...
... in possible serious personal injury. Inspect the tool carefully to do not operate your sander for assistance. Failure to make sure no breakage or damage occurred during shipping. PACKING LIST Belt Sander Sanding Belt Dust Collection Bag Operator's Manual WARNING: If any parts are included. .... (96.8 square cm) 700 surface ft./min.* 120 Volts, 60 Hz, AC only, 5 amps 6.3 lbs. (2.8 kg) UNPACKING INSTRUCTIONS Your sander has been shipped completely assembled. Do not discard the packing material until the missing parts are missing do so could result in . X 18 in. ...

English Manual
Page 7
... normal safety precautions to a power supply that is 120 volts, 60 Hz, AC only (normal household current). ELECTRIC MOTOR Your sander has a precision built electric motor. FEATURES DOUBLE INSULATION Double insulation is a concept in safety in electric power tools, which eliminates ... tool with protecting insulation. If your nearest authorized service center for easy handling. A substantial voltage drop will cause a loss of the sander provides for repair. All exposed metal parts are isolated from a break in different positions and at different angles. 7 Always use original...
... normal safety precautions to a power supply that is 120 volts, 60 Hz, AC only (normal household current). ELECTRIC MOTOR Your sander has a precision built electric motor. FEATURES DOUBLE INSULATION Double insulation is a concept in safety in electric power tools, which eliminates ... tool with protecting insulation. If your nearest authorized service center for easy handling. A substantial voltage drop will cause a loss of the sander provides for repair. All exposed metal parts are isolated from a break in different positions and at different angles. 7 Always use original...

English Manual
Page 9
...lock the trigger switch if you have the "lock-on" feature engaged during use finer grit for power sanding. To turn the sander on the sander: Depress the switch trigger. Release the switch trigger. Failure to be sanded determines which grit will do so could result in dust... or loose particles being thrown into your eyes, resulting in possible serious injury. Release the lock-on " position. Finally, use and the sander is accidentally disconnected from the power supply, disengage the "lock-on button. OPERATION WARNING: Always wear safety goggles or safety glasses with each...
...lock the trigger switch if you have the "lock-on" feature engaged during use finer grit for power sanding. To turn the sander on the sander: Depress the switch trigger. Release the switch trigger. Failure to be sanded determines which grit will do so could result in dust... or loose particles being thrown into your eyes, resulting in possible serious injury. Release the lock-on " position. Finally, use and the sander is accidentally disconnected from the power supply, disengage the "lock-on button. OPERATION WARNING: Always wear safety goggles or safety glasses with each...

English Manual
Page 10
WARNING: Failure to unplug the tool could result in them getting pinched, causing possible serious injury. Position the sander on the left. NOTE: If you are changing sanding belts, remove the old sanding belt at all times. Install the ...UNIDIRECTIONAL BELTS IN THE DIRECTION OF THE ROTATION INSTALL BIDIRECTIONAL BELTS IN EITHER DIRECTION Fig. 6 10 WARNING: Keep hands and fingers clear of the sander). Raise the tension release lever. Installing unidirectional sanding belts backwards can create a hazardous condition. Follow these directions to secure the sanding belt. Lower...
WARNING: Failure to unplug the tool could result in them getting pinched, causing possible serious injury. Position the sander on the left. NOTE: If you are changing sanding belts, remove the old sanding belt at all times. Install the ...UNIDIRECTIONAL BELTS IN THE DIRECTION OF THE ROTATION INSTALL BIDIRECTIONAL BELTS IN EITHER DIRECTION Fig. 6 10 WARNING: Keep hands and fingers clear of the sander). Raise the tension release lever. Installing unidirectional sanding belts backwards can create a hazardous condition. Follow these directions to secure the sanding belt. Lower...

English Manual
Page 11
...the tracking screw slowly counterclockwise. CAUTION: If the sanding belt wears excessively on the left. WARNING: Keep hands and fingers away from the sander causing injury. They could result in accidental starting of the body coming in contact with the outer edge of the base of the sanding ...belt should not contact a workpiece or any foreign object when you are making belt tracking adjustments. WARNING: Before connecting the sander to a power supply, always make sure it is probably adjusted too far inward and is not in possible serious injury. Failure to adjust ...
...the tracking screw slowly counterclockwise. CAUTION: If the sanding belt wears excessively on the left. WARNING: Keep hands and fingers away from the sander causing injury. They could result in accidental starting of the body coming in contact with the outer edge of the base of the sanding ...belt should not contact a workpiece or any foreign object when you are making belt tracking adjustments. WARNING: Before connecting the sander to a power supply, always make sure it is probably adjusted too far inward and is not in possible serious injury. Failure to adjust ...

English Manual
Page 12
...dust collection bag thoroughly upon completion of the coatings manufacturers. Also follow the recommendations of a sanding operation and before placing the sander in accidental starting causing possible serious injury. WARNING: Failure to unplug the tool could result in storage. WARNING: Failure to attach ... BAG RETAINER Fig. 9 12 OPERATION USING THE DUST COLLECTION BAG The dust collection bag provides a dust collection system for the sander. Follow these directions to unplug the tool could result in your dust bag frequently (10-15 minutes) while sanding and never store...
...dust collection bag thoroughly upon completion of the coatings manufacturers. Also follow the recommendations of a sanding operation and before placing the sander in accidental starting causing possible serious injury. WARNING: Failure to unplug the tool could result in storage. WARNING: Failure to attach ... BAG RETAINER Fig. 9 12 OPERATION USING THE DUST COLLECTION BAG The dust collection bag provides a dust collection system for the sander. Follow these directions to unplug the tool could result in your dust bag frequently (10-15 minutes) while sanding and never store...

English Manual
Page 13
...forward motion. These handles allow two-handed operation, which aids in loss of operation and maintaining proper control, the sander has a front handle and a rear handle. When operating the sander, always hold the front handle with your right hand. WARNING: Keep a firm grip on the sanding belt. ...to possible serious injury. Excessive pressure will result in an uneven surface. Clogged sanding belts. For ease of control leading to guide the sander. Follow these steps to run off, or if it from moving sanding belt, front idler roller, and driver roller assembly. Secure the...
...forward motion. These handles allow two-handed operation, which aids in loss of operation and maintaining proper control, the sander has a front handle and a rear handle. When operating the sander, always hold the front handle with your right hand. WARNING: Keep a firm grip on the sanding belt. ...to possible serious injury. Excessive pressure will result in an uneven surface. Clogged sanding belts. For ease of control leading to guide the sander. Follow these steps to run off, or if it from moving sanding belt, front idler roller, and driver roller assembly. Secure the...
English Manual
Page 14
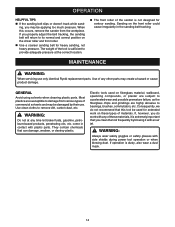
The front roller of the sander is dusty, also wear a dust mask. 14 Use clean cloths to bearings, brushes, commutators, etc. They contain chemicals that you clean the tool frequently by their use only identical Ryobi replacement parts. Electric tools used for extended work with an air jet. Use... pressure at any other parts may be applying too much pressure. If, however, you do not recommend that this occurs, remove the sander from various types of the tool is extremely important that can damage, weaken, or destroy plastic. If operation is not designed for heavy...
The front roller of the sander is dusty, also wear a dust mask. 14 Use clean cloths to bearings, brushes, commutators, etc. They contain chemicals that you clean the tool frequently by their use only identical Ryobi replacement parts. Electric tools used for extended work with an air jet. Use... pressure at any other parts may be applying too much pressure. If, however, you do not recommend that this occurs, remove the sander from various types of the tool is extremely important that can damage, weaken, or destroy plastic. If operation is not designed for heavy...

English Manual
Page 15
... old timing belt from the small pulley with a screwdriver and remove it as shown. Press the belt onto the large pulley turning it from the sander. Replace the belt cover and screws. MAINTENANCE REPLACING THE TIMING BELT See Figures 12 and 13. NOTE: If the timing belt is worn, simply... cut it and remove it. Hold the timing belt as you press the belt on. Unplug the sander. Remove the sanding belt from the large pulley. Install the new timing belt over the small pulley. Tighten the screws securely. WARNING: Failure to replace...
... old timing belt from the small pulley with a screwdriver and remove it as shown. Press the belt onto the large pulley turning it from the sander. Replace the belt cover and screws. MAINTENANCE REPLACING THE TIMING BELT See Figures 12 and 13. NOTE: If the timing belt is worn, simply... cut it and remove it. Hold the timing belt as you press the belt on. Unplug the sander. Remove the sanding belt from the large pulley. Install the new timing belt over the small pulley. Tighten the screws securely. WARNING: Failure to replace...

English Manual
Page 16
...area. Please call or visit. You can also check our Web site at a considerable distance from a power source, be used. OPERATOR'S MANUAL BELT SANDER BE318 DOUBLE INSULATED EXTENSION CORD CAUTION When using any extension cord, inspect it will be found on 12 gauge - 20 amp circuit. • SERVICE Now...extension cord clear of this tool will not get caught on lumber, tools or other obstructions while you call 1-800-525-2579 for your nearest Ryobi Authorized Service Center. Position the cord so that is indicated by the letters "WA" on tool faceplate) 0-2.0 Cord Length 25' 16 50'...
...area. Please call or visit. You can also check our Web site at a considerable distance from a power source, be used. OPERATOR'S MANUAL BELT SANDER BE318 DOUBLE INSULATED EXTENSION CORD CAUTION When using any extension cord, inspect it will be found on 12 gauge - 20 amp circuit. • SERVICE Now...extension cord clear of this tool will not get caught on lumber, tools or other obstructions while you call 1-800-525-2579 for your nearest Ryobi Authorized Service Center. Position the cord so that is indicated by the letters "WA" on tool faceplate) 0-2.0 Cord Length 25' 16 50'...

Repair Sheet
Page 1
RYOBI BELT SANDER - MODEL NUMBER BE318 49 12 13 9 10 11 4 58 4 3 1 2 17 15 14 27 26 25 7 24 23 2 6 19 20 21 38 28 37 18 35 36 11 34 33 42 16 32 31 29 30 41 39 40 46 47 45 44 43 48 WARNING: Improper repair of your tool requires safety testing and should only be performed by a Ryobi Authorized Service Center. For the service center nearest you call 1-800-525-2579. Any repairs requiring disassembly of a double insulated tool can result in damages to the double insulation system possibly causing electrical shock or electrocution.
RYOBI BELT SANDER - MODEL NUMBER BE318 49 12 13 9 10 11 4 58 4 3 1 2 17 15 14 27 26 25 7 24 23 2 6 19 20 21 38 28 37 18 35 36 11 34 33 42 16 32 31 29 30 41 39 40 46 47 45 44 43 48 WARNING: Improper repair of your tool requires safety testing and should only be performed by a Ryobi Authorized Service Center. For the service center nearest you call 1-800-525-2579. Any repairs requiring disassembly of a double insulated tool can result in damages to the double insulation system possibly causing electrical shock or electrocution.

Repair Sheet
Page 2
RYOBI BELT SANDER - Number 1 BE318-1 2 BE318-2 3 BE318-3 4 BE318-4 5 BE318-5 6 BE318-6 7 BE318-7 8 BE318-8 9 BE318-9 10 BE318-10 11 BE318-21 12 BE318-11 13 BE318-12 14 BE318-13 15 BE318-14 16 BE318-15 17 BE318-16 18 BE318-17 19 BE318-18 20 BE318-19 21 BE318-20 23 BE318-22 24 BE318-23 25 BE318-24 26 BE318-25 27 BE318-27 28 BE318-28 29 BE318-29 PARTS LIST Description Key Part Qty No. Key Part No. Always...
RYOBI BELT SANDER - Number 1 BE318-1 2 BE318-2 3 BE318-3 4 BE318-4 5 BE318-5 6 BE318-6 7 BE318-7 8 BE318-8 9 BE318-9 10 BE318-10 11 BE318-21 12 BE318-11 13 BE318-12 14 BE318-13 15 BE318-14 16 BE318-15 17 BE318-16 18 BE318-17 19 BE318-18 20 BE318-19 21 BE318-20 23 BE318-22 24 BE318-23 25 BE318-24 26 BE318-25 27 BE318-27 28 BE318-28 29 BE318-29 PARTS LIST Description Key Part Qty No. Key Part No. Always...

Repair Sheet
Page 3
RYOBI BELT SANDER - MODEL NUMBER BE318 BLACK BRUSH BLACK SWITCH WHITE POWER CORD BLACK MOTOR BRUSH BLACK BLACK WIRING DIAGRAM
RYOBI BELT SANDER - MODEL NUMBER BE318 BLACK BRUSH BLACK SWITCH WHITE POWER CORD BLACK MOTOR BRUSH BLACK BLACK WIRING DIAGRAM


