
User Manual (English)
Page 1
Universal Wireless Rear Speaker Kit RF-WHTIB User Guide
Universal Wireless Rear Speaker Kit RF-WHTIB User Guide

User Manual (English)
Page 2
Rocketfish RF-WHTIB Universal Wireless Rear Speaker Kit Contents Introduction 2 Features 4 Setting up your universal wireless rear speaker kit.. 7 Using your universal wireless rear speaker kit .........12 Troubleshooting 14 Specifications 15 Legal notices 15 One-Year Limited Warranty 17 Introduction Congratulations on your universal wireless rear speaker kit. Your RF-WHTIB Universal Wireless Rear Speaker Kit uses a proprietary 2.4 GHz wireless communication system to transmit low-latency, high fidelity audio to a stereo amplifier, providing a superior level of audio...
Rocketfish RF-WHTIB Universal Wireless Rear Speaker Kit Contents Introduction 2 Features 4 Setting up your universal wireless rear speaker kit.. 7 Using your universal wireless rear speaker kit .........12 Troubleshooting 14 Specifications 15 Legal notices 15 One-Year Limited Warranty 17 Introduction Congratulations on your universal wireless rear speaker kit. Your RF-WHTIB Universal Wireless Rear Speaker Kit uses a proprietary 2.4 GHz wireless communication system to transmit low-latency, high fidelity audio to a stereo amplifier, providing a superior level of audio...

User Manual (English)
Page 5
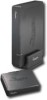
...; A holder for the receiver unit • An AC power adapter (for your RF-WHTIB Universal Wireless Rear Speaker Kit. Front view Back view 1 2 34 5 Bottom view 6 # Feature 1 Power indicator LED 2 Power button 3 Right speaker input terminals 4 Left speaker input terminals 5 DC IN jack 6 Manual connect button RF-WHTIB 5 Package contents Examine the contents of the box for the sender unit...
...; A holder for the receiver unit • An AC power adapter (for your RF-WHTIB Universal Wireless Rear Speaker Kit. Front view Back view 1 2 34 5 Bottom view 6 # Feature 1 Power indicator LED 2 Power button 3 Right speaker input terminals 4 Left speaker input terminals 5 DC IN jack 6 Manual connect button RF-WHTIB 5 Package contents Examine the contents of the box for the sender unit...

User Manual (English)
Page 7
RF-WHTIB 7 Setting up your universal wireless rear speaker kit Left speaker Center speaker Right speaker Right surround Receiver Left surround Amplifier Subwoofer Left surround Receiver Sender Right surround Note: If you need to mount the receiver, make sure that the left and right speaker cords are correctly connected to the speaker terminals of the receiver by checking the labels on the rear panel of the receiver.
RF-WHTIB 7 Setting up your universal wireless rear speaker kit Left speaker Center speaker Right speaker Right surround Receiver Left surround Amplifier Subwoofer Left surround Receiver Sender Right surround Note: If you need to mount the receiver, make sure that the left and right speaker cords are correctly connected to the speaker terminals of the receiver by checking the labels on the rear panel of the receiver.

User Manual (English)
Page 9
...AC power adapter The AC power adapter can be connected to a wall power outlet or the SWITCHED AC outlet of your universal wireless rear speaker kit. Connecting the receiver Connecting the receiver to your amplifier (on the back panel). Connecting the AC adapter To a wall power...outlet. OR Sender back panel To the SWITCHED AC outlet of your surround speakers Left surround speaker Right surround speaker To connect the surround speakers to the receiver: 1 Connect the right speaker to the left speaker terminals. RF-WHTIB 9 If you connect it to the SWITCHED AC outlet of the receiver...
...AC power adapter The AC power adapter can be connected to a wall power outlet or the SWITCHED AC outlet of your universal wireless rear speaker kit. Connecting the receiver Connecting the receiver to your amplifier (on the back panel). Connecting the AC adapter To a wall power...outlet. OR Sender back panel To the SWITCHED AC outlet of your surround speakers Left surround speaker Right surround speaker To connect the surround speakers to the receiver: 1 Connect the right speaker to the left speaker terminals. RF-WHTIB 9 If you connect it to the SWITCHED AC outlet of the receiver...

User Manual (English)
Page 12
... the receiver is an active link between the sender and receiver. 2 Turn on your amplifier, then play the audio or video source through your universal wireless rear speaker kit Establishing communications between them, the LED indicators turn on the System: 1 Press the (power) button on the back panel of the sender. For more information...
... the receiver is an active link between the sender and receiver. 2 Turn on your amplifier, then play the audio or video source through your universal wireless rear speaker kit Establishing communications between them, the LED indicators turn on the System: 1 Press the (power) button on the back panel of the sender. For more information...

User Manual (English)
Page 13
...-art 2.4 GHz technology to digitally send audio data from the sender to the rear speakers by 15-20 ms. RF-WHTIB 13 Wireless links create a small latency between the front and rear speakers. To optimize your system when tuning your surround sound The RocketFish Universal Wireless Rear Speaker Kit uses state-of the volume between the sender and receiver, and many A/V receivers...
...-art 2.4 GHz technology to digitally send audio data from the sender to the rear speakers by 15-20 ms. RF-WHTIB 13 Wireless links create a small latency between the front and rear speakers. To optimize your system when tuning your surround sound The RocketFish Universal Wireless Rear Speaker Kit uses state-of the volume between the sender and receiver, and many A/V receivers...

User Manual (English)
Page 14
...'s CONNECT button is on the front of both the sender and receiver, the front panel LEDs should be pressed for your universal wireless rear speaker kit. If they are connected correctly. When an active link is connected to see if the LEDs illuminate on the back panel.) This...the cables are solidly on and will also enter "connection mode." No communication between the sender and • Make sure that all speaker wires and the amplifier operation should light. During this period the CONNECT button on both the sender and receiver units. While in "connection...
...'s CONNECT button is on the front of both the sender and receiver, the front panel LEDs should be pressed for your universal wireless rear speaker kit. If they are connected correctly. When an active link is connected to see if the LEDs illuminate on the back panel.) This...the cables are solidly on and will also enter "connection mode." No communication between the sender and • Make sure that all speaker wires and the amplifier operation should light. During this period the CONNECT button on both the sender and receiver units. While in "connection...
