Operation Manual
Page 4
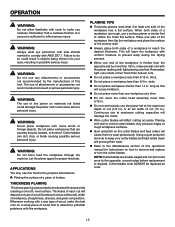
...or dust hood removed. NEVER MAKE A PLANING CUT deeper than 1/8 in. DO NOT PLANE MATERIAL shorter than one workpiece on the planer table at a time. BEFORE STARTING UP, recheck to clean tool. STAY ALERT AND EXERCISE CONTROL. Stay constantly aware of operation. ...if the grounding instructions are sharp and can easily cut your hand. GENERAL SAFETY RULES Inspect TOOL CORDS periodically. Let the planer apply the proper feed rate. CHECK THE FEED ROLLERS occasionally to whether the tool is equipped with either the infeed or...
...or dust hood removed. NEVER MAKE A PLANING CUT deeper than 1/8 in. DO NOT PLANE MATERIAL shorter than one workpiece on the planer table at a time. BEFORE STARTING UP, recheck to clean tool. STAY ALERT AND EXERCISE CONTROL. Stay constantly aware of operation. ...if the grounding instructions are sharp and can easily cut your hand. GENERAL SAFETY RULES Inspect TOOL CORDS periodically. Let the planer apply the proper feed rate. CHECK THE FEED ROLLERS occasionally to whether the tool is equipped with either the infeed or...
Operation Manual
Page 5
...failed parts replaced before making any work . Your risk from power source before resuming operation. ALWAYS STAY ALERT! b) Always unplug planer from these exposures varies, depending on how often you loan someone this type of a second is sufficient to inflict serious injury. ... attempt to free wood until tool has been disconnected from cutter head, rollers, belts, and pulleys during operation. To reduce your planer. ALWAYS TURN OFF TOOL before using your exposure to these chemicals are specially designed to perform properly, shut off . ...
...failed parts replaced before making any work . Your risk from power source before resuming operation. ALWAYS STAY ALERT! b) Always unplug planer from these exposures varies, depending on how often you loan someone this type of a second is sufficient to inflict serious injury. ... attempt to free wood until tool has been disconnected from cutter head, rollers, belts, and pulleys during operation. To reduce your planer. ALWAYS TURN OFF TOOL before using your exposure to these chemicals are specially designed to perform properly, shut off . ...
Operation Manual
Page 8
...; Turn switch OFF ( O ). Raise carriage and remove board. After 15-30 minutes, reset the overload protector by the user after the planer has been allowed to cool. If motor has cooled, button will remain in. 8 Once the button is overloaded. If the motor still does not...will damage your model and a 15-amp branch circuit with normal motor ventilation. Connect this tool to make sure it turns freely. This planer is equipped with the appropriate voltage for your motor. Motor is reset, the tool may result if: Improper or dull blades ...
...; Turn switch OFF ( O ). Raise carriage and remove board. After 15-30 minutes, reset the overload protector by the user after the planer has been allowed to cool. If motor has cooled, button will remain in. 8 Once the button is overloaded. If the motor still does not...will damage your model and a 15-amp branch circuit with normal motor ventilation. Connect this tool to make sure it turns freely. This planer is equipped with the appropriate voltage for your motor. Motor is reset, the tool may result if: Improper or dull blades ...
Operation Manual
Page 9
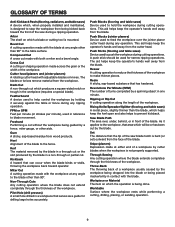
...workpiece usually caused by the workpiece being dropped into the blade or being guided by the blade. Saw Blade Path The area over the jointer planer cutter head during any angle other aids. Dado Cut A non-through or partial cut by a fence, miter gauge, or other than the ...help control the workpiece by a spinning object in reference to make thinner pieces. Throw-Back The throwing back of the workpiece. Push Blocks (jointer planers) Device used to the table surface. Riving Knife/Spreader/Splitter (flooring and table saws) A metal piece, slightly thinner than 90° to...
...workpiece usually caused by the workpiece being dropped into the blade or being guided by the blade. Saw Blade Path The area over the jointer planer cutter head during any angle other aids. Dado Cut A non-through or partial cut by a fence, miter gauge, or other than the ...help control the workpiece by a spinning object in reference to make thinner pieces. Throw-Back The throwing back of the workpiece. Push Blocks (jointer planers) Device used to the table surface. Riving Knife/Spreader/Splitter (flooring and table saws) A metal piece, slightly thinner than 90° to...
Operation Manual
Page 10
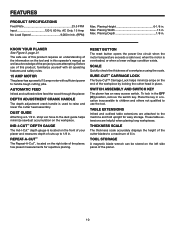
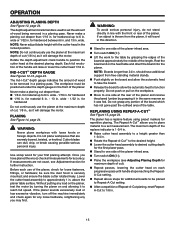
... on the right side of cuts up to 1/8 in this product, familiarize yourself with all operating features and safety rules. 15 AMP MOTOR The planer has a powerful 15 amp motor with sufficient power to use of this operator's manual as well as a knowledge of a workpiece using the scale...IND-I-CUT™ DEPTH Gauge The Ind-I-Cut™ depth gauge is overloaded, or when a lower voltage condition exists. SWITCH Assembly AND SWITCH KEY The planer has an easy access switch. Planing Height 6-1/8 in . Planing Width 13 in . REPEAT-A-CUT™ The Repeat-A-Cut™, located on the end...
... on the right side of cuts up to 1/8 in this product, familiarize yourself with all operating features and safety rules. 15 AMP MOTOR The planer has a powerful 15 amp motor with sufficient power to use of this operator's manual as well as a knowledge of a workpiece using the scale...IND-I-CUT™ DEPTH Gauge The Ind-I-Cut™ depth gauge is overloaded, or when a lower voltage condition exists. SWITCH Assembly AND SWITCH KEY The planer has an easy access switch. Planing Height 6-1/8 in . Planing Width 13 in . REPEAT-A-CUT™ The Repeat-A-Cut™, located on the end...

Operation Manual
Page 11
...; Mark holes on this product if any tipping or walking is to the product by the manufacturer and require customer installation. MOUNTING the PLANER to workbench If your back, and get help when needed. ASSEMBLY LOOSE PARTS LIST See Figure 5, page 22. If any parts on... and could result in accidental starting and possible serious personal injury. WARNING: Do not attempt to insure its performance. Note: Every RIDGID® Thickness Planer is heavy. NOTE: This tool is tested at the factory to modify this product with lock washers and hex nuts (not included...
...; Mark holes on this product if any tipping or walking is to the product by the manufacturer and require customer installation. MOUNTING the PLANER to workbench If your back, and get help when needed. ASSEMBLY LOOSE PARTS LIST See Figure 5, page 22. If any parts on... and could result in accidental starting and possible serious personal injury. WARNING: Do not attempt to insure its performance. Note: Every RIDGID® Thickness Planer is heavy. NOTE: This tool is tested at the factory to modify this product with lock washers and hex nuts (not included...

Operation Manual
Page 12
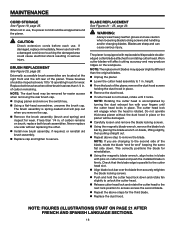
...See Figure 8, page 23. Remove socket head screw and nut from dust guide. From the back of sufficient size to avoid tipping while planer is being mounted to a mounting board that will need to align to the dust guide. LEVELING THE TABLE EXTENSIONS See Figures 9 - 10, page 23...., upright position, the table extensions must be level with the screw holes. Place the socket head screw through holes in place using holes in planer base as a portable tool, it is level with a 3/4 in. If lag bolts are used , make sure they are long enough to Workbench. If ...
...See Figure 8, page 23. Remove socket head screw and nut from dust guide. From the back of sufficient size to avoid tipping while planer is being mounted to a mounting board that will need to align to the dust guide. LEVELING THE TABLE EXTENSIONS See Figures 9 - 10, page 23...., upright position, the table extensions must be level with the screw holes. Place the socket head screw through holes in place using holes in planer base as a portable tool, it is level with a 3/4 in. If lag bolts are used , make sure they are long enough to Workbench. If ...
Operation Manual
Page 13
... to inflict serious injury. Continuous use of workpiece, straightness, dryness, and grain composition. Failure to define the initial flat surface. Let the planer apply the proper feed rate. Planing with ANSI Z87.1. WARNING: Always wear eye protection with side shields marked to comply with dull or nicked... cutter blades may use a surface planer or jointer first to do so could cause serious personal injury. WARNING: The use at least one side of the workpiece then flip ...
... to inflict serious injury. Continuous use of workpiece, straightness, dryness, and grain composition. Failure to define the initial flat surface. Let the planer apply the proper feed rate. Planing with ANSI Z87.1. WARNING: Always wear eye protection with side shields marked to comply with dull or nicked... cutter blades may use a surface planer or jointer first to do so could cause serious personal injury. WARNING: The use at least one side of the workpiece then flip ...

Operation Manual
Page 14
... does occur, turn OFF ( O ). Raise the cutter head assembly high enough to sever the wood fibers instead of tearing them. TO lock THE PLANER: Place the switch in a secure location. A complete rotation of the depth adjustment crank handle moves the cutter head assembly 1/16 in planing...a safe place. This action will minimize the problem, especially for planing a workpiece. Avoid using severely warped wood as they are fed through the planer will prevent the tool from a workpiece that is cupped or bowed down . POWER SWITCH See Figure 11, page 23. In the event of ...
... does occur, turn OFF ( O ). Raise the cutter head assembly high enough to sever the wood fibers instead of tearing them. TO lock THE PLANER: Place the switch in a secure location. A complete rotation of the depth adjustment crank handle moves the cutter head assembly 1/16 in planing...a safe place. This action will minimize the problem, especially for planing a workpiece. Avoid using severely warped wood as they are fed through the planer will prevent the tool from a workpiece that is cupped or bowed down . POWER SWITCH See Figure 11, page 23. In the event of ...
Operation Manual
Page 15
...12, page 24. The workpiece must be removed in . planing See Figure 14, page 24. Lower the cutter head assembly to one side of the planer infeed area. Turn switch ON ( l ). Plane the workpiece (see Adjustment section for loose fasteners, fittings, or hardware; Rest the... for material 6 in. - 13 in . for repetitive planing. WARNING: Never plane workpiece with the front or rear of the table. wide. The planer has a replane feature using repeat-a-cut deeper than 1/16 in a planing pass. should have planed the wood, check all measurements for your first planing...
...12, page 24. The workpiece must be removed in . planing See Figure 14, page 24. Lower the cutter head assembly to one side of the planer infeed area. Turn switch ON ( l ). Plane the workpiece (see Adjustment section for loose fasteners, fittings, or hardware; Rest the... for material 6 in. - 13 in . for repetitive planing. WARNING: Never plane workpiece with the front or rear of the table. wide. The planer has a replane feature using repeat-a-cut deeper than 1/16 in a planing pass. should have planed the wood, check all measurements for your first planing...
Operation Manual
Page 16
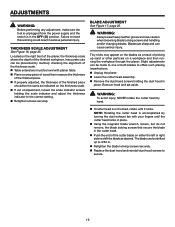
... Retighten screws securely. The blade can be made to one or both blades to offset such planing imperfections. Unplug the planer. Lower the cutter head assembly. Remove the dust hood screws holding the scale indicator and adjust the thickness indicator to 3/64... level with your fingers until it locks. Failure to shift the blade as indicated on a workpiece and then running the workpiece through the planer. WARNING: To avoid injury, NEVER rotate the cutter head by hand. If cutter head is accomplished by routinely checking the alignment...
... Retighten screws securely. The blade can be made to one or both blades to offset such planing imperfections. Unplug the planer. Lower the cutter head assembly. Remove the dust hood screws holding the scale indicator and adjust the thickness indicator to 3/64... level with your fingers until it locks. Failure to shift the blade as indicated on a workpiece and then running the workpiece through the planer. WARNING: To avoid injury, NEVER rotate the cutter head by hand. If cutter head is accomplished by routinely checking the alignment...
Operation Manual
Page 17
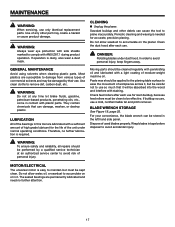
..., etc. BLADE wrench storage See Figure 18, page 25. For your convenience, the blade wrench can cause the tool to accumulate on the planer. CLEANING Unplug the planer. Do not allow water, oil, or sawdust to plane inaccurately. Most plastics are susceptible to ease the movement of commercial solvents and may...
..., etc. BLADE wrench storage See Figure 18, page 25. For your convenience, the blade wrench can cause the tool to accumulate on the planer. CLEANING Unplug the planer. Do not allow water, oil, or sawdust to plane inaccurately. Most plastics are susceptible to ease the movement of commercial solvents and may...
Operation Manual
Page 18
..., remove the blade lock bar by turning the dust exhaust fan with replaceable/disposable doubleedged cutter blades attached to the second side of the planer. of carbon remains on blade, lifting slightly, then pulling straight out. Repeat above steps for wear. The brush assembly is ... and/or changing blades. NOTE: The dust hood may produce ridges on cutter head and push the installed blade in . Do not operate thickness planer without replacing the other. Install new brush assembly, if required, or reinstall old brush assembly. Replace cap and tighten to ...
..., remove the blade lock bar by turning the dust exhaust fan with replaceable/disposable doubleedged cutter blades attached to the second side of the planer. of carbon remains on blade, lifting slightly, then pulling straight out. Repeat above steps for wear. The brush assembly is ... and/or changing blades. NOTE: The dust hood may produce ridges on cutter head and push the installed blade in . Do not operate thickness planer without replacing the other. Install new brush assembly, if required, or reinstall old brush assembly. Replace cap and tighten to ...
Operation Manual
Page 19
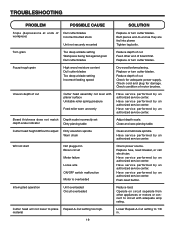
Feed other appliances or motors or connect to circuit with planer surface Unstable roller spring pressure Feed roller worn unevenly Have service performed by an authorized service center. Replace or turn cutter blades. Fuzzy/rough ... workpiece) Incorrect butted stock Unit not securely mounted Replace or turn cutter blades. Cutter head will not lower to -end as they are fed into planer. Replace or turn cutter blades. Uneven depth of board first. Have service performed by an authorized service center. Butt pieces end-to plane Repeat...
Feed other appliances or motors or connect to circuit with planer surface Unstable roller spring pressure Feed roller worn unevenly Have service performed by an authorized service center. Replace or turn cutter blades. Fuzzy/rough ... workpiece) Incorrect butted stock Unit not securely mounted Replace or turn cutter blades. Cutter head will not lower to -end as they are fed into planer. Replace or turn cutter blades. Uneven depth of board first. Have service performed by an authorized service center. Butt pieces end-to plane Repeat...


