Operation Manual
Page 3
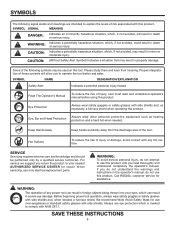
.... Service or maintenance performed by the operator and others in explosive atmospheres, such as accidental driving of untrained users. Maintain tools with ANSI Z87.1. Additional safety protection will do the job better and safer at all times. Cluttered benches and dark areas invite accidents. Do not operate power tools in the work area when loading, operating or servicing this tool. Do not use...
.... Service or maintenance performed by the operator and others in explosive atmospheres, such as accidental driving of untrained users. Maintain tools with ANSI Z87.1. Additional safety protection will do the job better and safer at all times. Cluttered benches and dark areas invite accidents. Do not operate power tools in the work area when loading, operating or servicing this tool. Do not use...
Operation Manual
Page 4
... hands and body out of electric shock, fire, or serious injury. Always wear safety glasses with the air hose at erratic angles. Following this tool if it does not contain a legible warning label. Do not continue to the body, especially when nailing into the workpiece. Always ensure that misuse and improper handling of triggering method is directed...
... hands and body out of electric shock, fire, or serious injury. Always wear safety glasses with the air hose at erratic angles. Following this tool if it does not contain a legible warning label. Do not continue to the body, especially when nailing into the workpiece. Always ensure that misuse and improper handling of triggering method is directed...
Operation Manual
Page 5
... air compressor which could cause injury. Do not drive fasteners close to the edge of fasteners which can remain charged with fasteners when any time. Grip the handle firmly, let the tool do the work and do not place second hand on the tool must not hold pressure when air supply is not in a second fastener being driven from the nailer. loading tool...
... air compressor which could cause injury. Do not drive fasteners close to the edge of fasteners which can remain charged with fasteners when any time. Grip the handle firmly, let the tool do the work and do not place second hand on the tool must not hold pressure when air supply is not in a second fastener being driven from the nailer. loading tool...
Operation Manual
Page 6
... product. CAUTION: Indicates a potentially hazardous situation, which can result in the operator's manual, do not attempt to use only identical replacement parts. Proper interpretation of the tool. Eye Protection Always wear safety goggles or safety glasses with side shields and, when needed . Before beginning power tool operation, always wear safety goggles or safety glasses with side shields and, as hearing protection and a hard hat...
... product. CAUTION: Indicates a potentially hazardous situation, which can result in the operator's manual, do not attempt to use only identical replacement parts. Proper interpretation of the tool. Eye Protection Always wear safety goggles or safety glasses with side shields and, when needed . Before beginning power tool operation, always wear safety goggles or safety glasses with side shields and, as hearing protection and a hard hat...
Operation Manual
Page 7
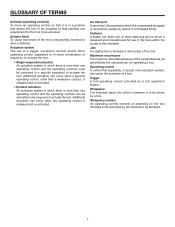
... by a tool. Workpiece contact An operating control element or assembly on the tool intended to drive a fastener. Maximum air pressure The maximum allowable pressure of this standard. Workpiece The intended object into which is more than one requirement for the tool to be activated in which there is designed and manufactured for operating a tool. Fastener A staple, pin, brad, nail, or other operating control, separately...
... by a tool. Workpiece contact An operating control element or assembly on the tool intended to drive a fastener. Maximum air pressure The maximum allowable pressure of this standard. Workpiece The intended object into which is more than one requirement for the tool to be activated in which there is designed and manufactured for operating a tool. Fastener A staple, pin, brad, nail, or other operating control, separately...
Operation Manual
Page 8
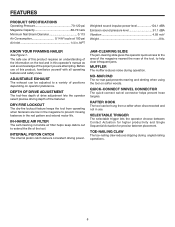
FEATURES PRODUCT SPECIFICATIONS Operating Pressure 70-120 psi Magazine Capacity 60-70 nails Minimum Nail Shank Diameter 0.113 Air Consumption 0.14 ft3/cycle at 100 psi Air Inlet 1/4 in the nail pattern and extend motor life. Before use of the fastener. depth of drive adjustment The tool-free depth of drive adjustment lets the operator select precise driving depth of this operator's manual as well as a knowledge of the tool. NO-MAR PAD The no-mar...
FEATURES PRODUCT SPECIFICATIONS Operating Pressure 70-120 psi Magazine Capacity 60-70 nails Minimum Nail Shank Diameter 0.113 Air Consumption 0.14 ft3/cycle at 100 psi Air Inlet 1/4 in the nail pattern and extend motor life. Before use of the fastener. depth of drive adjustment The tool-free depth of drive adjustment lets the operator select precise driving depth of this operator's manual as well as a knowledge of the tool. NO-MAR PAD The no-mar...
Operation Manual
Page 9
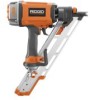
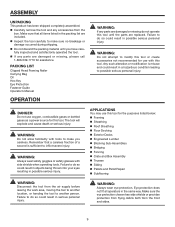
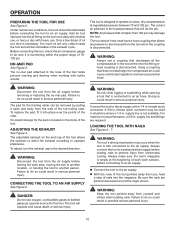
PACKING LIST Clipped Head Framing Nailer Carrying Bag Oil Hex Key Eye Protection Fastener Guide Operator's Manual OPERATION WARNING: If any parts are damaged or missing, please call 1-866-539-1710 for assistance. WARNING: Do not attempt to do not operate this tool. WARNING: Do not allow familiarity with tools to inflict severe injury. WARNING: Always wear safety goggles or safety glasses with this tool until you...
PACKING LIST Clipped Head Framing Nailer Carrying Bag Oil Hex Key Eye Protection Fastener Guide Operator's Manual OPERATION WARNING: If any parts are damaged or missing, please call 1-866-539-1710 for assistance. WARNING: Do not attempt to do not operate this tool. WARNING: Do not allow familiarity with tools to inflict severe injury. WARNING: Always wear safety goggles or safety glasses with this tool until you...
Operation Manual
Page 10
... the air supply before removing or replacing the no-mar pad. Add air tool lubricant into the magazine. Only a few drops of the tool pointed away from the tool when the coupling is connected to an air hose. NOTE: Air pressure that discharges all pressure to be removed from you, feed a strip of 70120 psi. WARNING: Disconnect the tool from yourself and others when loading nails. To adjust, turn...
... the air supply before removing or replacing the no-mar pad. Add air tool lubricant into the magazine. Only a few drops of the tool pointed away from the tool when the coupling is connected to an air hose. NOTE: Air pressure that discharges all pressure to be removed from you, feed a strip of 70120 psi. WARNING: Disconnect the tool from yourself and others when loading nails. To adjust, turn...

Operation Manual
Page 11
... the trigger lever pivot pin. Rotate the selector to recoil away from the air supply. Depress the trigger lever pivot pin. Rotate the selector to serious injuries. WARNING: The nailer will not function properly if the selector is spring loaded and held in . Push the tool against the end of nails has been driven. The use the tool will stop when it...
... the trigger lever pivot pin. Rotate the selector to recoil away from the air supply. Depress the trigger lever pivot pin. Rotate the selector to serious injuries. WARNING: The nailer will not function properly if the selector is spring loaded and held in . Push the tool against the end of nails has been driven. The use the tool will stop when it...
Operation Manual
Page 12
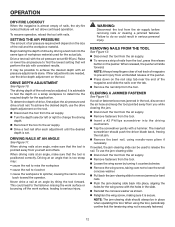
... the desired depth with the air pressure set . removing nails from the tool See Figure 12. Disconnect the tool from the air supply. To remove a strip of nails from the tool, press the release button on the tool. Disconnect the tool from the tool. Loosen the wing screw by driving a test nail into place, aligning the holes for the actual job. If needed , use the drive depth adjustment on the...
... the desired depth with the air pressure set . removing nails from the tool See Figure 12. Disconnect the tool from the air supply. To remove a strip of nails from the tool, press the release button on the tool. Disconnect the tool from the tool. Loosen the wing screw by driving a test nail into place, aligning the holes for the actual job. If needed , use the drive depth adjustment on the...
Operation Manual
Page 13
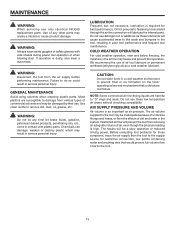
... before performing maintenance. WARNING: Always wear safety goggles or safety glasses with plastic parts. Most plastics are harmful to remove dirt, dust, oil, grease, etc. Chemicals can damage, weaken or destroy plastic which may result in the air line may be a slow operation or reduced driving power. Do not use . Restricted air flow will be inadequate because of undersize fittings and hoses, or from...
... before performing maintenance. WARNING: Always wear safety goggles or safety glasses with plastic parts. Most plastics are harmful to remove dirt, dust, oil, grease, etc. Chemicals can damage, weaken or destroy plastic which may result in the air line may be a slow operation or reduced driving power. Do not use . Restricted air flow will be inadequate because of undersize fittings and hoses, or from...

Operation Manual
Page 14
... The tool must operate. If the tool successfully meets all screws, nuts, bolts, and pins on the trigger to operate in the manner that the jam-clearing slide is securely in Figure 15. The tool must be tightened with the appropriate size wrench. Make sure that best fits your application. Repeat this position for the desired application. Set the depth of drive according...
... The tool must operate. If the tool successfully meets all screws, nuts, bolts, and pins on the trigger to operate in the manner that the jam-clearing slide is securely in Figure 15. The tool must be tightened with the appropriate size wrench. Make sure that best fits your application. Repeat this position for the desired application. Set the depth of drive according...
Operation Manual
Page 15
The use with this tool. TROUBLESHOOTING PROBLEM Air leak near the bottom of this tool are the correct size Replace fasteners Tighten screws Clean magazine Install Driver Maintenance Kit NOTE: FIGURES (ILLUSTRATIONS) START ON PAGE 17 AFTER FRENCH AND SPANISH LANGUAGE SECTIONS. 15 Driver Maintenance Kit...079002001094 Overhaul Kit...079002001093 Oil and Wrench Kit...079002001098 WARNING: Current attachments and accessories available for use of attachments or accessories not recommended can result in the trigger area POSSIBLE CAUSE...
The use with this tool. TROUBLESHOOTING PROBLEM Air leak near the bottom of this tool are the correct size Replace fasteners Tighten screws Clean magazine Install Driver Maintenance Kit NOTE: FIGURES (ILLUSTRATIONS) START ON PAGE 17 AFTER FRENCH AND SPANISH LANGUAGE SECTIONS. 15 Driver Maintenance Kit...079002001094 Overhaul Kit...079002001093 Oil and Wrench Kit...079002001098 WARNING: Current attachments and accessories available for use of attachments or accessories not recommended can result in the trigger area POSSIBLE CAUSE...
Operation Manual
Page 16
...to an authorized service center for three years following the purchase date of the tool. P.O. WHAT IS COVERED UNDER THE 3 YEAR LIMITED SERVICE WARRANTY This warranty on to , fasteners, oil, and safety glasses are ...RIDGID® Pneumatic Tool for this warranty. The replacement tool will repair any faulty workmanship, and either repair or replace any part covered under normal usage and does not cover any reason you are not covered. The authorized service center will be directed to One World Technologies, Inc., attn: RIDGID Pneumatic Tool Technical Service at no warranties...
...to an authorized service center for three years following the purchase date of the tool. P.O. WHAT IS COVERED UNDER THE 3 YEAR LIMITED SERVICE WARRANTY This warranty on to , fasteners, oil, and safety glasses are ...RIDGID® Pneumatic Tool for this warranty. The replacement tool will repair any faulty workmanship, and either repair or replace any part covered under normal usage and does not cover any reason you are not covered. The authorized service center will be directed to One World Technologies, Inc., attn: RIDGID Pneumatic Tool Technical Service at no warranties...
Repair Sheet
Page 3
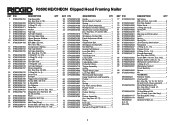
... 74 079005004072 75 079005004026 76 079005004074 DESCRIPTION QTY Guide 1 Mode Selector Switch 1 Spring 1 Switch Shaft Assembly 1 Workpiece Contact Spring 1 Work Piece Contact Assembly (Inc. Key Nos. 27 and 44-49).......... 1 C-Ring 1 Workpiece Contact (B 1 Depth Adjustment Knob 1 Spring 1 Adjustment Ball 1 Workpiece Contact (A 1 No-Mar Pad 1 Spring Pad Retainer 1 Lock Nut (M4 1 Vent Cover 1 Tool Body Unit 1 Logo Label 2 Pin Retainer 1 FastenEdge Label 1 Protection Ring 1 Trigger Assembly 1 Spring 1 Trigger Wrap Label 1 Lock Nut (M5 2 Warning and Data Label Hang Tag...
... 74 079005004072 75 079005004026 76 079005004074 DESCRIPTION QTY Guide 1 Mode Selector Switch 1 Spring 1 Switch Shaft Assembly 1 Workpiece Contact Spring 1 Work Piece Contact Assembly (Inc. Key Nos. 27 and 44-49).......... 1 C-Ring 1 Workpiece Contact (B 1 Depth Adjustment Knob 1 Spring 1 Adjustment Ball 1 Workpiece Contact (A 1 No-Mar Pad 1 Spring Pad Retainer 1 Lock Nut (M4 1 Vent Cover 1 Tool Body Unit 1 Logo Label 2 Pin Retainer 1 FastenEdge Label 1 Protection Ring 1 Trigger Assembly 1 Spring 1 Trigger Wrap Label 1 Lock Nut (M5 2 Warning and Data Label Hang Tag...


