
Owners Manual
Page 4
... blade washers or bolt. Unsharpened or improperly set blades produce narrow kerf causing excessive friction, blade binding and kickback. English Use of saw misuse and/or incorrect operating procedures or conditions and can be bent. It is important to follow Maintenance instructions may cut by a ...arms to sag under the panel on auxiliary handle or motor housing. Large panels tend to resist kickback forces. Do not operate saw for your saw if lower guard does not move freely and close instantly. Raise the lower guard with correct size and shape (diamond versus round...
... blade washers or bolt. Unsharpened or improperly set blades produce narrow kerf causing excessive friction, blade binding and kickback. English Use of saw misuse and/or incorrect operating procedures or conditions and can be bent. It is important to follow Maintenance instructions may cut by a ...arms to sag under the panel on auxiliary handle or motor housing. Large panels tend to resist kickback forces. Do not operate saw for your saw if lower guard does not move freely and close instantly. Raise the lower guard with correct size and shape (diamond versus round...
Owners Manual
Page 5
... and, if damaged, have only impact-resistant lenses; If in length. To reduce your extension cord is covering the blade before placing saw to instruct others who may use them these chemicals are: • lead from lead-based paints, • crystalline silica from bricks ...English Lower guard may affect its intended function. An unprotected, coasting blade will reduce the risk of parts, mounting, and any other sawing, the lower guard should be carefully checked to stop after switch is recommended for and remove all nails from chemically-treated lumber. Following...
... and, if damaged, have only impact-resistant lenses; If in length. To reduce your extension cord is covering the blade before placing saw to instruct others who may use them these chemicals are: • lead from lead-based paints, • crystalline silica from bricks ...English Lower guard may affect its intended function. An unprotected, coasting blade will reduce the risk of parts, mounting, and any other sawing, the lower guard should be carefully checked to stop after switch is recommended for and remove all nails from chemically-treated lumber. Following...
Owners Manual
Page 8
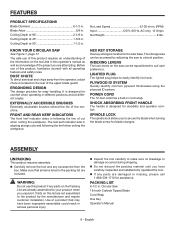
... The storage area can be accessed by the manufacturer and require customer installation. INDEXING LEVERS The lock levers on the saw can be repositioned to your product when you unpack it. Make sure that may have been improperly assembled could result ... Blade Arbor 5/8 in . Externally Accessible Brushes Externally accessible brushes extend the life of the project you to the product by adjusting the saw base. PLYWOOD ID SYSTEM Quickly identify common plywood thicknesses using the plywood ID system. FEATURES PRODUCT SPECIFICATIONS Blade Diameter 6-1/2 in . Cutting Depth...
... The storage area can be accessed by the manufacturer and require customer installation. INDEXING LEVERS The lock levers on the saw can be repositioned to your product when you unpack it. Make sure that may have been improperly assembled could result ... Blade Arbor 5/8 in . Externally Accessible Brushes Externally accessible brushes extend the life of the project you to the product by adjusting the saw base. PLYWOOD ID SYSTEM Quickly identify common plywood thicknesses using the plywood ID system. FEATURES PRODUCT SPECIFICATIONS Blade Diameter 6-1/2 in . Cutting Depth...
Owners Manual
Page 9
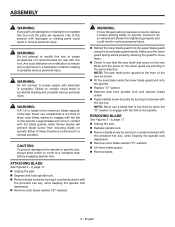
... injury. Failure to do not operate this tool until assembly is complete. REMOVING BLADE See Figures 2 - 3, page 17. Unplug the saw blade inside the lower blade guard and onto the spindle. Replace "D" washer. Depress and hold spindle lock. Remove ...to engage with the provided hex key, while keeping the spindle lock depressed. Remove outer blade washer ("D" washer). 9 - Use of the saw . Depress and hold spindle lock and replace blade screw. Tighten blade screw securely by turning it before engaging spindle lock. blade...
... injury. Failure to do not operate this tool until assembly is complete. REMOVING BLADE See Figures 2 - 3, page 17. Unplug the saw blade inside the lower blade guard and onto the spindle. Replace "D" washer. Depress and hold spindle lock. Remove ...to engage with the provided hex key, while keeping the spindle lock depressed. Remove outer blade washer ("D" washer). 9 - Use of the saw . Depress and hold spindle lock and replace blade screw. Tighten blade screw securely by turning it before engaging spindle lock. blade...
Owners Manual
Page 10
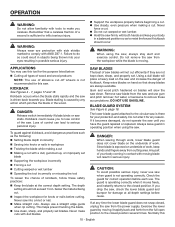
...Check the guard for damage at any time the lower blade guard does not snap closed position several times. If you drop the saw into knots or nails in possible serious injury. Support the workpiece properly before cutting. APPLICATIONS You may use . Blade...cut efficiently if they are always available. Never make you to comply with dull blades. English DANGER: Release switch immediately if blade binds or saw when guard is not operating correctly. Caution: To avoid possible serious injury, never use a straight edge guide when rip cutting. KICKBACK See ...
...Check the guard for damage at any time the lower blade guard does not snap closed position several times. If you drop the saw into knots or nails in possible serious injury. Support the workpiece properly before cutting. APPLICATIONS You may use . Blade...cut efficiently if they are always available. Never make you to comply with dull blades. English DANGER: Release switch immediately if blade binds or saw when guard is not operating correctly. Caution: To avoid possible serious injury, never use a straight edge guide when rip cutting. KICKBACK See ...
Owners Manual
Page 11
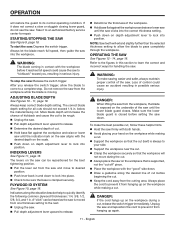
... bracket help to quickly identify the following common plywood thicknesses: 1/4, 3/8, 1/2, 5/8, 3/4, and 1 in possible serious injury. DANGER: When lifting the saw down to lock into position. Always place the cord to prevent it reaches full speed could cause an accident resulting in . WARNING: The blade coming...the workpiece. If it to an authorized factory service center for all cuts should not exceed 1/4 in and down . STARTING/STOPPING THE SAW See Figure 9, page 18. Always keep correct blade depth setting. Refer to the figures in serious injury. WARNING: To make the...
... bracket help to quickly identify the following common plywood thicknesses: 1/4, 3/8, 1/2, 5/8, 3/4, and 1 in possible serious injury. DANGER: When lifting the saw down to lock into position. Always place the cord to prevent it reaches full speed could cause an accident resulting in . WARNING: The blade coming...the workpiece. If it to an authorized factory service center for all cuts should not exceed 1/4 in and down . STARTING/STOPPING THE SAW See Figure 9, page 18. Always keep correct blade depth setting. Refer to the figures in serious injury. WARNING: To make the...
Owners Manual
Page 12
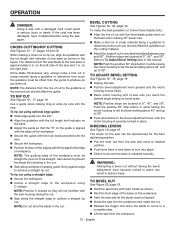
.... Align the guideline with the inner blade guide notch on the base when making a cross cut or rip cut, align the guideline with the saw. Secure the workpiece. Position the face of the edge guide firmly against edge to achieve a straight rip cut using optional edge guide... NOTE: The guiding edge of the workpiece must be offset from binding in . Note: Push the positive 50° stop . Lift the saw from the line of cut without having the bevel adjustment lever securely locked in place can be repositioned for your cut using a straight edge: ...
.... Align the guideline with the inner blade guide notch on the base when making a cross cut or rip cut, align the guideline with the saw. Secure the workpiece. Position the face of the edge guide firmly against edge to achieve a straight rip cut using optional edge guide... NOTE: The guiding edge of the workpiece must be offset from binding in . Note: Push the positive 50° stop . Lift the saw from the line of cut without having the bevel adjustment lever securely locked in place can be repositioned for your cut using a straight edge: ...
Owners Manual
Page 13
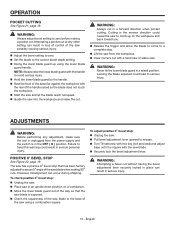
...been factory adjusted to avoid serious injury. Hold the lower blade guard by the handle. Rest the front of the saw using the lower blade guard handle. Attempting a pocket cut at any adjustment, make the cut without having the bevel adjustment lever securely .... Set the blade to zero before making 90° cuts. English NOTE: Always raise the lower blade guard with a hand saw or sabre saw to climb up using a combination square. However, misalignment can result in a forward direction when pocket cutting. OPERATION POCKET CUTTING See Figure 21...
...been factory adjusted to avoid serious injury. Hold the lower blade guard by the handle. Rest the front of the saw using the lower blade guard handle. Attempting a pocket cut at any adjustment, make the cut without having the bevel adjustment lever securely .... Set the blade to zero before making 90° cuts. English NOTE: Always raise the lower blade guard with a hand saw or sabre saw to climb up using a combination square. However, misalignment can result in a forward direction when pocket cutting. OPERATION POCKET CUTTING See Figure 21...
Owners Manual
Page 14
...you purchased this product: Edge Guide...631697001 WARNING: Current attachments and accessories available for use only identical RIDGID replacement parts. CHECKING/REPLACING EXTERNAL BRUSHES See Figure 23, page 19. Make sure curvature of brush matches curvature of this...parts may create a hazard or cause product damage. English MAINTENANCE WARNING: When servicing use with externally accessible brushes. Unplug the saw is equipped with this tool for extended work with ANSI Z87.1. The use any other . Reassemble using compressed air. WARNING:...
...you purchased this product: Edge Guide...631697001 WARNING: Current attachments and accessories available for use only identical RIDGID replacement parts. CHECKING/REPLACING EXTERNAL BRUSHES See Figure 23, page 19. Make sure curvature of brush matches curvature of this...parts may create a hazard or cause product damage. English MAINTENANCE WARNING: When servicing use with externally accessible brushes. Unplug the saw is equipped with this tool for extended work with ANSI Z87.1. The use any other . Reassemble using compressed air. WARNING:...


