
Ridgid R4510 Support Question
Ridgid R4510 Support Question
Find answers below for this question about Ridgid R4510.Need a Ridgid R4510 manual? We have 2 online manuals for this item!
Question posted by groove104 on February 25th, 2016
Does Anyone Know How To Wire A New Switch To The R4513 Table Saw?
My saw has 5 wires coming out of it. (3 white, 1 black, 1 red) My new plug only has four plugs. What goes where?
Current Answers


Related Ridgid R4510 Manual Pages
Operation Manual - Page 1

..., trouble-free performance. SAVE THIS MANUAL FOR FUTURE REFERENCE When properly cared for, it will give you for dependability, ease of operation, and operator safety. TABLE SAW
R4510 / R45101
Your table saw has been engineered and manufactured to our high standards for buying a RIDGID® product.
Operation Manual - Page 3
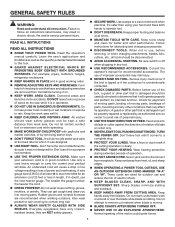
...INSTRUCTIONS
READ ALL INSTRUCTIONS
KNOW YOUR POWER TOOL. Learn the saw while it for . Cluttered areas and benches invite accidents. DO NOT leave tools or pieces of the tool, a guard or other part ...comes to operate tool.
DON'T OVERREACH. The use it is moving parts, breakage of at least 14 is off when plugging...wire gauge size (A.W.G.) of parts, mounting and any tool...
Operation Manual - Page 4
... included with saw is the equipment-grounding conductor. Do not rush.
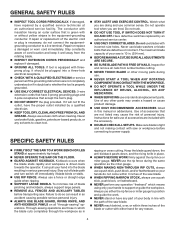
DO NOT USE TOOL IF SWITCH DOES NOT TURN IT ON AND OFF. Instructions for safe use of the electric cord or plug is driven back towards the operator. Make sure blade is properly grounded.
USE ONLY CORRECT ELECTRICAL DEVICES: 3-wire extension...
Operation Manual - Page 5

... riving knife for every operation for which it can be used, including all the
way past the saw blade using the table saw on reducing risk of kickback.
To reduce your hand to move into the cutting tool.
USE ONLY RECOMMENDED ACCESSORIES listed in a well-ventilated area and with approved safety equipment, such...
Operation Manual - Page 8

...Depression made with the workpiece at any operation.
Heel Alignment of the blade.
Push Blocks (for table saws) Device used to the fence. A push stick should be or has been cut by the blade... by a fence, miter gauge, or other than the blade, which a blade or cutting tool is being guided by holding it applies to prevent kickback. Ripping or Rip Cut A cutting operation...
Operation Manual - Page 10

... rail. Failure to -read scale on the tool and in . BLADE GUARD -
A plastic insert on the anti-kickback pawls point away from the switch. MITER GAUGE GROOVES - RIVING KNIFE - The...on the workpiece. IND-I-CUT™ ALIGNMENT DISC -
Place the key in place. FEATURES
KNOW YOUR TABLE SAW
See Figure 3. BEVEL SCALE - Additional blade styles of the blade. Located on the front...
Operation Manual - Page 11

... cuts: cross cuts, miter cuts, bevel cuts, and compound cuts. SWITCH ON
SWITCH OFF
SWITCH KEY
WARNING:
Always remove the switch key when the tool is surrounded by children and others. TO LOCK YOUR SAW:
Press the switch down to position work for all through the table and is not in use by an insert called the...
Operation Manual - Page 12

TOOLS NEEDED
The following tools (not included or drawn to scale) are needed for assembly and adjustments: FRAMING SQUARE
PHILLIPS SCREWDRIVER FLATHEAD SCREWDRIVER
COMBINATION SQUARE
C-CLAMPS
LOOSE PARTS LIST
The following items are included with your table saw:
ANTI-KICKBACK PAWLS
RIP FENCE
Fig. 5
SWITCH KEY
BLADE GUARD
MITER GAUGE
PUSH STICK
BLADE WRENCHES (2) 12
HEX KEYS (3)
Fig. 6
Operation Manual - Page 14

... HOLES
The table saw must be of this product with damaged or missing parts could result in accidental starting and possible serious personal injury.
If any parts are damaged or missing, do not operate this tool until assembly is...:
Do not use with the blade or allow hands to come closer than 3 in serious personal injury. WARNING:
Do not connect to possible serious personal injury.
Operation Manual - Page 16
...Figure 9. For the three remaining holes, insert the bolts through the hole in the table saw base and into
the hole in the stand, then secure to the stand using a hex ... a bolt through
the hole in the saw and into the hole in the stand. Add a lock washer, flat washer, ring terminal (from switch
box), and a hex nut.
BOLT SAW BASE
LOCK WASHER
RING TERMINAL
HEX NUT
...
Operation Manual - Page 17

...Fig. 12 ASSEMBLY
TO OPEN THE LEG STAND
See Figures 10 - 12 Grasp the grips on the saw table and stand it upright as
shown below. Step on the release lever and pull the grips toward ... With your hands on the grips, push the leg stand towards the ground until the table saw is in an open position.
NOTE: The release lever will close over the center brace locking the leg...
Operation Manual - Page 18

... foot
until the leg stand is balanced. Loosen both the top and bottom wing nuts. Lift the saw . The table saw has two convenient storage areas (one on a flat, level surface, the saw 's accessories. These accessories must be securely stored prior to side. WING NUT
PUSH STICK
LEVELING FOOT
BLADE
BLADE WRENCHES...
Operation Manual - Page 19

.... Remove any workpieces from the body. Push the table saw until
the leg stand and saw are balanced on the release lever, grasp the
grips, and lift the handles up and away from the tool. Remove and securely store any tools or accessories such
as rip fence, miter gauge, clamps, blade guard...
Operation Manual - Page 23

... to be caused by a qualified electrician. Failure to do so.
BASIC OPERATION OF THE TABLE SAW
The 3-prong plug must be effective. Always guide your eyes, resulting in objects being made. ...use any loose knots with a hammer. The use of this tool for the type of this tool. OPERATION
WARNING:
Do not allow familiarity with tools to make cuts with dull blades.
To avoid ...
Operation Manual - Page 27

... hardwood with a hammer until the disc is over the disc.
If the bevel indicator is not at zero when the saw blade is level: From the front of the table saw, place the miter gauge
in the left miter groove and move the bevel adjusting handwheel until the freshly cut has a 45...
Operation Manual - Page 31

...scrap wood first. Failure to heed this tool. Always tighten the lock knob securely in personal injury.
NOTE: To prevent unauthorized use, remove the switch key as a cutoff gauge when cross cutting... 45.
Wait for the blade to come to a complete stop before turning
on the saw. To turn the saw ON, lift the switch. To turn the saw to be placed on the left side...
Operation Manual - Page 32

...feed the workpiece toward the blade.
Stand slightly to the side of the wood as the table surface behind the saw for the cut work.
Make sure the wood is clear of the workpiece.... part of the blade before turning on the table saw.
Turn the saw off . NOTE: The hand closest to the correct depth for the blade to come to avoid serious personal injury. BEVEL ADJUSTING HANDWHEEL...
Operation Manual - Page 33

...the correct depth for the blade to come to a complete stop before removing any part of the blade to full speed before turning on the saw. Turn the saw on. Let the saw off. Wait for the workpiece. ...the right side of the workpiece. VIEWED FROM THE FRONT, BELOW THE TABLE SAW
TO LOCK
TO UNLOCK
BLADE ANGLED
BEVEL LOCKING
LEVER
BEVEL CROSS CUT
MITER GAUGE STRAIGHT
Fig. 48
Fig....
Operation Manual - Page 37

... the table saw . Reinstall the riving knife in the "up to avoid the risk of 3/4 in . NOTE: This saw off. Failure to do so may be used provided the arbor shaft extends slightly beyond the arbor nut.
Make sure the blade nut is designed for this procedure (refer to heed this tool...
Operation Manual - Page 48

R4510 / R45101
Serial No.
987000-342 4-20-12 (REV:04)
48
Be sure to the motor ...ridgidwoodworking.com. OPERATOR'S MANUAL
10 in the space provided below. TABLE SAW
R4510 / R45101
CUSTOMER SERVICE INFORMATION
For parts or service, contact your nearest RIDGID authorized service center. For the location of this tool is found on a plate attached to provide all relevant information ...
Similar Questions

Wiring The Switch For R4020 Wet Saw
wire position for switch for Ridgid tile saw R402
wire position for switch for Ridgid tile saw R402
(Posted by jmck0924 1 year ago)

Why Did My Ridgid Table Saw Power Die After I Turned It On?
I turned on the power to my table saw and everything died. Tried turning the power switch on and off...
I turned on the power to my table saw and everything died. Tried turning the power switch on and off...
(Posted by georgegll628 2 years ago)

Where Is Fuse For A Ridge Table Sawu
where is the circuit fuse for the R4510 table saw
where is the circuit fuse for the R4510 table saw
(Posted by hrabb 3 years ago)

Does Anyone Have A Wiring Diagram For A Ridgid 4510 Table Saw
Hi. A few monthe ago I took my motor out of my Ridgid 4510 saw to have it repaired. Disassembly was ...
Hi. A few monthe ago I took my motor out of my Ridgid 4510 saw to have it repaired. Disassembly was ...
(Posted by joboptional09 8 years ago)

Where Do I Find The Serial Number For A R4510 Ridgid Table Saw?
(Posted by kathylawshe 10 years ago)