User's Guide
Page 2
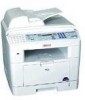
... are subject to change without prior notice. This guide also provides the basic description of handling or operating the machine. About the User's Guide This Laser MFP User's Guide provides information you need for setting up your computer. SmarThru also lets you access scanned images that you can then email from...
... are subject to change without prior notice. This guide also provides the basic description of handling or operating the machine. About the User's Guide This Laser MFP User's Guide provides information you need for setting up your computer. SmarThru also lets you access scanned images that you can then email from...
User's Guide
Page 6
Aficio FX200/DSm520pf/AC120/Aficio FX200L/DSm520pfl/AC120L : The CE declaration of Comformity is available on the Internet at URL : http://www.ricoh.co.jp/fax/ce_doc IS 2020S : The CE declaration of Comformity is available on the Internet at the end of its literature, indicates...be disposed with the essential requirements and provisions of Directive 1999/5/EC of the European Parliament and of the Council of 9 March 1999 on software switch settings. In the event of the purchase contract. To prevent possible harm to the environment or human health from uncontrolled waste disposal, please...
Aficio FX200/DSm520pf/AC120/Aficio FX200L/DSm520pfl/AC120L : The CE declaration of Comformity is available on the Internet at URL : http://www.ricoh.co.jp/fax/ce_doc IS 2020S : The CE declaration of Comformity is available on the Internet at the end of its literature, indicates...be disposed with the essential requirements and provisions of Directive 1999/5/EC of the European Parliament and of the Council of 9 March 1999 on software switch settings. In the event of the purchase contract. To prevent possible harm to the environment or human health from uncontrolled waste disposal, please...
User's Guide
Page 12
... Save Mode 2.24 Scan Lamp Save Mode 2.24 About the Software 2.26 Printer Driver Features 2.27 Installing the Software in Windows 2.28 System Requirements 2.28 Installing Software for Local Printing 2.29 Installing Software for Network Printing 2.34 Installing the SmarThru 4 2.41 Repairing Software 2.43 Removing Software 2.44 Uninstalling the MFP Driver 2.44 Uninstalling the SmarThru 2.45...
... Save Mode 2.24 Scan Lamp Save Mode 2.24 About the Software 2.26 Printer Driver Features 2.27 Installing the Software in Windows 2.28 System Requirements 2.28 Installing Software for Local Printing 2.29 Installing Software for Network Printing 2.34 Installing the SmarThru 4 2.41 Repairing Software 2.43 Removing Software 2.44 Uninstalling the MFP Driver 2.44 Uninstalling the SmarThru 2.45...
User's Guide
Page 23
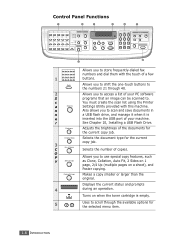
... C O P Y Special Copy Reduce/Enlarge 4 5 Allows you to . You must create the scan list using the Printer Settings Utility provided with the touch of your PC software programs that an image can be scanned to access a list of the documents for the current copy job. Adjusts the brightness of your machine. Displays...
... C O P Y Special Copy Reduce/Enlarge 4 5 Allows you to . You must create the scan list using the Printer Settings Utility provided with the touch of your PC software programs that an image can be scanned to access a list of the documents for the current copy job. Adjusts the brightness of your machine. Displays...
User's Guide
Page 26
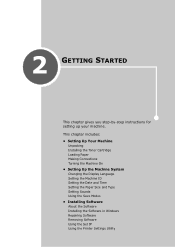
... Machine ID Setting the Date and Time Setting the Paper Size and Type Setting Sounds Using the Save Modes • Installing Software About the Software Installing the Software in Windows Repairing Software Removing Software Using the Set IP Using the Printer Settings Utility 2 GETTING STARTED This chapter gives you step-by-step instructions for setting...
... Machine ID Setting the Date and Time Setting the Paper Size and Type Setting Sounds Using the Save Modes • Installing Software About the Software Installing the Software in Windows Repairing Software Removing Software Using the Set IP Using the Printer Settings Utility 2 GETTING STARTED This chapter gives you step-by-step instructions for setting...
User's Guide
Page 27
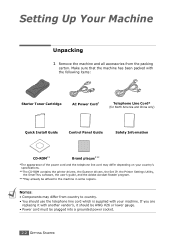
... been packed with your country's specifications. **The CD-ROM contains the printer drivers, the Scanner drivers, the Set IP, the Printer Settings Utility, the SmarThru software, the user's guide, and the Adobe Acrobat Reader program. ***May already be affixed to country. • You should be AWG #26 or lower gauge. •...
... been packed with your country's specifications. **The CD-ROM contains the printer drivers, the Scanner drivers, the Set IP, the Printer Settings Utility, the SmarThru software, the user's guide, and the Adobe Acrobat Reader program. ***May already be affixed to country. • You should be AWG #26 or lower gauge. •...
User's Guide
Page 51
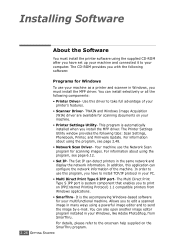
... Direct Print Type S IPP port- Your machine use your machine as a printer and scanner in Windows, you must install the printer software using the supplied CD-ROM after you to edit a scanned image in your machine. • Printer Settings Utility- The Printer Settings Utility...driver. You can configure the network information of your Windows, like Adobe PhotoShop, from Windows applications. • SmarThru- Installing Software About the Software You must install the MFP driver. TWAIN and Windows Image Acquisition (WIA) driver are available for your computer. This program is...
... Direct Print Type S IPP port- Your machine use your machine as a printer and scanner in Windows, you must install the printer software using the supplied CD-ROM after you to edit a scanned image in your machine. • Printer Settings Utility- The Printer Settings Utility...driver. You can configure the network information of your Windows, like Adobe PhotoShop, from Windows applications. • SmarThru- Installing Software About the Software You must install the MFP driver. TWAIN and Windows Image Acquisition (WIA) driver are available for your computer. This program is...
User's Guide
Page 53
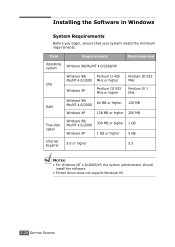
... XP 1 GB or higher 5 GB Internet Explorer 5.0 or higher 5.5 NOTES: • For Windows NT 4.0/2000/XP, the system administrator should install the software. • Printer driver does not support Windows 95. 2.28 GETTING STARTED Installing the Software in Windows System Requirements Before you begin, ensure that your system meets the minimum requirements.
... XP 1 GB or higher 5 GB Internet Explorer 5.0 or higher 5.5 NOTES: • For Windows NT 4.0/2000/XP, the system administrator should install the software. • Printer driver does not support Windows 95. 2.28 GETTING STARTED Installing the Software in Windows System Requirements Before you begin, ensure that your system meets the minimum requirements.
User's Guide
Page 54
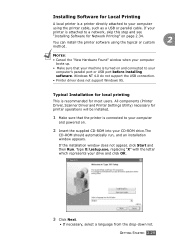
... 95. Type X:\setup.exe, replacing "X" with the letter which represents your computer's parallel port or USB port before installing software. You can install the printer software using the printer cable, such as a USB or parallel cable. If the installation window does not appear, click Start and... then Run. Installing Software for Network Printing" on page 2.34. If your printer is attached to a network, skip this step and see "Installing Software for Local Printing A local printer is turned on and connected to your CD...
... 95. Type X:\setup.exe, replacing "X" with the letter which represents your computer's parallel port or USB port before installing software. You can install the printer software using the printer cable, such as a USB or parallel cable. If the installation window does not appear, click Start and... then Run. Installing Software for Network Printing" on page 2.34. If your printer is attached to a network, skip this step and see "Installing Software for Local Printing A local printer is turned on and connected to your CD...
User's Guide
Page 56
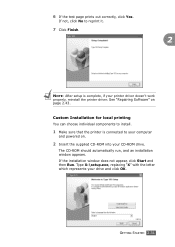
... the letter which represents your printer driver doesn't work properly, reinstall the printer driver. 6 If the test page prints out correctly, click Yes. See "Repairing Software" on . 2 Insert the supplied CD-ROM into your CD-ROM drive. If not, click No to reprint it. 7 Click Finish. 2 NOTE: After setup is connected...
... the letter which represents your printer driver doesn't work properly, reinstall the printer driver. 6 If the test page prints out correctly, click Yes. See "Repairing Software" on . 2 Insert the supplied CD-ROM into your CD-ROM drive. If not, click No to reprint it. 7 Click Finish. 2 NOTE: After setup is connected...
User's Guide
Page 59
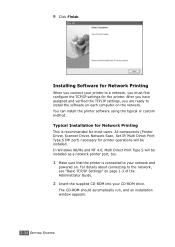
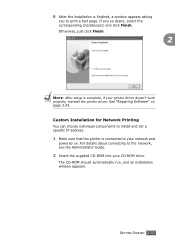
You can install the printer software using the typical or custom method. All components (Printer Driver, Scanner Driver, Network Scan, Set IP, Multi Direct Print Type S IPP port) necessary for printer ... Settings" on page 1-3 of the Administrator Guide. 2 Insert the supplied CD-ROM into your network and powered on the network. Installing Software for Network Printing This is connected to install the software on each computer on . For details about connecting to a network, you are ready to your CD-ROM drive. 9 Click Finish...
You can install the printer software using the typical or custom method. All components (Printer Driver, Scanner Driver, Network Scan, Set IP, Multi Direct Print Type S IPP port) necessary for printer ... Settings" on page 1-3 of the Administrator Guide. 2 Insert the supplied CD-ROM into your network and powered on the network. Installing Software for Network Printing This is connected to install the software on each computer on . For details about connecting to a network, you are ready to your CD-ROM drive. 9 Click Finish...
User's Guide
Page 62
... to the network, see the Administrator Guide. 2 Insert the supplied CD-ROM into your printer driver doesn't work properly, reinstall the printer driver. See "Repairing Software" on . 6 After the installation is finished, a window appears asking you so desire, select the corresponding checkbox(es) and click Finish. The CD-ROM should automatically...
... to the network, see the Administrator Guide. 2 Insert the supplied CD-ROM into your printer driver doesn't work properly, reinstall the printer driver. See "Repairing Software" on . 6 After the installation is finished, a window appears asking you so desire, select the corresponding checkbox(es) and click Finish. The CD-ROM should automatically...

User's Guide
Page 65
6 Select the components to be installed and click Next. 7 After selecting the components, the following window appears. Click Next. If you to print a test page. You can also change the printer name, set the printer to be shared on a server checkbox. 8 After the installation is finished, a window appears asking you so desire, select the corresponding checkbox(es) and click Finish. 2.40 GETTING STARTED To install this software on a server, select the Setting up this printer on the network, set the printer as the default printer, and change the port name of each printer.
6 Select the components to be installed and click Next. 7 After selecting the components, the following window appears. Click Next. If you to print a test page. You can also change the printer name, set the printer to be shared on a server checkbox. 8 After the installation is finished, a window appears asking you so desire, select the corresponding checkbox(es) and click Finish. 2.40 GETTING STARTED To install this software on a server, select the Setting up this printer on the network, set the printer as the default printer, and change the port name of each printer.
User's Guide
Page 66
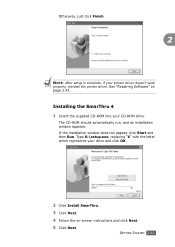
See "Repairing Software" on -screen instructions and click Next. 5 Click Next. Type X:\setup.exe, replacing "X" with the letter which represents your drive and click OK. 2 Click Install SmarThru. 3 ...
See "Repairing Software" on -screen instructions and click Next. 5 Click Next. Type X:\setup.exe, replacing "X" with the letter which represents your drive and click OK. 2 Click Install SmarThru. 3 ...

User's Guide
Page 67
.... • Copy component: to produce professional quality copies. • Print component: to print images you have saved. 7 Follow the on-screen instructions to install. The software installation supports two types of setup: • Typical: The program will be installed with the most common options and is recommended for most users. •...
.... • Copy component: to produce professional quality copies. • Print component: to print images you have saved. 7 Follow the on-screen instructions to install. The software installation supports two types of setup: • Typical: The program will be installed with the most common options and is recommended for most users. •...

User's Guide
Page 68
... is required if your printer is done, click Finish. Do as follows: a. NOTES: If your installation fails or the software does not work properly. Then the installation will start and a test page will appear. • After connecting the printer, click Next. • If.... 5 When the reinstallation is not already connected to reinstall and click Next. GETTING STARTED 2.43 This Repair procedure does not physically 2 repair SmarThru software. If the test page prints out correctly, click Yes. If you select Printer Driver Type 103 PCL 6, the window asking you to connect the ...
... is required if your printer is done, click Finish. Do as follows: a. NOTES: If your installation fails or the software does not work properly. Then the installation will start and a test page will appear. • After connecting the printer, click Next. • If.... 5 When the reinstallation is not already connected to reinstall and click Next. GETTING STARTED 2.43 This Repair procedure does not physically 2 repair SmarThru software. If the test page prints out correctly, click Yes. If you select Printer Driver Type 103 PCL 6, the window asking you to connect the ...
User's Guide
Page 69
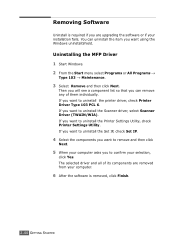
.... 5 When your computer asks you want to confirm your installation fails. You can remove any of its components are removed from your computer. 6 After the software is required if you are upgrading the software or if your selection, click Yes. Removing Software Uninstall is removed, click Finish. 2.44 GETTING STARTED
.... 5 When your computer asks you want to confirm your installation fails. You can remove any of its components are removed from your computer. 6 After the software is required if you are upgrading the software or if your selection, click Yes. Removing Software Uninstall is removed, click Finish. 2.44 GETTING STARTED

User's Guide
Page 70
... beginning uninstallation, ensure that all applications are closed on your computer asks you to confirm, click OK. 4 Click Finish. A system reboot is required after the software is uninstalled. 2 1 From the Start menu, select Programs. 2 Select SmarThru 4, and then select Uninstall SmarThru 4. 3 When your computer asks you must shut the computer down...
... beginning uninstallation, ensure that all applications are closed on your computer asks you to confirm, click OK. 4 Click Finish. A system reboot is required after the software is uninstalled. 2 1 From the Start menu, select Programs. 2 Select SmarThru 4, and then select Uninstall SmarThru 4. 3 When your computer asks you must shut the computer down...
User's Guide
Page 73
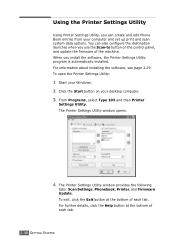
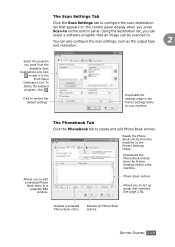
...opens. 4 The Printer Settings Utility window provides the following tabs: Scan Settings, Phonebook, Printer, and Firmware Update. For information about installing the software, see page 2.29. To open the Printer Settings Utility: 1 Start your Windows. 2 Click the Start button on the control panel, ...each tab. Using the Printer Settings Utility Using Printer Settings Utility, you can also configure the destination launches when you install the software, the Printer Settings Utility program is automatically installed. You can create and edit Phone Book entries from your desktop computer. 3 ...
...opens. 4 The Printer Settings Utility window provides the following tabs: Scan Settings, Phonebook, Printer, and Firmware Update. For information about installing the software, see page 2.29. To open the Printer Settings Utility: 1 Start your Windows. 2 Click the Start button on the control panel, ...each tab. Using the Printer Settings Utility Using Printer Settings Utility, you can also configure the destination launches when you install the software, the Printer Settings Utility program is automatically installed. You can create and edit Phone Book entries from your desktop computer. 3 ...
User's Guide
Page 74
Using the destination list, you can select a software program that appears on the control panel. Select the program you to set up group dial numbers. Click to create and edit Phone Book entries. ...
Using the destination list, you can select a software program that appears on the control panel. Select the program you to set up group dial numbers. Click to create and edit Phone Book entries. ...


