User Guide
Page 2
MODE SAT DVD FM/ AM CD HOME THEATER AUDIO VIDEO RECEIVER 6 CH VCR-1 TV ARENA CLUB TEST/ SET UP PRESET EQ VCR-2 TAPE DSP OFF NIGHT BYPASS SET DEMO MULTI JOG BLE S-VIDEO VCR 2 VIDEO L AUDIO R a l RT2500/ RT2500R Audio/Video Receiver RT2500 ENG 5/26/00 2:56 PM Page 3 u s e r m a n I LEVEL I u DSPoirguoinct a d e l s s o r VOLUME TRE BASS I STADIUM CONCERT THEATER CHURCH I TUNING P.SCAN SURR.
MODE SAT DVD FM/ AM CD HOME THEATER AUDIO VIDEO RECEIVER 6 CH VCR-1 TV ARENA CLUB TEST/ SET UP PRESET EQ VCR-2 TAPE DSP OFF NIGHT BYPASS SET DEMO MULTI JOG BLE S-VIDEO VCR 2 VIDEO L AUDIO R a l RT2500/ RT2500R Audio/Video Receiver RT2500 ENG 5/26/00 2:56 PM Page 3 u s e r m a n I LEVEL I u DSPoirguoinct a d e l s s o r VOLUME TRE BASS I STADIUM CONCERT THEATER CHURCH I TUNING P.SCAN SURR.
User Guide
Page 3
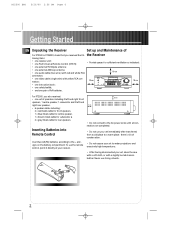
.../BACK OF PRODUCT Remote Control No. For instructions on different branch circuits. NO USER SERVICEABLE PARTS INSIDE. This equipment has been type tested and found to radio and television reception. For Your Safety The AC power plug is polarized (one blade is receiving interference. • Plug the unit into the outlet completely, turn the plug over and try to change the outlet, or use a different one...
.../BACK OF PRODUCT Remote Control No. For instructions on different branch circuits. NO USER SERVICEABLE PARTS INSIDE. This equipment has been type tested and found to radio and television reception. For Your Safety The AC power plug is polarized (one blade is receiving interference. • Plug the unit into the outlet completely, turn the plug over and try to change the outlet, or use a different one...
User Guide
Page 4
... the Speakers 5 Index 18 Connecting the Subwoofers 5 Positioning your Speakers 6 US Warranty 19 Connecting for Power 7 Using Headphones 7 Canadian Warranty 20 Demo Mode 7 Restore to Factory Settings 7 Operating your Receiver Receiver Controls 8 Your Remote Control 9 The Built-in Radio 10 Seek Tuning 10 Storing and Recalling Stations in Memory . .10 Using the Receiver to Play DVD/ CD/ Video Cassette Player 10 Using the Remote to Control Additional Components 10 Advanced Sound Control Dolby Pro Logic and Dolby 3 Stereo 11 5.1 ch Input for Dolby Digital 11 Stereo 11...
... the Speakers 5 Index 18 Connecting the Subwoofers 5 Positioning your Speakers 6 US Warranty 19 Connecting for Power 7 Using Headphones 7 Canadian Warranty 20 Demo Mode 7 Restore to Factory Settings 7 Operating your Receiver Receiver Controls 8 Your Remote Control 9 The Built-in Radio 10 Seek Tuning 10 Storing and Recalling Stations in Memory . .10 Using the Receiver to Play DVD/ CD/ Video Cassette Player 10 Using the Remote to Control Additional Components 10 Advanced Sound Control Dolby Pro Logic and Dolby 3 Stereo 11 5.1 ch Input for Dolby Digital 11 Stereo 11...
User Guide
Page 5
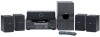
... I I I I TUNING P.SCAN SURR. MODE 6 CH TEST/ SET UP PRESET EQ BYPASS DVD SAT CD FM/ AM HOME THEATER AUDIO VIDEO RECEIVER VCR-1 TV VCR-2 TAPE SET DEMO MULTI JOG Digital Sound Processor VOLUME BASS TREBLE S-VIDEO VCR 2 VIDEO L AUDIO R LEVEL 10 cm For RT2500, you received the following items: • one receiver unit; • one RCA Universal Remote Control (CRK76); • one external FM Dipole antenna; • one external AM loop antenna; • one audio cable (two wires) with red and white RCA connectors; • one video cable...
... I I I I TUNING P.SCAN SURR. MODE 6 CH TEST/ SET UP PRESET EQ BYPASS DVD SAT CD FM/ AM HOME THEATER AUDIO VIDEO RECEIVER VCR-1 TV VCR-2 TAPE SET DEMO MULTI JOG Digital Sound Processor VOLUME BASS TREBLE S-VIDEO VCR 2 VIDEO L AUDIO R LEVEL 10 cm For RT2500, you received the following items: • one receiver unit; • one RCA Universal Remote Control (CRK76); • one external FM Dipole antenna; • one external AM loop antenna; • one audio cable (two wires) with red and white RCA connectors; • one video cable...
User Guide
Page 6
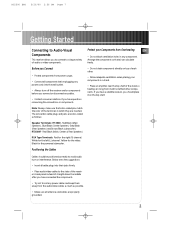
... audio or video components. RT2500 ENG 5/26/00 2:56 PM Page 7 Getting Started Connecting to Audio-Visual Components This receiver allows you to connect to a large variety of the stand so heating air rising from power surges. • Connect all components before plugging any component. Before you Connect • Protect components from it on the top shelf. Red/ Black (Main, Center & Rear Speakers) RCA Type Terminals: Red for the left (L) channel. Positioning the Cables Protect your components...
... audio or video components. RT2500 ENG 5/26/00 2:56 PM Page 7 Getting Started Connecting to Audio-Visual Components This receiver allows you to connect to a large variety of the stand so heating air rising from power surges. • Connect all components before plugging any component. Before you Connect • Protect components from it on the top shelf. Red/ Black (Main, Center & Rear Speakers) RCA Type Terminals: Red for the left (L) channel. Positioning the Cables Protect your components...

User Guide
Page 7
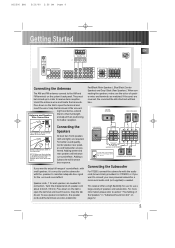
Note: This receiver provides one optical and one coaxial digital input for each SAT receiver / DVD player. Connect components capable of other components (e.g. DVD or SAT) or standard PCM (CD) format digital signals. Note: Before plugging in the optical cable or SVideo cable, make sure to match the shape of the plug and jack, otherwise, you can make use of optical cable is needed . Read section on "Input Signal Setting" under "Advanced Sound Control" carefully to AUDIO OUT(DVD) Multi-Channel Decoder e.g. DTS to S-VIDEO OUT (DVD) to AUDIO OUT...
Note: This receiver provides one optical and one coaxial digital input for each SAT receiver / DVD player. Connect components capable of other components (e.g. DVD or SAT) or standard PCM (CD) format digital signals. Note: Before plugging in the optical cable or SVideo cable, make sure to match the shape of the plug and jack, otherwise, you can make use of optical cable is needed . Read section on "Input Signal Setting" under "Advanced Sound Control" carefully to AUDIO OUT(DVD) Multi-Channel Decoder e.g. DTS to S-VIDEO OUT (DVD) to AUDIO OUT...
User Guide
Page 8
... user to use the subwoofer with the audio cord (brown/ black) provided. Press down on the tab to open the terminal and insert the wire. Red/Black (Main Speakers), Blue/Black (Center Speaker) and Grey/ Black (Rear Speakers). If the cords are color-coded into: SUB WOOFER +- To ease speaker connections, the speaker cords and the terminals are reversed, the sound will lack bass. For more information please refer to section "Fine Setting of the Antenna...
... user to use the subwoofer with the audio cord (brown/ black) provided. Press down on the tab to open the terminal and insert the wire. Red/Black (Main Speakers), Blue/Black (Center Speaker) and Grey/ Black (Rear Speakers). If the cords are color-coded into: SUB WOOFER +- To ease speaker connections, the speaker cords and the terminals are reversed, the sound will lack bass. For more information please refer to section "Fine Setting of the Antenna...
User Guide
Page 9
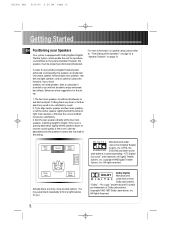
.... 3. Aim the rear speakers directly at the ceiling. Dolby Digital Manufactured under License from Dolby Laboratories. However, the speakers must be set up: 1. You may result in less satisfactory sound. 2. RT2500 ENG 5/26/00 2:56 PM Page 10 Getting Started EN Positioning your front speakers are small speakers, then a subwoofer is densely decorated, face the speakers towards the rear wall at the two main speakers, matching height...
.... 3. Aim the rear speakers directly at the ceiling. Dolby Digital Manufactured under License from Dolby Laboratories. However, the speakers must be set up: 1. You may result in less satisfactory sound. 2. RT2500 ENG 5/26/00 2:56 PM Page 10 Getting Started EN Positioning your front speakers are small speakers, then a subwoofer is densely decorated, face the speakers towards the rear wall at the two main speakers, matching height...
User Guide
Page 10
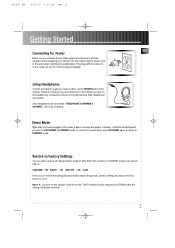
... turn down the volume before plugging your audio system, use it will scroll on display. RT2500 ENG 5/26/00 2:56 PM Page 11 Getting Started EN Connecting for Power Make sure you connect all settings back to original state. Using Headphones To listen privately through your receiver into the outlet. Be sure to STANDBY mode. Demo Mode Right after headphones are connected, "HEADPHONE DOWNMIX 2 CHANNEL" will first enter TUNER mode and show frequency...
... turn down the volume before plugging your audio system, use it will scroll on display. RT2500 ENG 5/26/00 2:56 PM Page 11 Getting Started EN Connecting for Power Make sure you connect all settings back to original state. Using Headphones To listen privately through your receiver into the outlet. Be sure to STANDBY mode. Demo Mode Right after headphones are connected, "HEADPHONE DOWNMIX 2 CHANNEL" will first enter TUNER mode and show frequency...
User Guide
Page 11
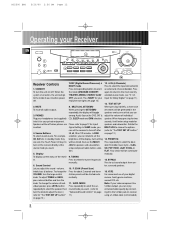
... HOME THEATER AUDIO VIDEO RECEIVER VCR-1 TV VCR-2 TAPE MULTI JOG 8 SET DEMO Digital Sound Processor VOLUME BASS 6 TREBLE S-VIDEO VCR 2 VIDEO L AUDIO R 16 Receiver Controls 7.DSP (Digital Sound Processor) & 12. 6 CH (6 Channels) NIGHT mode Press to select the input connected to 1. When the the mode (STADIUM/ CONCERT/ again to return to the most recently system is turned on page 11). TEST/ SET UP 2. PHONES among Audio Source (for DVD, SAT & adjust the volume of the display. Signal Setting. In standby mode, they brightness of individual Plug your digital knob...
... HOME THEATER AUDIO VIDEO RECEIVER VCR-1 TV VCR-2 TAPE MULTI JOG 8 SET DEMO Digital Sound Processor VOLUME BASS 6 TREBLE S-VIDEO VCR 2 VIDEO L AUDIO R 16 Receiver Controls 7.DSP (Digital Sound Processor) & 12. 6 CH (6 Channels) NIGHT mode Press to select the input connected to 1. When the the mode (STADIUM/ CONCERT/ again to return to the most recently system is turned on page 11). TEST/ SET UP 2. PHONES among Audio Source (for DVD, SAT & adjust the volume of the display. Signal Setting. In standby mode, they brightness of individual Plug your digital knob...
User Guide
Page 12
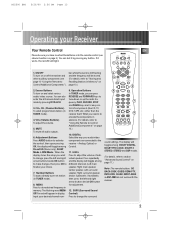
... audio outputs. 6. MENU Press to tune down or up the radio frequency. Operation Buttons In TUNER mode, you need is still flashing and the frequency will be sure you want to change the surround 8 MENU 1 2 CLEAR 3 4 5 7 8 INPUT•SEEK 0 6 7 9 ANT•FMS REVERSE PLAY FORWARD 9 RECORD STOP PAUSE AUDIO DIGITALLEVEL SURR 6 10 11 12 universal sound settings. Press repeatedly and the display will appear in red will toggle among Preset EQ (Stereo only), SLEEP Mode & DIM Mode. The display...
... audio outputs. 6. MENU Press to tune down or up the radio frequency. Operation Buttons In TUNER mode, you need is still flashing and the frequency will be sure you want to change the surround 8 MENU 1 2 CLEAR 3 4 5 7 8 INPUT•SEEK 0 6 7 9 ANT•FMS REVERSE PLAY FORWARD 9 RECORD STOP PAUSE AUDIO DIGITALLEVEL SURR 6 10 11 12 universal sound settings. Press repeatedly and the display will appear in red will toggle among Preset EQ (Stereo only), SLEEP Mode & DIM Mode. The display...
User Guide
Page 13
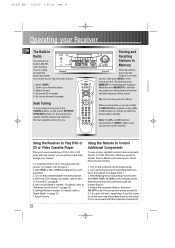
... 5 universal Digital Sound Processor VOLUME BASS 3 TREBLE S-VIDEO VCR 2 VIDEO L AUDIO R LEVEL Storing and Recalling Stations in case you need is still flashing, input your desired channel number and the frequency will search for the next available station for the brand of the TUNING buttons on the unit or REVERSE/ FORWARD buttons on receiver or press CH+ or CH- buttons respond only in TUNER mode in Memory Set to desired frequency by trying to switch channels. Turn on remote to Control...
... 5 universal Digital Sound Processor VOLUME BASS 3 TREBLE S-VIDEO VCR 2 VIDEO L AUDIO R LEVEL Storing and Recalling Stations in case you need is still flashing, input your desired channel number and the frequency will search for the next available station for the brand of the TUNING buttons on the unit or REVERSE/ FORWARD buttons on receiver or press CH+ or CH- buttons respond only in TUNER mode in Memory Set to desired frequency by trying to switch channels. Turn on remote to Control...
User Guide
Page 14
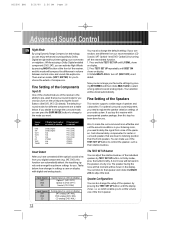
... buttons work. The 3 Stereo mode will give you the sound quality you the most recently selected mode.You can only adjust Sound Control, SLEEP mode, DIM selection, Source Buttons and MUTE when this mode is selected. 5.1 ch Input for bass sounds ( counted as 0.1 channel ), constitue as VCR). Dolby Digital is optimal for playback. Press 6 CH on the unit or DVD•6 CH button on your speaker system configurations (such as size and number of speakers) and type of program...
... buttons work. The 3 Stereo mode will give you the sound quality you the most recently selected mode.You can only adjust Sound Control, SLEEP mode, DIM selection, Source Buttons and MUTE when this mode is selected. 5.1 ch Input for bass sounds ( counted as 0.1 channel ), constitue as VCR). Dolby Digital is optimal for playback. Press 6 CH on the unit or DVD•6 CH button on your speaker system configurations (such as size and number of speakers) and type of program...
User Guide
Page 15
... you turn off the smart detect function. 1. Source/ Input DVD SAT VCR1 VCR2 TV CD TAPE TUNER If Digital Input (optical If Analog Input or coaxial) is selected is the ability to pre-select the best surround mode for you need to register the speaker selection settings of the receiver is selected Dolby Digital Dolby Digital N/A N/A N/A STEREO N/A N/A PRO LOGIC PRO LOGIC PRO LOGIC PRO LOGIC PRO LOGIC STEREO STEREO STEREO You may also change to adjust the level. You can make the surround sound more...
... you turn off the smart detect function. 1. Source/ Input DVD SAT VCR1 VCR2 TV CD TAPE TUNER If Digital Input (optical If Analog Input or coaxial) is selected is the ability to pre-select the best surround mode for you need to register the speaker selection settings of the receiver is selected Dolby Digital Dolby Digital N/A N/A N/A STEREO N/A N/A PRO LOGIC PRO LOGIC PRO LOGIC PRO LOGIC PRO LOGIC STEREO STEREO STEREO You may also change to adjust the level. You can make the surround sound more...
User Guide
Page 16
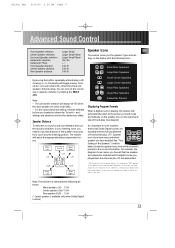
... side of the display. (See diagram) It is important to input the distance of the speakers measured from your listening room, you have enabled (See "Fine Setting of five channels plus LFE complemented. Speaker Distance To make the surround sound more dynamic deep bass sound effects. Main Left L/R Centre C ch Main Right L/R Small Center Speakers Large Center Speakers Small Rear Speakers Large Rear Speakers Subwoofer Present Displaying Program Formats When a digital source is playing, the receiver will be...
... side of the display. (See diagram) It is important to input the distance of the speakers measured from your listening room, you have enabled (See "Fine Setting of five channels plus LFE complemented. Speaker Distance To make the surround sound more dynamic deep bass sound effects. Main Left L/R Centre C ch Main Right L/R Small Center Speakers Large Center Speakers Small Rear Speakers Large Rear Speakers Subwoofer Present Displaying Program Formats When a digital source is playing, the receiver will be...
User Guide
Page 17
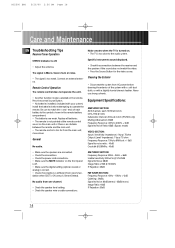
... are connected. • Check the connections. • Check the power cord connections. • Make sure the MUTE indicator on the remote. No audio from one channel. • Check the speaker level setting. • Check the speaker wire or cable connections. Equipment Specifications: AMPLIFIER SECTION: All 5 channels: each battery to operate the remote. RT2500 ENG 5/26/00 2:56 PM Page 18 Care and Maintenance EN Troubleshooting Tips Receiver/Tuner Operation STEREO indicator is off . • Make sure the digital setting (optical, coaxial...
... are connected. • Check the connections. • Check the power cord connections. • Make sure the MUTE indicator on the remote. No audio from one channel. • Check the speaker level setting. • Check the speaker wire or cable connections. Equipment Specifications: AMPLIFIER SECTION: All 5 channels: each battery to operate the remote. RT2500 ENG 5/26/00 2:56 PM Page 18 Care and Maintenance EN Troubleshooting Tips Receiver/Tuner Operation STEREO indicator is off . • Make sure the digital setting (optical, coaxial...
User Guide
Page 20
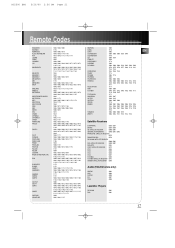
RT2500 ENG 5/26/00 2:56 PM Page 21 Remote Codes...SYMPHONIC TANDY TATUNG TECHNICS TECHWOOD TEKNIKA TELECAPTION TMK TOSHIBA TOTEVISION UNIVERSAL VICTOR VIDTECH VIKING WARDS YAMAHA ZENITH 1008 1176 1002 1004...RECEIVER 5075 PRIMESTAR DBS 5076 PROSCAN SATELLITE RECEIVER 5000, 5001 RCA SATELLITE RECEIVER 5000, 5001 REALISTIC 5063 SONY SATELLITE RECEIVER 5072 STS1 5064 STS2 5065 STS3 5066 STS4 5067 TOSHIBA 5068 TOSHIBA SATELLITE RECEIVER 5073 UNIDEN SATELLITE RECEIVER 5069 Audio (RCA/Dimensia only) AM/FM AUX PHONO CD TAPE 4003 4004 4005 4007 4006 Laserdisc Players PROSCAN RCA...
RT2500 ENG 5/26/00 2:56 PM Page 21 Remote Codes...SYMPHONIC TANDY TATUNG TECHNICS TECHWOOD TEKNIKA TELECAPTION TMK TOSHIBA TOTEVISION UNIVERSAL VICTOR VIDTECH VIKING WARDS YAMAHA ZENITH 1008 1176 1002 1004...RECEIVER 5075 PRIMESTAR DBS 5076 PROSCAN SATELLITE RECEIVER 5000, 5001 RCA SATELLITE RECEIVER 5000, 5001 REALISTIC 5063 SONY SATELLITE RECEIVER 5072 STS1 5064 STS2 5065 STS3 5066 STS4 5067 TOSHIBA 5068 TOSHIBA SATELLITE RECEIVER 5073 UNIDEN SATELLITE RECEIVER 5069 Audio (RCA/Dimensia only) AM/FM AUX PHONO CD TAPE 4003 4004 4005 4007 4006 Laserdisc Players PROSCAN RCA...
User Guide
Page 21
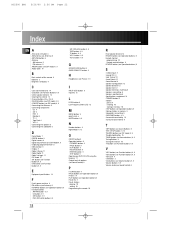
... S S-Video Input 8 Second VCR 8 Seek Tuning 10 Smart Detect 12 Sound Control 8 Speaker configurations 12 Speaker distance 12 Speaker icon 12 Speaker terminals, matching 5 Speakers, connecting 5 Speakers, positioning 6 Specifications, equipment 14 STANDBY button 8 Stations preset 8 recalling 10 storing in memory 10 STOP button (see Operation buttons) 9 Storing stations in memory 9 Subwoofer, connecting 5 SURROUND button 8, 9 Surround channel delay 13 Surround sound control 9 T TAPE button (see Source Buttons) 9 TEST/ SET UP button 8, 12 THEATER button (see DSP mode) 8, 9 Troubleshooting tips 15...
... S S-Video Input 8 Second VCR 8 Seek Tuning 10 Smart Detect 12 Sound Control 8 Speaker configurations 12 Speaker distance 12 Speaker icon 12 Speaker terminals, matching 5 Speakers, connecting 5 Speakers, positioning 6 Specifications, equipment 14 STANDBY button 8 Stations preset 8 recalling 10 storing in memory 10 STOP button (see Operation buttons) 9 Storing stations in memory 9 Subwoofer, connecting 5 SURROUND button 8, 9 Surround channel delay 13 Surround sound control 9 T TAPE button (see Source Buttons) 9 TEST/ SET UP button 8, 12 THEATER button (see DSP mode) 8, 9 Troubleshooting tips 15...
User Guide
Page 22
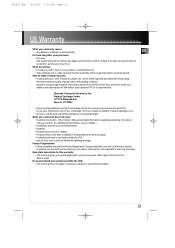
... operating instructions and user controls. If you prepaid freight. What your unit. Contact your name and address and a description of the defect. We recommend using the original carton and packing materials. • Include in case of damage or loss. • A new or refurbished unit will make a warranty claim: • Properly pack your dealer.) • Installation and set-up service adjustments...
... operating instructions and user controls. If you prepaid freight. What your unit. Contact your name and address and a description of the defect. We recommend using the original carton and packing materials. • Include in case of damage or loss. • A new or refurbished unit will make a warranty claim: • Properly pack your dealer.) • Installation and set-up service adjustments...
User Guide
Page 23
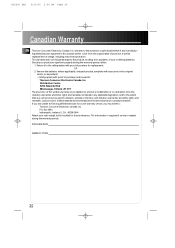
...Box 0944 Indianapolis, Indiana, U.S.A., 46206-0944 Attach your product not perform properly during the warranty period. Distribution Centre 6200 Edwards Blvd Mississauga, Ontario L5T 2V7 The provisions of this booklet for future reference. If you may write to comply therewith. This information is required if service is needed...remedies, such provisions shall be deemed to be replaced free of purchase for out of or subtraction from accidents, misuse or leaking batteries. Mail prepaid (with proof of charge, including return transportation. RT2500 ENG 5/26/00 2:56 PM Page 24 ...
...Box 0944 Indianapolis, Indiana, U.S.A., 46206-0944 Attach your product not perform properly during the warranty period. Distribution Centre 6200 Edwards Blvd Mississauga, Ontario L5T 2V7 The provisions of this booklet for future reference. If you may write to comply therewith. This information is required if service is needed...remedies, such provisions shall be deemed to be replaced free of purchase for out of or subtraction from accidents, misuse or leaking batteries. Mail prepaid (with proof of charge, including return transportation. RT2500 ENG 5/26/00 2:56 PM Page 24 ...


