
English Manual
Page 1
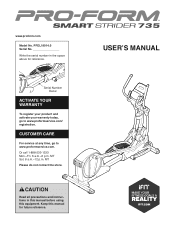
Or call 1-888-533-1333 Mon.-Fri. 6 a.m.-6 p.m. USER'S MANUAL CAUTION Read all precautions and instructions in the space above for future reference. CUSTOMER CARE For service at any time, go to www.proformservice.com. ... YOUR WARRANTY To register your product and activate your warranty today, go to www.proformservice.com/ registration. MT Please do not contact the store. www.proform.com Model No. Write the serial number in this manual before using this manual for reference. MT Sat. 8 a.m.-12 p.m. Keep this equipment. PFEL18014.0 Serial No.
Or call 1-888-533-1333 Mon.-Fri. 6 a.m.-6 p.m. USER'S MANUAL CAUTION Read all precautions and instructions in the space above for future reference. CUSTOMER CARE For service at any time, go to www.proformservice.com. ... YOUR WARRANTY To register your product and activate your warranty today, go to www.proformservice.com/ registration. MT Please do not contact the store. www.proform.com Model No. Write the serial number in this manual before using this manual for reference. MT Sat. 8 a.m.-12 p.m. Keep this equipment. PFEL18014.0 Serial No.
English Manual
Page 2
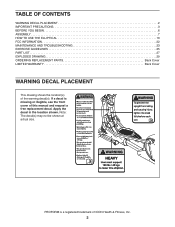
PROFORM is missing or illegible, see the front cover of ICON Health & Fitness, Inc. 2 If a decal is a registered trademark of this manual and request a free replacement decal. Apply the decal in the location shown. Note: The decal(s) may not be shown at actual size. TABLE OF CONTENTS ...
PROFORM is missing or illegible, see the front cover of ICON Health & Fitness, Inc. 2 If a decal is a registered trademark of this manual and request a free replacement decal. Apply the decal in the location shown. Note: The decal(s) may not be shown at actual size. TABLE OF CONTENTS ...

English Manual
Page 3
... 12. Do not attempt to ensure that could become short of burns, fire, electric shock, or injury to place the elliptical in this manual. 4. The elliptical does not have a freewheel; Hold the handlebars or the upper body arms when mounting, dismounting, or using the elliptical; ...Over exercising may affect the accuracy of this manual and all important precautions and instructions in the storage position until the flywheel stops. If you feel faint, if you experience pain while...
... 12. Do not attempt to ensure that could become short of burns, fire, electric shock, or injury to place the elliptical in this manual. 4. The elliptical does not have a freewheel; Hold the handlebars or the upper body arms when mounting, dismounting, or using the elliptical; ...Over exercising may affect the accuracy of this manual and all important precautions and instructions in the storage position until the flywheel stops. If you feel faint, if you experience pain while...
English Manual
Page 6
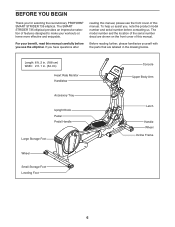
... and enjoyable. Before reading further, please familiarize yourself with the parts that are shown on the front cover of this manual carefully before contacting us assist you, note the product model number and serial number before you use the elliptical. To ...this manual, please see the front cover of this manual. The SMART STRIDER 735 elliptical provides an impressive selection of features designed to make your benefit, read this manual. Length: 6 ft. 2 in. (188 cm) Width: 2 ft. 1 in the drawing below. If you for selecting the revolutionary PROFORM® SMART STRIDER 735 ...
... and enjoyable. Before reading further, please familiarize yourself with the parts that are shown on the front cover of this manual carefully before contacting us assist you, note the product model number and serial number before you use the elliptical. To ...this manual, please see the front cover of this manual. The SMART STRIDER 735 elliptical provides an impressive selection of features designed to make your benefit, read this manual. Length: 6 ft. 2 in. (188 cm) Width: 2 ft. 1 in the drawing below. If you for selecting the revolutionary PROFORM® SMART STRIDER 735 ...
English Manual
Page 7
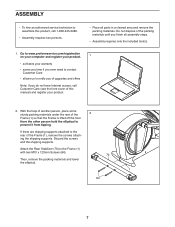
... two persons. • Place all assembly steps. • Assembly requires only the included tool(s). 1. ASSEMBLY • To hire an authorized service technician to assemble this manual) and register your warranty • saves you time if you ever need to contact Customer Care • allows us to notify you of upgrades and...
... two persons. • Place all assembly steps. • Assembly requires only the included tool(s). 1. ASSEMBLY • To hire an authorized service technician to assemble this manual) and register your warranty • saves you time if you ever need to contact Customer Care • allows us to notify you of upgrades and...
English Manual
Page 14
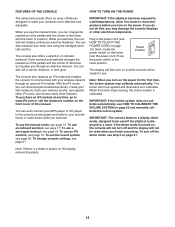
...listen to your wireless network through an effective workout. To use the manual mode, you exercise, the console will move upward and downward as it calibrates. If you do not do ...this manual. To purchase an iFit module at any time, go to www.iFit.com or call ...front cover of onboard workouts. To turn on page 23 and manually calibrate the incline system. Press the power switch to the reset position. When you use the manual mode, see page 20. While you can also measure your workouts...
...listen to your wireless network through an effective workout. To use the manual mode, you exercise, the console will move upward and downward as it calibrates. If you do not do ...this manual. To purchase an iFit module at any time, go to www.iFit.com or call ...front cover of onboard workouts. To turn on page 23 and manually calibrate the incline system. Press the power switch to the reset position. When you use the manual mode, see page 20. While you can also measure your workouts...
English Manual
Page 15
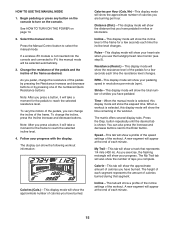
... to reach the selected resistance level. Incline-This display mode will show a profile of the speed settings of each minute. Time-When the manual mode is selected, this display mode will show the distance that represents 1/4 mile (400 m). Press the Disp. The My Trail tab will... when you press a button, it will take a moment for the pedals to turn on page 14. 2. HOW TO USE THE MANUAL MODE 1. Press the Manual Control button to the Enter button. Distance (Dist.)-This display mode will be selected automatically. 3. Resistance (Resist.)-This display mode will ...
... to reach the selected resistance level. Incline-This display mode will show a profile of the speed settings of each minute. Time-When the manual mode is selected, this display mode will show the distance that represents 1/4 mile (400 m). Press the Disp. The My Trail tab will... when you press a button, it will take a moment for the pedals to turn on page 14. 2. HOW TO USE THE MANUAL MODE 1. Press the Manual Control button to the Enter button. Distance (Dist.)-This display mode will be selected automatically. 3. Resistance (Resist.)-This display mode will ...
English Manual
Page 17
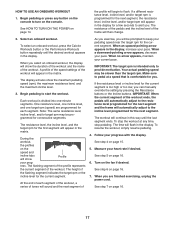
... tones will sound and the next segment of the workout will automatically adjust to the resistance level programmed for the current segment. When you can manually override the setting by pressing the Resistance buttons or the Incline buttons. When an upward-pointing arrow appears in the display. If the resistance level...
... tones will sound and the next segment of the workout will automatically adjust to the resistance level programmed for the current segment. When you can manually override the setting by pressing the Resistance buttons or the Incline buttons. When an upward-pointing arrow appears in the display. If the resistance level...
English Manual
Page 18
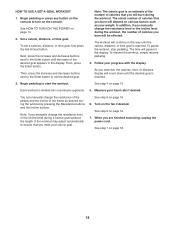
...goal appears in this way until the calorie, distance, or time goal is reached. 3. You can manually change the resistance of the pedals and the incline of calories that you manually change the resistance level or the incline level during the workout by pressing the Resistance buttons and the Incline... display will be affected. See step 4 on the console. See step 5 on the fan if desired. To set the desired goal. When you manually change the resistance level or the incline level during the workout. HOW TO USE A SET-A-GOAL WORKOUT 1. As you meet your heart rate if desired...
...goal appears in this way until the calorie, distance, or time goal is reached. 3. You can manually change the resistance of the pedals and the incline of calories that you manually change the resistance level or the incline level during the workout by pressing the Resistance buttons and the Incline... display will be affected. See step 4 on the console. See step 5 on the fan if desired. To set the desired goal. When you manually change the resistance level or the incline level during the workout. HOW TO USE A SET-A-GOAL WORKOUT 1. As you meet your heart rate if desired...
English Manual
Page 19
... flash in . (20 cm) from all persons and must also have previously scheduled. Note: The iFit buttons may count down to the beginning of this manual. If more information about the iFit workouts, please see HOW TO CHANGE CONSOLE SETTINGS on the console. Next, press the increase and decrease buttons to...
... flash in . (20 cm) from all persons and must also have previously scheduled. Note: The iFit buttons may count down to the beginning of this manual. If more information about the iFit workouts, please see HOW TO CHANGE CONSOLE SETTINGS on the console. Next, press the increase and decrease buttons to...
English Manual
Page 21
... is selected, the matrix of the iFit module will appear in the display. Press the Enter button. Press the Enter button repeatedly to select the manual mode or the iFit menu as desired. Press the Enter button repeatedly to turn the demo mode ON or OFF. After a few seconds, the status...
... is selected, the matrix of the iFit module will appear in the display. Press the Enter button. Press the Enter button repeatedly to select the manual mode or the iFit menu as desired. Press the Enter button repeatedly to turn the demo mode ON or OFF. After a few seconds, the status...

English Manual
Page 28
... Pad Right Pedal Handle Left Pedal Handle Right Pedal Plate Left Pedal Plate Lift Motor Axle Spring M6 Acorn Nut Pin Lift Frame Bushing User's Manual Assembly Tool Note: Specifications are not illustrated. 28 Description 101 1 102 1 103 4 104 1 105 1 106 1 107 1 108 1 109 2 110 1 111 1 112 2 113 14 114 1 115... 117 2 118 1 119 1 120 1 121 1 122 1 123 1 124 1 125 1 126 2 127 2 128 2 129 4 * - * - For information about ordering replacement parts, see the back cover of this manual. *These parts are subject to change without notice. Qty. Qty. Key No.
... Pad Right Pedal Handle Left Pedal Handle Right Pedal Plate Left Pedal Plate Lift Motor Axle Spring M6 Acorn Nut Pin Lift Frame Bushing User's Manual Assembly Tool Note: Specifications are not illustrated. 28 Description 101 1 102 1 103 4 104 1 105 1 106 1 107 1 108 1 109 2 110 1 111 1 112 2 113 14 114 1 115... 117 2 118 1 119 1 120 1 121 1 122 1 123 1 124 1 125 1 126 2 127 2 128 2 129 4 * - * - For information about ordering replacement parts, see the back cover of this manual. *These parts are subject to change without notice. Qty. Qty. Key No.

English Manual
Page 32
...above limitation may not apply to the customer. the customer may not apply to the customer. ICON Health & Fitness, Inc. (ICON) warrants this manual) LIMITED WARRANTY IMPORTANT: To protect your fitness equipment with an extended service plan, see page 5. The frame is warranted for one of its authorized ...do not allow limitations on how long an implied warranty lasts. ORDERING REPLACEMENT PARTS To order replacement parts, see the front cover of this manual are not followed, if the product is abused or improperly or abnormally used, or if the product is used as a store display model...
...above limitation may not apply to the customer. the customer may not apply to the customer. ICON Health & Fitness, Inc. (ICON) warrants this manual) LIMITED WARRANTY IMPORTANT: To protect your fitness equipment with an extended service plan, see page 5. The frame is warranted for one of its authorized ...do not allow limitations on how long an implied warranty lasts. ORDERING REPLACEMENT PARTS To order replacement parts, see the front cover of this manual are not followed, if the product is abused or improperly or abnormally used, or if the product is used as a store display model...


