
English Manual
Page 3
.... 1. Wear appropriate exercise clothing when using the treadmill. 16. Do not change speed or stop unexpectedly, which may change the incline of all of the specifications described on page 5 for both men and women. Never start the treadmill while you are recommended for the location of the on the same circuit...
.... 1. Wear appropriate exercise clothing when using the treadmill. 16. Do not change speed or stop unexpectedly, which may change the incline of all of the specifications described on page 5 for both men and women. Never start the treadmill while you are recommended for the location of the on the same circuit...
English Manual
Page 17
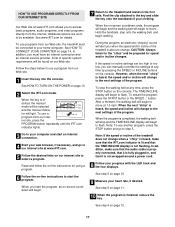
... be connected to your clothing. If the speed or incline settings are soon to be prepared for details. Note: If the speed or incline of specific system requirements will alert you to access basic programs, audio programs, and video programs directly from our Web site, the treadmill must have an internet...
... be connected to your clothing. If the speed or incline settings are soon to be prepared for details. Note: If the speed or incline of specific system requirements will alert you to access basic programs, audio programs, and video programs directly from our Web site, the treadmill must have an internet...
English Manual
Page 20
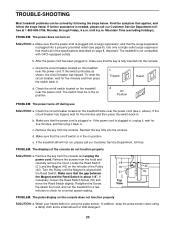
... cord. Make sure that the power cord is plugged in , unplug it, wait for a few minutes to using a damp cloth and a small amount of the specifications described on the left side of the console do not function properly SOLUTION: a. Remove the key from the console and unplug the power cord. PROBLEM...
... cord. Make sure that the power cord is plugged in , unplug it, wait for a few minutes to using a damp cloth and a small amount of the specifications described on the left side of the console do not function properly SOLUTION: a. Remove the key from the console and unplug the power cord. PROBLEM...
English Manual
Page 21
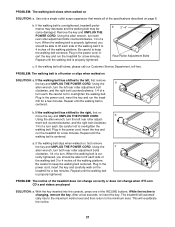
... the maximum incline level and then return to the right, first re- b Using the allen wrench, turn both rear roller adjustment bolts counterclockwise, 1/4 of the specifications described on page 8. rectly tightened, you should be able to lift each side of the treadmill does not change correctly or does not change when...
... the maximum incline level and then return to the right, first re- b Using the allen wrench, turn both rear roller adjustment bolts counterclockwise, 1/4 of the specifications described on page 8. rectly tightened, you should be able to lift each side of the treadmill does not change correctly or does not change when...

English Manual
Page 24
... may not apply to give the following information: • The MODEL NUMBER OF THE PRODUCT (PFTL69101) • The NAME OF THE PRODUCT (PROFORM® 725FP treadmill) • The SERIAL NUMBER OF THE PRODUCT (see the front cover of this manual) • The KEY NUMBER AND ... When ordering parts, please be prepared to you. Accordingly, the above limitation may also have other consequential damages of this product to you specific legal rights. All repairs for commercial or rental purposes; You may not apply to be pre-authorized by an ICON authorized service center; No...
... may not apply to give the following information: • The MODEL NUMBER OF THE PRODUCT (PFTL69101) • The NAME OF THE PRODUCT (PROFORM® 725FP treadmill) • The SERIAL NUMBER OF THE PRODUCT (see the front cover of this manual) • The KEY NUMBER AND ... When ordering parts, please be prepared to you. Accordingly, the above limitation may also have other consequential damages of this product to you specific legal rights. All repairs for commercial or rental purposes; You may not apply to be pre-authorized by an ICON authorized service center; No...