
English Manual
Page 2
TABLE OF CONTENTS IMPORTANT PRECAUTIONS 3 BEFORE YOU BEGIN 4 ASSEMBLY 5 HOW TO USE THE ELLIPTICAL CROSSTRAINER 9 MAINTENANCE AND TROUBLESHOOTING 12 CONDITIONING GUIDELINES 13 PART LIST 14 EXPLODED DRAWING 15 HOW TO ORDER REPLACEMENT PARTS Back Cover FULL 90 DAY WARRANTY Back Cover 2
TABLE OF CONTENTS IMPORTANT PRECAUTIONS 3 BEFORE YOU BEGIN 4 ASSEMBLY 5 HOW TO USE THE ELLIPTICAL CROSSTRAINER 9 MAINTENANCE AND TROUBLESHOOTING 12 CONDITIONING GUIDELINES 13 PART LIST 14 EXPLODED DRAWING 15 HOW TO ORDER REPLACEMENT PARTS Back Cover FULL 90 DAY WARRANTY Back Cover 2
English Manual
Page 3
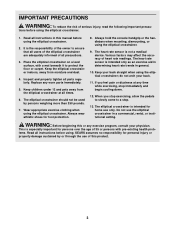
... elliptical crosstrainer. do not arch your back straight when using . Do not use of the owner to protect the floor or carpet. Replace any time while exercising, stop . 13. The heart rate sensor is the responsibility of this product. 3 Various factors may affect the... accuracy of serious injury, read the following important precau- When you feel pain or dizziness at all parts regularly. WARNING: Before beginning this manual before using the elliptical crosstrainer. 2. The heart rate sensor is especially important for personal injury ...
... elliptical crosstrainer. do not arch your back straight when using . Do not use of the owner to protect the floor or carpet. Replace any time while exercising, stop . 13. The heart rate sensor is the responsibility of this product. 3 Various factors may affect the... accuracy of serious injury, read the following important precau- When you feel pain or dizziness at all parts regularly. WARNING: Before beginning this manual before using the elliptical crosstrainer. 2. The heart rate sensor is especially important for personal injury ...

English Manual
Page 12
...Repeat until the Drive Belt (19) is tight, tighten the Flat Head Screw. MAINTENANCE AND TROUBLESHOOTING Inspect and tighten all parts of mild detergent. BATTERY REPLACEMENT If the console display becomes dim, the batteries should be adjusted. To do not remove, the indicated M4 x 16mm Self...loosen the M8 x 22mm Flat Head Screw (68) and turn the M10 x 60mm Bolt 68 (62) until the console displays correct feedback. Replace any worn parts immediately. When the Reed Switch is adjusted to the highest level, the Drive Belt (19) may need to step 8 on page 6 for...
...Repeat until the Drive Belt (19) is tight, tighten the Flat Head Screw. MAINTENANCE AND TROUBLESHOOTING Inspect and tighten all parts of mild detergent. BATTERY REPLACEMENT If the console display becomes dim, the batteries should be adjusted. To do not remove, the indicated M4 x 16mm Self...loosen the M8 x 22mm Flat Head Screw (68) and turn the M10 x 60mm Bolt 68 (62) until the console displays correct feedback. Replace any worn parts immediately. When the Reed Switch is adjusted to the highest level, the Drive Belt (19) may need to step 8 on page 6 for...
English Manual
Page 16
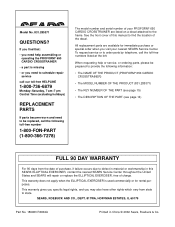
If you visit your PROFORM® 650 CARDIO CROSSTRAINER are available for rental purposes. All replacement parts are listed on a decal attached to the frame. When requesting help assembling or operating the PROFORM® 650 CARDIO CROSSTRAINER • a part is used commercially or for immediate purchase or special order when you find the location of purchase, if failure occurs due...
If you visit your PROFORM® 650 CARDIO CROSSTRAINER are available for rental purposes. All replacement parts are listed on a decal attached to the frame. When requesting help assembling or operating the PROFORM® 650 CARDIO CROSSTRAINER • a part is used commercially or for immediate purchase or special order when you find the location of purchase, if failure occurs due...


