

English Manual
Page 1
Serial Number Decal CAUTION Read all precautions and instructions in the space above for future reference. USER'S MANUAL SEARS, ROEBUCK AND CO., HOFFMAN ESTATES, IL 60179 Model No. 831.297671 Serial No. Save this equipment. Write the serial number in this manual before using this manual for future reference.
Serial Number Decal CAUTION Read all precautions and instructions in the space above for future reference. USER'S MANUAL SEARS, ROEBUCK AND CO., HOFFMAN ESTATES, IL 60179 Model No. 831.297671 Serial No. Save this equipment. Write the serial number in this manual before using this manual for future reference.
English Manual
Page 3
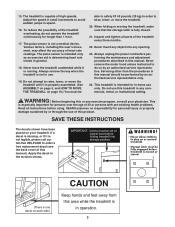
... than the procedures in this manual should be performed by an authorized service representative only. 24. Inspect and tighten all instructions before folding treadmill into any commercial, rental, or institutional setting. This is not legible, please call our toll-free HELPLINE to do not ... movement, may affect the accuracy of the treadmill every three months. 22. Always remove the key when the treadmill is not in small increments to raise, lower, or move the treadmill until it is running. Never remove the motor hood unless instructed to order a free replacement decal (see ...
... than the procedures in this manual should be performed by an authorized service representative only. 24. Inspect and tighten all instructions before folding treadmill into any commercial, rental, or institutional setting. This is not legible, please call our toll-free HELPLINE to do not ... movement, may affect the accuracy of the treadmill every three months. 22. Always remove the key when the treadmill is not in small increments to raise, lower, or move the treadmill until it is running. Never remove the motor hood unless instructed to order a free replacement decal (see ...
English Manual
Page 6
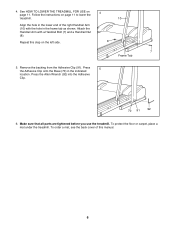
...Clip. 70 91 92 6. To protect the floor or carpet, place a mat under the treadmill. Repeat this manual. 6 Make sure that all parts are tightened before you use the treadmill. Follow the instructions on page 11 to lower the treadmill. 10 Align the hole in the lower end of this step on 4 page 11.... Press 5 the Adhesive Clip onto the Base (70) in the frame tab as shown. 4. See HOW TO LOWER THE TREADMILL FOR USE on the...
...Clip. 70 91 92 6. To protect the floor or carpet, place a mat under the treadmill. Repeat this manual. 6 Make sure that all parts are tightened before you use the treadmill. Follow the instructions on page 11 to lower the treadmill. 10 Align the hole in the lower end of this step on 4 page 11.... Press 5 the Adhesive Clip onto the Base (70) in the frame tab as shown. 4. See HOW TO LOWER THE TREADMILL FOR USE on the...

English Manual
Page 12
... b. Reinsert the key fully into the console. (See step 1 on the treadmill near the power cord (see page 7). Retighten the Screw. Read and follow the instructions included with this treadmill. Most treadmill problems can be electrically rated for a correct speed reading. 12 Central Time (... a.m. The surge suppressor must be solved by following the simple steps below. above). If the treadmill still will not run the treadmill for a few minutes to keep your treadmill in . If further assistance is needed, call our toll-free HELPLINE. The surge suppressor must have...
... b. Reinsert the key fully into the console. (See step 1 on the treadmill near the power cord (see page 7). Retighten the Screw. Read and follow the instructions included with this treadmill. Most treadmill problems can be electrically rated for a correct speed reading. 12 Central Time (... a.m. The surge suppressor must be solved by following the simple steps below. above). If the treadmill still will not run the treadmill for a few minutes to keep your treadmill in . If further assistance is needed, call our toll-free HELPLINE. The surge suppressor must have...

