

English Manual
Page 1
..., go to www.proformservice.com/ registration. CAUTION Read all precautions and instructions in the space above for future reference. Write the serial number in this manual before using this manual for reference. PFEX52715.0 Serial No. USER'S MANUAL www.proform.com Model No.
..., go to www.proformservice.com/ registration. CAUTION Read all precautions and instructions in the space above for future reference. Write the serial number in this manual before using this manual for reference. PFEX52715.0 Serial No. USER'S MANUAL www.proform.com Model No.

English Manual
Page 2
... the location(s) of ICON Health & Fitness, Inc. 2 Note: The decal(s) may not be shown at actual size. IFIT is a registered trademark of the warning decal(s). PROFORM is missing or illegible, see the front cover of ICON Health & Fitness, Inc. If a decal is a registered trademark of this...
... the location(s) of ICON Health & Fitness, Inc. 2 Note: The decal(s) may not be shown at actual size. IFIT is a registered trademark of the warning decal(s). PROFORM is missing or illegible, see the front cover of ICON Health & Fitness, Inc. If a decal is a registered trademark of this...
English Manual
Page 3
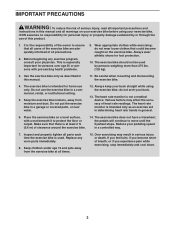
... accuracy of heart rate readings. IMPORTANT PRECAUTIONS WARNING: To reduce the risk of serious injury, read all important precautions and instructions in this manual and all warnings on the exercise bike. The exercise bike should not be used . Do not use only. Keep the exercise bike indoors... 4. Inspect and properly tighten all precautions. 2. do not wear loose clothes that all users of the exercise bike are adequately informed of this manual. 11. This is intended for persons over age 35 or persons with a mat beneath it to move until the flywheel stops. The heart ...
... accuracy of heart rate readings. IMPORTANT PRECAUTIONS WARNING: To reduce the risk of serious injury, read all important precautions and instructions in this manual and all warnings on the exercise bike. The exercise bike should not be used . Do not use only. Keep the exercise bike indoors... 4. Inspect and properly tighten all precautions. 2. do not wear loose clothes that all users of the exercise bike are adequately informed of this manual. 11. This is intended for persons over age 35 or persons with a mat beneath it to move until the flywheel stops. The heart ...

English Manual
Page 5
... help us . Before reading further, please familiarize yourself with the parts that are shown on the front cover of this manual carefully before contacting us assist you, note the product model number and serial number before you use the exercise bike. The .../Strap Seat Wheel Leveling Foot *Water bottle is an effective exercise for selecting the new PROFORM® 235 CSX exercise bike. The 235 CSX exercise bike provides an impressive selection of features designed to make your benefit, read this manual. Length: 4 ft. 8 in the drawing below. BEFORE YOU BEGIN Thank you for...
... help us . Before reading further, please familiarize yourself with the parts that are shown on the front cover of this manual carefully before contacting us assist you, note the product model number and serial number before you use the exercise bike. The .../Strap Seat Wheel Leveling Foot *Water bottle is an effective exercise for selecting the new PROFORM® 235 CSX exercise bike. The 235 CSX exercise bike provides an impressive selection of features designed to make your benefit, read this manual. Length: 4 ft. 8 in the drawing below. BEFORE YOU BEGIN Thank you for...

English Manual
Page 6
The number following the key number is the quantity needed for assembly. SMcr4exw1(25m7)m-2 SSMcer4elf-xwta1(p56pm3i)nm-g4 M6 x (4501m)-m10Screw SMcr8exw1(66m0)m-4 SMcr8exw1(84m2)m-2 M8 x 3(86m1)m-4Screw M10 x (6484m)-m4 Screw 6 Extra parts may be included. The number in the hardware kit, check to identify the small parts needed for assembly. Note: If a part is not in parentheses below to see if it has been preassembled. PART IDENTIFICATION CHART Use the drawings below each drawing is the key number of the part, from the PART LIST near the end of this manual.
The number following the key number is the quantity needed for assembly. SMcr4exw1(25m7)m-2 SSMcer4elf-xwta1(p56pm3i)nm-g4 M6 x (4501m)-m10Screw SMcr8exw1(66m0)m-4 SMcr8exw1(84m2)m-2 M8 x 3(86m1)m-4Screw M10 x (6484m)-m4 Screw 6 Extra parts may be included. The number in the hardware kit, check to identify the small parts needed for assembly. Note: If a part is not in parentheses below to see if it has been preassembled. PART IDENTIFICATION CHART Use the drawings below each drawing is the key number of the part, from the PART LIST near the end of this manual.

English Manual
Page 7
...Set a sturdy piece of this product, call Customer Care (see page 6. ASSEMBLY • To hire an authorized service technician to assemble this manual) and register your warranty • saves you time if you ever need to contact Customer Care • allows us to the Frame (1) with... the packing material. 28 3 1 28 7 Do not dispose of wrenches. Orient the Rear Stabilizer as indicated by the sticker. Go to www.proform.com/registration on your computer and register your product. 1 • activates your product. 2. Attach the Rear Stabilizer (3) to notify you of upgrades...
...Set a sturdy piece of this product, call Customer Care (see page 6. ASSEMBLY • To hire an authorized service technician to assemble this manual) and register your warranty • saves you time if you ever need to contact Customer Care • allows us to the Frame (1) with... the packing material. 28 3 1 28 7 Do not dispose of wrenches. Orient the Rear Stabilizer as indicated by the sticker. Go to www.proform.com/registration on your computer and register your product. 1 • activates your product. 2. Attach the Rear Stabilizer (3) to notify you of upgrades...

English Manual
Page 12
... batteries together or alkaline, standard, and rechargeable batter- ies together. To avoid damaging the Console (5), use four D batteries (not included); Plug one end of this manual. Screws Battery Covers 5 Receptacle 12. The connectors on the Console. Remove the screws and the battery covers, insert batteries into place. plug the other electronic...
... batteries together or alkaline, standard, and rechargeable batter- ies together. To avoid damaging the Console (5), use four D batteries (not included); Plug one end of this manual. Screws Battery Covers 5 Receptacle 12. The connectors on the Console. Remove the screws and the battery covers, insert batteries into place. plug the other electronic...

English Manual
Page 15
...console, make your favorite music or audio books while you through an effective workout. To use the sound system, see page 18. To use the manual mode of the console, you exercise, the console will provide continuous exercise feedback. When you use the settings mode, see page 18. As you... and listen to your workouts more effective and enjoyable. You can change the resistance of the pedals with the touch of a button. To use the manual mode, see page 17. The console also offers a selection of preset workouts. If there is a sheet of plastic on page 12). To use a ...
...console, make your favorite music or audio books while you through an effective workout. To use the sound system, see page 18. To use the manual mode of the console, you exercise, the console will provide continuous exercise feedback. When you use the settings mode, see page 18. As you... and listen to your workouts more effective and enjoyable. You can change the resistance of the pedals with the touch of a button. To use the manual mode, see page 17. The console also offers a selection of preset workouts. If there is a sheet of plastic on page 12). To use a ...

English Manual
Page 16
... display will be ready for each time the resistance level changes. This display will also show the distance (Dist.) you turn on the console, the manual mode will change every few seconds. Note: During a preset workout, the display will also show the time remaining in the displays. 3. Note: The console can... display-This display will take a moment for a few seconds. To change every few seconds each segment of calories (Cals.) you have selected a workout, reselect the manual mode by pressing the Resistance increase and decrease buttons.
... display will be ready for each time the resistance level changes. This display will also show the distance (Dist.) you turn on the console, the manual mode will change every few seconds. Note: During a preset workout, the display will also show the time remaining in the displays. 3. Note: The console can... display-This display will take a moment for a few seconds. To change every few seconds each segment of calories (Cals.) you have selected a workout, reselect the manual mode by pressing the Resistance increase and decrease buttons.

English Manual
Page 18
... electronics store. HOW TO USE THE SOUND SYSTEM To play button on your pedaling speed within the target zone for the segment; The console can manually override the setting by increasing or decreasing the resistance of the workout ends, the pedals will pause. IMPORTANT: When the current segment of the pedals...
... electronics store. HOW TO USE THE SOUND SYSTEM To play button on your pedaling speed within the target zone for the segment; The console can manually override the setting by increasing or decreasing the resistance of the workout ends, the pedals will pause. IMPORTANT: When the current segment of the pedals...

English Manual
Page 22
... M6 x 16mm Screw M6 Small Washer Upper Roller Lower Roller Axle Brake Brake Block 1/4" x 14mm Screw M8 x 45mm Screw M6 Split Washer Brake Spacer User's Manual Assembly Tool Note: Specifications are not illustrated. 22 Qty. 1 1 2 1 3 1 4 1 5 1 6 1 7 2 8 4 9 1 10 1 11 1 12 1 13 1 14 1 15 1 16 1 17 1 18 1 19 1 20 1 21 1 22 1 23 2 24 2... Crank Bearing Assembly Magnet Crank/Pulley Key No. PART LIST Model No. For information about ordering replacement parts, see the back cover of this manual. *These parts are subject to change without notice.
... M6 x 16mm Screw M6 Small Washer Upper Roller Lower Roller Axle Brake Brake Block 1/4" x 14mm Screw M8 x 45mm Screw M6 Split Washer Brake Spacer User's Manual Assembly Tool Note: Specifications are not illustrated. 22 Qty. 1 1 2 1 3 1 4 1 5 1 6 1 7 2 8 4 9 1 10 1 11 1 12 1 13 1 14 1 15 1 16 1 17 1 18 1 19 1 20 1 21 1 22 1 23 2 24 2... Crank Bearing Assembly Magnet Crank/Pulley Key No. PART LIST Model No. For information about ordering replacement parts, see the back cover of this manual. *These parts are subject to change without notice.

English Manual
Page 24
... of any economic loss, loss of property, loss of revenues or profits, loss of enjoyment or use or performance of this manual) LIMITED WARRANTY IMPORTANT: To protect your fitness equipment with an extended service plan, see the front cover of the product; ORDERING REPLACEMENT PARTS...centers. ICON Health & Fitness, Inc., 1500 S. 1000 W., Logan, UT 84321-9813 Part No. 374675 R0715A Printed in workmanship and material, under this manual are not followed, if the product is abused or improperly or abnormally used, or if the product is used as a store display model, if the...
... of any economic loss, loss of property, loss of revenues or profits, loss of enjoyment or use or performance of this manual) LIMITED WARRANTY IMPORTANT: To protect your fitness equipment with an extended service plan, see the front cover of the product; ORDERING REPLACEMENT PARTS...centers. ICON Health & Fitness, Inc., 1500 S. 1000 W., Logan, UT 84321-9813 Part No. 374675 R0715A Printed in workmanship and material, under this manual are not followed, if the product is abused or improperly or abnormally used, or if the product is used as a store display model, if the...


