User Manual
Page 2
... accept any changes or modifications to radio communications. "Polaroid" and "Polaroid and Pixel" are designed to provide reasonable protection against harmful interference in a residential installation.This equipment generates uses and can be determined by turning the equipment off and on a circuit different from that to discontinue midway (fail), restart the application or disconnect and connect the communication cable (USB, etc.) again...
... accept any changes or modifications to radio communications. "Polaroid" and "Polaroid and Pixel" are designed to provide reasonable protection against harmful interference in a residential installation.This equipment generates uses and can be determined by turning the equipment off and on a circuit different from that to discontinue midway (fail), restart the application or disconnect and connect the communication cable (USB, etc.) again...
User Manual
Page 3
...polaroid.com and click on Company or call the customer service number for your dealer for precise product definition and included accessories. „ The illustrations in this user manual. Occasionally a retailer will specify a unique product color, appearance, and internal memory capacity. This User Manual... human health. This is disposed of as batteries, chargers, AC adapters, memory cards, cables, pouches, and language support. Contact your country listed in this manual. Product Information „ Product design and specifications are for the product. „ The...
...polaroid.com and click on Company or call the customer service number for your dealer for precise product definition and included accessories. „ The illustrations in this user manual. Occasionally a retailer will specify a unique product color, appearance, and internal memory capacity. This User Manual... human health. This is disposed of as batteries, chargers, AC adapters, memory cards, cables, pouches, and language support. Contact your country listed in this manual. Product Information „ Product design and specifications are for the product. „ The...
User Manual
Page 7
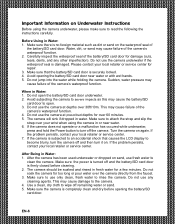
... the battery/SD card door. Make sure to use any other imperfection). Do not use the camera underwater if the waterproof seal is turned off the camera. Make sure that causes the LCD display to become blurry, turn off and the battery/SD card door is securely locked. 4. After Being in Water: 1. Use a clean, dry cloth to wipe off and then turn it on. If the problem persists...
... the battery/SD card door. Make sure to use any other imperfection). Do not use the camera underwater if the waterproof seal is turned off the camera. Make sure that causes the LCD display to become blurry, turn off and the battery/SD card door is securely locked. 4. After Being in Water: 1. Use a clean, dry cloth to wipe off and then turn it on. If the problem persists...
User Manual
Page 9
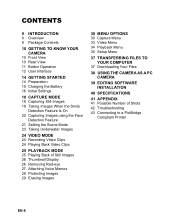
... Setting the Scene Mode 23 Taking Underwater Images 24 VIDEO MODE 24 Recording Video Clips 24 Playing Back Video Clips 25 PLAYBACK MODE 25 Playing Back of Still Images 26 Thumbnail Display 26 Removing Red-eye 27 Attaching Voice Memos 28 Protecting Images 29 Erasing Images 30 MENU OPTIONS 30 Capture Menu 33 Video Menu 34 Playback Menu 35 Setup Menu 37 TRANSFERRING FILES TO YOUR COMPUTER 37 Downloading Your Files 38 USING THE CAMERA AS A PC CAMERA 39 EDITING SOFTWARE INSTALLATION 40 SPECIFICATIONS 41 APPENDIX 41 Possible Number of Shots 42 Troubleshooting...
... Setting the Scene Mode 23 Taking Underwater Images 24 VIDEO MODE 24 Recording Video Clips 24 Playing Back Video Clips 25 PLAYBACK MODE 25 Playing Back of Still Images 26 Thumbnail Display 26 Removing Red-eye 27 Attaching Voice Memos 28 Protecting Images 29 Erasing Images 30 MENU OPTIONS 30 Capture Menu 33 Video Menu 34 Playback Menu 35 Setup Menu 37 TRANSFERRING FILES TO YOUR COMPUTER 37 Downloading Your Files 38 USING THE CAMERA AS A PC CAMERA 39 EDITING SOFTWARE INSTALLATION 40 SPECIFICATIONS 41 APPENDIX 41 Possible Number of Shots 42 Troubleshooting...
User Manual
Page 12
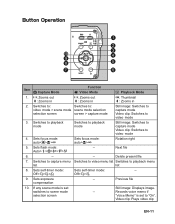
Sets self-timer mode: Sets self-timer mode: -- Off>f>g>h Off>f>g 9. Sets flash mode: Auto>a>d>c>`>_ -- Switches to: Switches to: video mode > scene mode scene mode selection selection screen screen > capture mode Still image: Switches to capture mode Video clip: Switches to playback menu list list 8. Sets exposure compensation -- Delete present file 7. Previous file 10. Records voice memo if "Voice Memo" is set to video mode 4. Button Operation 1 2 3 10 4 9 SET 8 5 7 6 Item 8 Capture Mode Function 6 Video Mode 7 Playback Mode 1. >: Zooms ...
Sets self-timer mode: Sets self-timer mode: -- Off>f>g>h Off>f>g 9. Sets flash mode: Auto>a>d>c>`>_ -- Switches to: Switches to: video mode > scene mode scene mode selection selection screen screen > capture mode Still image: Switches to capture mode Video clip: Switches to playback menu list list 8. Sets exposure compensation -- Delete present file 7. Previous file 10. Records voice memo if "Voice Memo" is set to video mode 4. Button Operation 1 2 3 10 4 9 SET 8 5 7 6 Item 8 Capture Mode Function 6 Video Mode 7 Playback Mode 1. >: Zooms ...
User Manual
Page 13
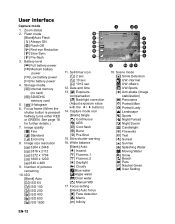
... mode icon [Blank] Single [T] Continuous [U] AEB [.] Cont.flash [/] Burst [+] Pre-Shot 15. Focus setting [Blank] Auto focus [Z] Face detection [O] Macro [Q] Infinity 18. Storage media [r] Internal memory (no card) [q] SD/SDHC memory card 5. [ ] Histogram 6. Image size resolution [n] 3264 x 2448 [l] 2816 x 2112 [i] 2272 x 1704 [f] 1600 x 1200 [x] 640 x 480 9. Number of pictures remaining 10. Zoom status 2. Date and time 13. [s] Exposure compensation [P] Backlight correction (Adjust exposure value with the e / f buttons) 14. Slow shutter warning 16. ISO [Blank] Auto [:] ISO...
... mode icon [Blank] Single [T] Continuous [U] AEB [.] Cont.flash [/] Burst [+] Pre-Shot 15. Focus setting [Blank] Auto focus [Z] Face detection [O] Macro [Q] Infinity 18. Storage media [r] Internal memory (no card) [q] SD/SDHC memory card 5. [ ] Histogram 6. Image size resolution [n] 3264 x 2448 [l] 2816 x 2112 [i] 2272 x 1704 [f] 1600 x 1200 [x] 640 x 480 9. Number of pictures remaining 10. Zoom status 2. Date and time 13. [s] Exposure compensation [P] Backlight correction (Adjust exposure value with the e / f buttons) 14. Slow shutter warning 16. ISO [Blank] Auto [:] ISO...
User Manual
Page 17
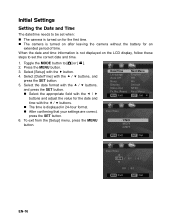
... time. Initial Settings Setting the Date and Time The date/time needs to set when: „ The camera is turned on after leaving the camera without the battery for the date and time with the f button. 4. To exit from the [Setup] menu, press the MENU button. When the date and time information is not displayed on the LCD display, follow these steps to be set the correct date and time. 1. Select [Date/Time] with the c / d buttons, and press the SET button. 5. Toggle the MODE button...
... time. Initial Settings Setting the Date and Time The date/time needs to set when: „ The camera is turned on after leaving the camera without the battery for the date and time with the f button. 4. To exit from the [Setup] menu, press the MENU button. When the date and time information is not displayed on the LCD display, follow these steps to be set the correct date and time. 1. Select [Date/Time] with the c / d buttons, and press the SET button. 5. Toggle the MODE button...
User Manual
Page 18
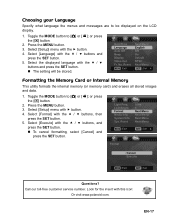
... icon: Or visit www.polaroid.com. Questions? Look for the insert with f button. 4. Select [Setup] menu with the c / d buttons, and press the SET button. „ To cancel formatting, select [Cancel] and press the SET button. Toggle the MODE button to be stored. Press the MENU button. 3. Call our toll-free customer service number. Press the MENU button. 3. or press the [7] button. 2. Formatting the Memory Card or Internal Memory This utility formats the internal memory (or memory card) and erases all stored images and data...
... icon: Or visit www.polaroid.com. Questions? Look for the insert with f button. 4. Select [Setup] menu with the c / d buttons, and press the SET button. „ To cancel formatting, select [Cancel] and press the SET button. Toggle the MODE button to be stored. Press the MENU button. 3. Call our toll-free customer service number. Press the MENU button. 3. or press the [7] button. 2. Formatting the Memory Card or Internal Memory This utility formats the internal memory (or memory card) and erases all stored images and data...

User Manual
Page 22
... them together with the e / f ! RPortrait Lady Use this mode to capture dark scenes such as night views. EN-21 Toggle the MODE button until the scene mode selection screen appears. 2. The table below will help you choose the appropriate scene mode: Scene mode Description W Smile Shot Use this mode when you want to capture an image that makes a man stand out against a slightly blurred background...
... them together with the e / f ! RPortrait Lady Use this mode to capture dark scenes such as night views. EN-21 Toggle the MODE button until the scene mode selection screen appears. 2. The table below will help you choose the appropriate scene mode: Scene mode Description W Smile Shot Use this mode when you want to capture an image that makes a man stand out against a slightly blurred background...
User Manual
Page 24
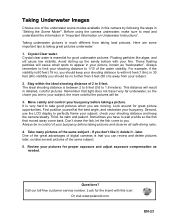
... 30 feet (9m) visibility you can review and delete pictures later, so take good pictures when you . Call our toll-free customer service number. These floating particles will result in detailed, colorful pictures. Taking Underwater Images Choose one of the underwater scene modes available in this icon: Or visit www.polaroid.com. Stay within 6 feet (1.8m); Move calmly and control your fins. Look around for the...
... 30 feet (9m) visibility you can review and delete pictures later, so take good pictures when you . Call our toll-free customer service number. These floating particles will result in detailed, colorful pictures. Taking Underwater Images Choose one of the underwater scene modes available in this icon: Or visit www.polaroid.com. Stay within 6 feet (1.8m); Move calmly and control your fins. Look around for the...
User Manual
Page 25
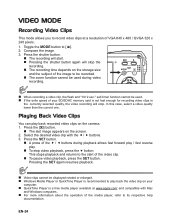
... the write speed of the image to the start . „ Pressing the shutter button again will stop video playback, press the d button. and compatible with the e / f buttons. 3. Select the desired video clip with Mac and Windows computers. „ For more information about the operation of the media player, refer to play back recorded video clips on the screen. 2. This stops playback and returns to be recorded. „ The zoom function cannot be displayed rotated...
... the write speed of the image to the start . „ Pressing the shutter button again will stop video playback, press the d button. and compatible with the e / f buttons. 3. Select the desired video clip with Mac and Windows computers. „ For more information about the operation of the media player, refer to play back recorded video clips on the screen. 2. This stops playback and returns to be recorded. „ The zoom function cannot be displayed rotated...
User Manual
Page 32
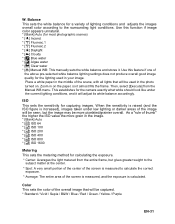
... . Balance This sets the white balance for the camera exactly what white should look like under low lighting or darker areas of the overall image that will adjust its white balance accordingly. Place a white paper in the middle of the scene, with all lights that will be captured. * Standard / Vivid / Sepia / B&W / Blue / Red / Green / Yellow / Purple EN-31 W. Use this function if image color appears unnatural. * [Blank] Auto (for the lighting used...
... . Balance This sets the white balance for the camera exactly what white should look like under low lighting or darker areas of the overall image that will adjust its white balance accordingly. Place a white paper in the middle of the scene, with all lights that will be captured. * Standard / Vivid / Sepia / B&W / Blue / Red / Green / Yellow / Purple EN-31 W. Use this function if image color appears unnatural. * [Blank] Auto (for the lighting used...
User Manual
Page 33
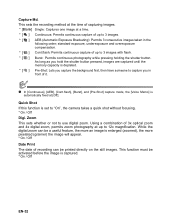
... camera takes a quick shot without focusing. * On / Off Digi. Zoom This sets whether or not to capture you in the following order; This function must be printed directly on the still images. standard exposure, underexposure and overexposure compensation. * [ . ] Cont.flash: Permits continuous capture of recording can be a useful feature, the more an image is captured. * On / Off EN-32 As long as you hold the shutter button pressed, images are...
... camera takes a quick shot without focusing. * On / Off Digi. Zoom This sets whether or not to capture you in the following order; This function must be printed directly on the still images. standard exposure, underexposure and overexposure compensation. * [ . ] Cont.flash: Permits continuous capture of recording can be a useful feature, the more an image is captured. * On / Off EN-32 As long as you hold the shutter button pressed, images are...
User Manual
Page 36
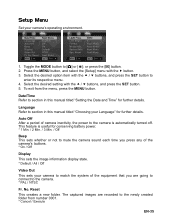
... power to enter its respective menu. 4. Date/Time Refer to section in this manual titled "Choosing your Language" for further details. Toggle the MODE button to the newly created folder from the menu, press the MENU button. Auto Off After a period of the equipment that you press any of the camera's buttons. * On / Off Display This sets the image information display state. * Default / All / Off Video Out This sets your camera's operating environment. 1. Reset This...
... power to enter its respective menu. 4. Date/Time Refer to section in this manual titled "Choosing your Language" for further details. Toggle the MODE button to the newly created folder from the menu, press the MENU button. Auto Off After a period of the equipment that you press any of the camera's buttons. * On / Off Display This sets the image information display state. * Default / All / Off Video Out This sets your camera's operating environment. 1. Reset This...
User Manual
Page 37
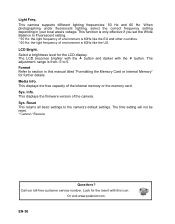
... icon: Or visit www.polaroid.com. LCD Bright. Media Info. Call our toll-free customer service number. Reset This returns all basic settings to 5. This displays the free capacity of the camera. Look for the insert with the d button. This function is only effective if you set the White Balance to section in your local area's voltage. This camera supports different lighting frequencies: 50 Hz and 60 Hz. The adjustment...
... icon: Or visit www.polaroid.com. LCD Bright. Media Info. Call our toll-free customer service number. Reset This returns all basic settings to 5. This displays the free capacity of the camera. Look for the insert with the d button. This function is only effective if you set the White Balance to section in your local area's voltage. This camera supports different lighting frequencies: 50 Hz and 60 Hz. The adjustment...
User Manual
Page 38
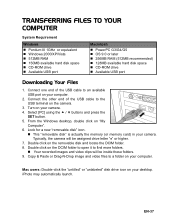
... the SET button. 5. Double click on the DCIM folder to open it to an available USB port on your camera. 4. Mac users: Double-click the "untitled" or "unlabeled" disk drive icon on your computer. 2. Connect one end of the USB cable to a folder on the camera. 3. Copy & Paste or Drag-N-Drop image and video files to the USB terminal on your camera. Look for a new "removable disk" icon. „ This "removable disk" is actually the memory (or memory card...
... the SET button. 5. Double click on the DCIM folder to open it to an available USB port on your camera. 4. Mac users: Double-click the "untitled" or "unlabeled" disk drive icon on your computer. 2. Connect one end of the USB cable to a folder on the camera. 3. Copy & Paste or Drag-N-Drop image and video files to the USB terminal on your camera. Look for a new "removable disk" icon. „ This "removable disk" is actually the memory (or memory card...
User Manual
Page 40
... layouts. Create horizontal, vertical and 360° panorama pictures all within this icon: Or visit www.polaroid.com. Print Creations - brings you tons of software that brings out the creativity in "Administrator" mode. „ The software is not supported by Mac Questions? The welcome screen appears. 2. Click the respective software name. Call our toll-free customer service number. Look for you, and gives you a family...
... layouts. Create horizontal, vertical and 360° panorama pictures all within this icon: Or visit www.polaroid.com. Print Creations - brings you tons of software that brings out the creativity in "Administrator" mode. „ The software is not supported by Mac Questions? The welcome screen appears. 2. Click the respective software name. Call our toll-free customer service number. Look for you, and gives you a family...
User Manual
Page 41
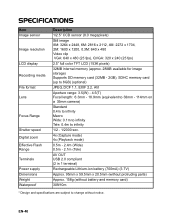
SPECIFICATIONS Item Image sensor Image resolution LCD display Recording media File format Lens Focus Range Shutter speed Digital zoom Effective Flash Range Terminals Power supply Dimensions Weight Waterproof Description 1/2.5" CCD sensor (8.0 megapixels) Still image 8M: 3264 x 2448, 6M: 2816 x 2112, 4M: 2272 x 1704, 2M: 1600 x 1200, 0.3M: 640 x 480 Video clip VGA: 640 x 480 (25 fps), QVGA: 320 x 240 (25 fps) 2.5" full color TFT LCD (153K pixels) 32MB internal memory (approx. 28MB available for...
SPECIFICATIONS Item Image sensor Image resolution LCD display Recording media File format Lens Focus Range Shutter speed Digital zoom Effective Flash Range Terminals Power supply Dimensions Weight Waterproof Description 1/2.5" CCD sensor (8.0 megapixels) Still image 8M: 3264 x 2448, 6M: 2816 x 2112, 4M: 2272 x 1704, 2M: 1600 x 1200, 0.3M: 640 x 480 Video clip VGA: 640 x 480 (25 fps), QVGA: 320 x 240 (25 fps) 2.5" full color TFT LCD (153K pixels) 32MB internal memory (approx. 28MB available for...
User Manual
Page 43
... lens is subjected to an Turn off the camera, then turn it for repairs. The correct date and time is write-protected. The battery is not fully charged. The battery is not inserted. again. formatted on the memory You played back a memory card that Insert a memory card that of continuous use to maximize its charged. buttons are pressed, it does not focus. the camera or the flash. LCD display. The contents on this camera. Troubleshooting Refer to the symptoms and solutions...
... lens is subjected to an Turn off the camera, then turn it for repairs. The correct date and time is write-protected. The battery is not fully charged. The battery is not inserted. again. formatted on the memory You played back a memory card that Insert a memory card that of continuous use to maximize its charged. buttons are pressed, it does not focus. the camera or the flash. LCD display. The contents on this camera. Troubleshooting Refer to the symptoms and solutions...
User Manual
Page 44
... SET button. Printing images When the camera is properly connected to a PictBridge compliant printer, the PictBridge menu is displayed on the right hand side will appear. The [USB] screen is available, images can be printed by connecting the digital still camera directly to the PictBridge-compatible printer without using a computer. Connect the other end of the USB cable to your camera. 4. Select the item you want to configure with date imprint or not. „ [Paper Size...
... SET button. Printing images When the camera is properly connected to a PictBridge compliant printer, the PictBridge menu is displayed on the right hand side will appear. The [USB] screen is available, images can be printed by connecting the digital still camera directly to the PictBridge-compatible printer without using a computer. Connect the other end of the USB cable to your camera. 4. Select the item you want to configure with date imprint or not. „ [Paper Size...


