User Guide
Page 10
The Amplifier is described in a separate guide which should be read following familiarization with the headset. This User Guide will help you for selecting the DuoSet® Headset from Plantronics. WELCOME Thank you install your DuoSet Headset and learn its basic operation.
The Amplifier is described in a separate guide which should be read following familiarization with the headset. This User Guide will help you for selecting the DuoSet® Headset from Plantronics. WELCOME Thank you install your DuoSet Headset and learn its basic operation.
User Guide
Page 15
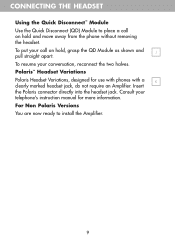
CONNECTING THE HEADSET Using the Quick Disconnect™ Module Use the Quick Disconnect (QD) Module to install the Amplifier. 9 Insert the Polaris connector directly into the headset jack. For Non Polaris Versions You are now ready to place a call on hold , grasp the QD ... your conversation, reconnect the two halves. To resume your telephone's instruction manual for use with phones with a K clearly marked headset jack, do not require an Amplifier.
CONNECTING THE HEADSET Using the Quick Disconnect™ Module Use the Quick Disconnect (QD) Module to install the Amplifier. 9 Insert the Polaris connector directly into the headset jack. For Non Polaris Versions You are now ready to place a call on hold , grasp the QD ... your conversation, reconnect the two halves. To resume your telephone's instruction manual for use with phones with a K clearly marked headset jack, do not require an Amplifier.
User Guide
Page 16
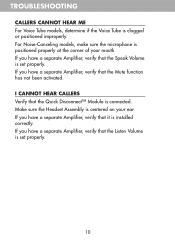
...that the Mute function has not been activated. If you have a separate Amplifier, verify that the Quick Disconnect™ Module is connected. Make sure the Headset Assembly is set properly. 10 If you have a separate Amplifier, verify that the Speak Volume is centered on your mouth. If you ...have a separate Amplifier, verify that the Listen Volume is positioned properly at the corner of your ear. For Noise-...
...that the Mute function has not been activated. If you have a separate Amplifier, verify that the Quick Disconnect™ Module is connected. Make sure the Headset Assembly is set properly. 10 If you have a separate Amplifier, verify that the Speak Volume is centered on your mouth. If you ...have a separate Amplifier, verify that the Listen Volume is positioned properly at the corner of your ear. For Noise-...

User Guide
Page 18
Cushions (2) (P/N 43937-01) Replace when torn or soiled. Extension Cord (P/N 40711-01) Increase mobility in your work area; lets you stay on supplies and accessories, call Plantronics at 1-800-544-4660 or visit our website at www.plantronics.com. Earloops (3 Sizes) (P/N 43297-01) Non-flexible earloops offer fit variations. Voice Tube (P/N 29960-01) Replace if clogged or damaged. 12 SUPPLIES AND ACCESSORIES For information on the line while moving away from the amplifier. See also Diagram Key for additional part numbers.
Cushions (2) (P/N 43937-01) Replace when torn or soiled. Extension Cord (P/N 40711-01) Increase mobility in your work area; lets you stay on supplies and accessories, call Plantronics at 1-800-544-4660 or visit our website at www.plantronics.com. Earloops (3 Sizes) (P/N 43297-01) Non-flexible earloops offer fit variations. Voice Tube (P/N 29960-01) Replace if clogged or damaged. 12 SUPPLIES AND ACCESSORIES For information on the line while moving away from the amplifier. See also Diagram Key for additional part numbers.


