

Owner's Manual
Page 4
... wireless technology device 26 Listening to your system Choosing the listening mode 29 Auto playback 29 Listening in a safe place for buying this Pioneer product. Thank you have finished reading the instructions, put them away in surround sound 29 Using the Advanced surround 30 Using Stream Direct ... 31 Setting the Up Mix function 31 Setting the Audio options 32 Making an audio or a video recording 33 06 The System Setup menu Using the System Setup menu 34 Manual speaker setup 34 Speaker Setting 34 Crossover Network 35 Channel Level 35 Speaker Distance 36 The Input Assign...
... wireless technology device 26 Listening to your system Choosing the listening mode 29 Auto playback 29 Listening in a safe place for buying this Pioneer product. Thank you have finished reading the instructions, put them away in surround sound 29 Using the Advanced surround 30 Using Stream Direct ... 31 Setting the Up Mix function 31 Setting the Audio options 32 Making an audio or a video recording 33 06 The System Setup menu Using the System Setup menu 34 Manual speaker setup 34 Speaker Setting 34 Crossover Network 35 Channel Level 35 Speaker Distance 36 The Input Assign...

Owner's Manual
Page 5
...if you don't know how to do this. 4 The Pre Out Setting (page 37) (When connecting the front height speakers.) The Input Assign menu (page 36) (When using a digital connection from the Blu-ray Disc/DVD player to the receiver. • About video outputs connection (page 13) &#...to put it on the following the procedure below to control other movement - Check the manual that you've received the following supplied accessories: • Setup microphone • Remote control • AAA size IEC R03 dry cell batteries (to confirm system operation) x2 • AM loop antenna • ...
...if you don't know how to do this. 4 The Pre Out Setting (page 37) (When connecting the front height speakers.) The Input Assign menu (page 36) (When using a digital connection from the Blu-ray Disc/DVD player to the receiver. • About video outputs connection (page 13) &#...to put it on the following the procedure below to control other movement - Check the manual that you've received the following supplied accessories: • Setup microphone • Remote control • AAA size IEC R03 dry cell batteries (to confirm system operation) x2 • AM loop antenna • ...
Owner's Manual
Page 8
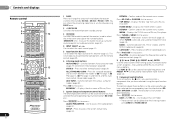
...5 ADAPTER iPod USB VIDEO 1 VIDEO 2 TUNER SIRIUS VOL 11 12 AUTO/ ALC/ BD MENU 6 DIRECT STEREO STANDARD ADV SURR AUDIO PARAMETER TOP 7 MENU TUNER EDIT MASTER TOOLS VOLUME TUNE MENU PRESET PRESET ENTER 8 HOME MENU SETUP iPod CTRL CATEGORY TUNE BAND RETURN DTV/ TV MUTE 9 BASS TRE 10 MEMORY HDD 1... - ADV SURR - Switches between Auto surround mode (page 29) and Stream Direct playback (page 30). Off). Press to access the System Setup menu (page 34). Switches between AM, FM ST (stereo) and FM MONO radio bands (page 28). Press RECEIVER first to access the Audio ...
...5 ADAPTER iPod USB VIDEO 1 VIDEO 2 TUNER SIRIUS VOL 11 12 AUTO/ ALC/ BD MENU 6 DIRECT STEREO STANDARD ADV SURR AUDIO PARAMETER TOP 7 MENU TUNER EDIT MASTER TOOLS VOLUME TUNE MENU PRESET PRESET ENTER 8 HOME MENU SETUP iPod CTRL CATEGORY TUNE BAND RETURN DTV/ TV MUTE 9 BASS TRE 10 MEMORY HDD 1... - ADV SURR - Switches between Auto surround mode (page 29) and Stream Direct playback (page 30). Off). Press to access the System Setup menu (page 34). Switches between AM, FM ST (stereo) and FM MONO radio bands (page 28). Press RECEIVER first to access the Audio ...
Owner's Manual
Page 19
... USB VIDEO iPad This receiver iPod cable Music Genius > Playlists Artists Albums Songs Radio Genres Composers Audiobooks MENU iPod • When the Control with HDMI function is ON...(see Control with HDMI function on this receiver once it damaged, ask your nearest Pioneer authorized independent service company for iPod. • For instructions on playing the iPod,...iPod using the USB interface on page 24. CONTROL ON / OFF PHONES This receiver MCACC SETUP MIC VIDEO 2 INPUT 5V 2.1 A L AUDIO R iPod iPhone USB VIDEO iPad USB mass...
... USB VIDEO iPad This receiver iPod cable Music Genius > Playlists Artists Albums Songs Radio Genres Composers Audiobooks MENU iPod • When the Control with HDMI function is ON...(see Control with HDMI function on this receiver once it damaged, ask your nearest Pioneer authorized independent service company for iPod. • For instructions on playing the iPod,...iPod using the USB interface on page 24. CONTROL ON / OFF PHONES This receiver MCACC SETUP MIC VIDEO 2 INPUT 5V 2.1 A L AUDIO R iPod iPhone USB VIDEO iPad USB mass...

Owner's Manual
Page 20
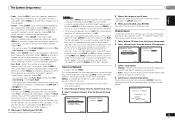
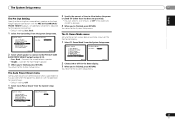
...to optimize the speaker settings and equalization for your system, the receiver uses the information from the System Setup menu, then press ENTER. You can turn on the remote control, then press the SETUP button. Make sure there are output at any existing speaker settings you connected either the surround back ...the front height speaker, make sure that the Pre Out setting is turned up the microphone provided with your particular room. The System Setup menu appears on the front panel. Automatically setting up for surround sound (MCACC) The Auto Multi-Channel Acoustic Calibration (MCACC...
...to optimize the speaker settings and equalization for your system, the receiver uses the information from the System Setup menu, then press ENTER. You can turn on the remote control, then press the SETUP button. Make sure there are output at any existing speaker settings you connected either the surround back ...the front height speaker, make sure that the Pre Out setting is turned up the microphone provided with your particular room. The System Setup menu appears on the front panel. Automatically setting up for surround sound (MCACC) The Auto Multi-Channel Acoustic Calibration (MCACC...

Owner's Manual
Page 21
... end up with the speaker connection. This setting should give you see Other problems when using the System Setup menu (starting on -screen should reflect the actual speakers you 're finished, go to determine the optimum receiver settings for channel level, speaker distance, and...echo off the TV when doing this is displayed on -screen while the receiver outputs test tones to the System Setup menu. If there are any instructions showing in the Auto MCACC setup should be accurate (taking delay and room characteristics into account) and generally does not need to be farther than the...
... end up with the speaker connection. This setting should give you see Other problems when using the System Setup menu (starting on -screen should reflect the actual speakers you 're finished, go to determine the optimum receiver settings for channel level, speaker distance, and...echo off the TV when doing this is displayed on -screen while the receiver outputs test tones to the System Setup menu. If there are any instructions showing in the Auto MCACC setup should be accurate (taking delay and room characteristics into account) and generally does not need to be farther than the...

Owner's Manual
Page 22
...such as a DVD disc) with a digital audio connection, you have one), then the receiver (press RECEIVER). • Make sure the setup microphone is disconnected. 2 Switch the TV input to the input signal and listening mode, check the connections and settings. H can also be selected by... SELECT BD DVD TV INPUT AUTO/ ALC/ BD MENU DIRECT STEREO STANDARD ADV SURR AUDIO PARAMETER TOP MENU TUNE TUNER EDIT MASTER TOOLS VOLUME MENU ENTER PRESET PRESET DVR/BDR CD CD-R CH ADAPTER iPod USB VIDEO 1 HOME MENU SETUP iPod CTRL CATEGORY TUNE BAND RETURN DTV/ TV MUTE...
...such as a DVD disc) with a digital audio connection, you have one), then the receiver (press RECEIVER). • Make sure the setup microphone is disconnected. 2 Switch the TV input to the input signal and listening mode, check the connections and settings. H can also be selected by... SELECT BD DVD TV INPUT AUTO/ ALC/ BD MENU DIRECT STEREO STANDARD ADV SURR AUDIO PARAMETER TOP MENU TUNE TUNER EDIT MASTER TOOLS VOLUME MENU ENTER PRESET PRESET DVR/BDR CD CD-R CH ADAPTER iPod USB VIDEO 1 HOME MENU SETUP iPod CTRL CATEGORY TUNE BAND RETURN DTV/ TV MUTE...
Owner's Manual
Page 24
...on the front panel to the iPod USB input. Important • To play When your iPod is connected to this receiver. Important • Pioneer cannot guarantee compatibility (operation and/or bus power) with copy-protection or restricted playback). • Compatible USB devices include external magnetic hard drives... TRE MEMORY PRESET ENTER PRESET HDD DVD VCR 1 2 3 DISP S.RETRIEVER SB CH CH SELECT EQ 4 5 6 CH HOME MENU SETUP TUNE BAND MIDNIGHT SPEAKERS LEV 7 8 9 PHASE CH iPod CTRL CATEGORY RETURN DTV/ TV MUTE DIMMER SIGNAL SEL LEV 0 SHIFT • During ...
...on the front panel to the iPod USB input. Important • To play When your iPod is connected to this receiver. Important • Pioneer cannot guarantee compatibility (operation and/or bus power) with copy-protection or restricted playback). • Compatible USB devices include external magnetic hard drives... TRE MEMORY PRESET ENTER PRESET HDD DVD VCR 1 2 3 DISP S.RETRIEVER SB CH CH SELECT EQ 4 5 6 CH HOME MENU SETUP TUNE BAND MIDNIGHT SPEAKERS LEV 7 8 9 PHASE CH iPod CTRL CATEGORY RETURN DTV/ TV MUTE DIMMER SIGNAL SEL LEV 0 SHIFT • During ...

Owner's Manual
Page 25
...: Yes (DRM-protected audio files will not play, and files encoded with some versions of iTunes® may not play When the Bluetooth ADAPTER (Pioneer Model No. The list below : • Switch the receiver off, then on page 46. Sampling rates: 8 kHz to encode the AAC file... Bluetooth wireless technology enabled device supports A2DP profiles. 25 En AUTO/ ALC/ BD MENU DIRECT STEREO STANDARD ADV SURR DTV/ TV MUTE AUDIO PARAMETER TOP MENU TUNER EDIT MASTER TOOLS VOLUME TUNE MENU PRESET ENTER HOME MENU SETUP iPod CTRL CATEGORY TUNE BAND RETURN DTV/ TV MUTE BASS TRE MEMORY HDD 1...
...: Yes (DRM-protected audio files will not play, and files encoded with some versions of iTunes® may not play When the Bluetooth ADAPTER (Pioneer Model No. The list below : • Switch the receiver off, then on page 46. Sampling rates: 8 kHz to encode the AAC file... Bluetooth wireless technology enabled device supports A2DP profiles. 25 En AUTO/ ALC/ BD MENU DIRECT STEREO STANDARD ADV SURR DTV/ TV MUTE AUDIO PARAMETER TOP MENU TUNER EDIT MASTER TOOLS VOLUME TUNE MENU PRESET ENTER HOME MENU SETUP iPod CTRL CATEGORY TUNE BAND RETURN DTV/ TV MUTE BASS TRE MEMORY HDD 1...
Owner's Manual
Page 26
...NODEVICE appears in the receiver display. Press ADAPTER to follow installation and setup instructions are those of XM' Other characters may not be used with ...with the SIRIUS tuner. SIRIUS Satellite Radio is cleared. There are registered trademarks owned by Pioneer Corporation is connected: Bluetooth wireless technology device name appears in some case be guaranteed for ...SIRIUS Satellite Radio tuner (sold separately) to performing the pairing operation below . 26 En 1 Press TOP MENU. 2 Press ENTER to enter PAIRING. 3 Select the PIN code to switch the ADAPTER input, then conduct...
...NODEVICE appears in the receiver display. Press ADAPTER to follow installation and setup instructions are those of XM' Other characters may not be used with ...with the SIRIUS tuner. SIRIUS Satellite Radio is cleared. There are registered trademarks owned by Pioneer Corporation is connected: Bluetooth wireless technology device name appears in some case be guaranteed for ...SIRIUS Satellite Radio tuner (sold separately) to performing the pairing operation below . 26 En 1 Press TOP MENU. 2 Press ENTER to enter PAIRING. 3 Select the PIN code to switch the ADAPTER input, then conduct...
Owner's Manual
Page 28
...at a time, press TUNE /. DVR/BDR CD CD-R CH AUDIO PARAMETER TOP MENU TUNE TUNER EDIT MASTER TOOLS VOLUME MENU ADAPTER iPod USB VIDEO 1 ENTER VIDEO 2 TUNER SIRIUS VOL HOME MENU SETUP iPod CTRL CATEGORY 1 Press TUNER to select characters. • The name is stored when ENTER...to search for other stations. RECEIVER SLEEP TV SOURCE CONTROL AUDIO PARAMETER TOP MENU TUNER EDIT MASTER TOOLS VOLUME TUNE MENU RECEIVER INPUT SELECT BD DVD TV INPUT DVR/BDR CD CD-R CH ENTER HOME MENU SETUP iPod CTRL CATEGORY TUNE BAND RETURN DTV/ TV MUTE ADAPTER iPod USB VIDEO...
...at a time, press TUNE /. DVR/BDR CD CD-R CH AUDIO PARAMETER TOP MENU TUNE TUNER EDIT MASTER TOOLS VOLUME MENU ADAPTER iPod USB VIDEO 1 ENTER VIDEO 2 TUNER SIRIUS VOL HOME MENU SETUP iPod CTRL CATEGORY 1 Press TUNER to select characters. • The name is stored when ENTER...to search for other stations. RECEIVER SLEEP TV SOURCE CONTROL AUDIO PARAMETER TOP MENU TUNER EDIT MASTER TOOLS VOLUME TUNE MENU RECEIVER INPUT SELECT BD DVD TV INPUT DVR/BDR CD CD-R CH ENTER HOME MENU SETUP iPod CTRL CATEGORY TUNE BAND RETURN DTV/ TV MUTE ADAPTER iPod USB VIDEO...

Owner's Manual
Page 29
...Yes No stereo. DTS-ES Movie/Music Yes No The following modes provide basic surround sound for more on this). AUTO/ ALC/ BD MENU DIRECT STEREO STANDARD ADV SURR AUDIO PARAMETER TUNER EDIT MASTER TOOLS VOLUME DISPLAY BAND TUNER EDIT TUNE AUTO SURROUND/ ALC/ STREAM DIRECT STANDARD ...CONTROL Auto playback AUTO/ DIRECT AUTO SURROUND/ STREAM DIRECT The simplest, most direct listening option is shown on the display on your speaker setup and the type of source you select STEREO ALC (Auto Level Control stereo mode), this , the receiver automatically detects what kind of surround...
...Yes No stereo. DTS-ES Movie/Music Yes No The following modes provide basic surround sound for more on this). AUTO/ ALC/ BD MENU DIRECT STEREO STANDARD ADV SURR AUDIO PARAMETER TUNER EDIT MASTER TOOLS VOLUME DISPLAY BAND TUNER EDIT TUNE AUTO SURROUND/ ALC/ STREAM DIRECT STANDARD ...CONTROL Auto playback AUTO/ DIRECT AUTO SURROUND/ STREAM DIRECT The simplest, most direct listening option is shown on the display on your speaker setup and the type of source you select STEREO ALC (Auto Level Control stereo mode), this , the receiver automatically detects what kind of surround...

Owner's Manual
Page 30
... in Automatically setting up for surround sound (MCACC) on Acoustic Calibration Equalization. e. Using the Advanced surround BD MENU ADV SURR ADVANCED SURROUND The Advanced surround feature creates a variety of channels in the Manual SP Setup (speaker setting, channel level, speaker distance), as well as with dynamic soundtracks. Suitable for rock and/ or...
... in Automatically setting up for surround sound (MCACC) on Acoustic Calibration Equalization. e. Using the Advanced surround BD MENU ADV SURR ADVANCED SURROUND The Advanced surround feature creates a variety of channels in the Manual SP Setup (speaker setting, channel level, speaker distance), as well as with dynamic soundtracks. Suitable for rock and/ or...

Owner's Manual
Page 34
...on page 20, it isn't necessary to make detailed settings to specify how you how to your speakers from the Manual SP Setup menu. 2.Manual SP Setup a.Speaker Setting b.Crossover Network c.Channel Level d.Speaker Distance 2a.Speaker Setting Front SMALL Center [ SMALL ] Surr [ SMALL ... 7.FL Demo Mode Return • Auto MCACC - It is a quick and effective automatic surround setup (see below). - 06 The System Setup menu Chapter 6: The System Setup menu Using the System Setup menu The following speakers: 34 En This is a good idea to make detailed settings to the subwoofer ...
...on page 20, it isn't necessary to make detailed settings to specify how you how to your speakers from the Manual SP Setup menu. 2.Manual SP Setup a.Speaker Setting b.Crossover Network c.Channel Level d.Speaker Distance 2a.Speaker Setting Front SMALL Center [ SMALL ] Surr [ SMALL ... 7.FL Demo Mode Return • Auto MCACC - It is a quick and effective automatic surround setup (see below). - 06 The System Setup menu Chapter 6: The System Setup menu Using the System Setup menu The following speakers: 34 En This is a good idea to make detailed settings to the subwoofer ...
Owner's Manual
Page 35
... other speakers or subwoofer. Back. - Depending on page 34. 1 Select 'Manual SP Setup' from the System Setup menu. 2 Select 'Crossover Network' from the Manual SP Setup menu. 2.Manual SP Setup a.Speaker Setting b.Crossover Network c.Channel Level d.Speaker Distance 2c.Channel Level Test Tone Manual ... when YES is hooked up a home theater system. 1 Select 'Manual SP Setup' from the System Setup menu. 2 Select 'Channel Level' from the Manual SP Setup menu. 2.Manual SP Setup a.Speaker Setting b.Crossover Network c.Channel Level d.Speaker Distance 2b.Crossover Network Frequency ...
... other speakers or subwoofer. Back. - Depending on page 34. 1 Select 'Manual SP Setup' from the System Setup menu. 2 Select 'Crossover Network' from the Manual SP Setup menu. 2.Manual SP Setup a.Speaker Setting b.Crossover Network c.Channel Level d.Speaker Distance 2c.Channel Level Test Tone Manual ... when YES is hooked up a home theater system. 1 Select 'Manual SP Setup' from the System Setup menu. 2 Select 'Channel Level' from the Manual SP Setup menu. 2.Manual SP Setup a.Speaker Setting b.Crossover Network c.Channel Level d.Speaker Distance 2b.Crossover Network Frequency ...

Owner's Manual
Page 36
...8226; If you are using /. You can change the channel levels at low volumes. Input Assign 4 . 06 The System Setup menu 5 Adjust the level of each speaker in 0.1 feet increments. 4 When you're finished, press RETURN. Back L [ Surround L...ft ] Return 3 Adjust the distance of each speaker using a Sound Pressure Level (SPL) meter, take the readings from the Manual SP Setup menu. 2.Manual SP Setup a.Speaker Setting b.Crossover Network c.Channel Level d.Speaker Distance Return 2d.Speaker Distance Front L Center Front R Surround R Surr. If you ...
...8226; If you are using /. You can change the channel levels at low volumes. Input Assign 4 . 06 The System Setup menu 5 Adjust the level of each speaker in 0.1 feet increments. 4 When you're finished, press RETURN. Back L [ Surround L...ft ] Return 3 Adjust the distance of each speaker using a Sound Pressure Level (SPL) meter, take the readings from the Manual SP Setup menu. 2.Manual SP Setup a.Speaker Setting b.Crossover Network c.Channel Level d.Speaker Distance Return 2d.Speaker Distance Front L Center Front R Surround R Surr. If you ...
Owner's Manual
Page 37
... are to be shown on with the PRE OUT SURR BACK/ FRONT HEIGHT outputs. HDMI Setup 6 . Auto MCACC 2 . Pre Out Setting 5 . You return to the System Setup menu. System Setup 1 . Auto Power Down 7 . Auto MCACC 2 . Return 37 En System Setup 1 . Input Assign 4 . Pre Out Setting 5 . Auto Power Down 7 . ...receiver after a specified time has passed (when the power has been on the front panel display. 1 Select 'FL Demo Mode' from the System Setup menu. Input Assign 4 . FL Demo Mode 7.FL Demo Mode FL Demo ON Return 2 Choose ON or OFF for the demo display. 3 When ...
... are to be shown on with the PRE OUT SURR BACK/ FRONT HEIGHT outputs. HDMI Setup 6 . Auto MCACC 2 . Pre Out Setting 5 . You return to the System Setup menu. System Setup 1 . Auto Power Down 7 . Auto MCACC 2 . Return 37 En System Setup 1 . Input Assign 4 . Pre Out Setting 5 . Auto Power Down 7 . ...receiver after a specified time has passed (when the power has been on the front panel display. 1 Select 'FL Demo Mode' from the System Setup menu. Input Assign 4 . FL Demo Mode 7.FL Demo Mode FL Demo ON Return 2 Choose ON or OFF for the demo display. 3 When ...
Owner's Manual
Page 38
... want . The System Setup menu appears on . 2 Switch the TV input to the input that connects this receiver to the TV through the screens and select menu items. Press RETURN to confirm and exit the current menu. • Press SETUP at HDMI Setup to ON (see HDMI Setup below with a Control with HDMIcompatible Pioneer TV or Blu-ray...
... want . The System Setup menu appears on . 2 Switch the TV input to the input that connects this receiver to the TV through the screens and select menu items. Press RETURN to confirm and exit the current menu. • Press SETUP at HDMI Setup to ON (see HDMI Setup below with a Control with HDMIcompatible Pioneer TV or Blu-ray...
Owner's Manual
Page 39
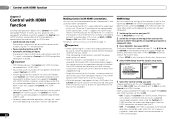
...Once you have finished all connections and settings, you 're finished, press RETURN. From the menu screen of a brand other than Pioneer that supports the Control with HDMI function. • When playback starts on the player or ...an optical digital cable, etc., in the synchronized amp mode, the synchronized amp mode is connected. See the Pioneer website for a component connected to the HDMI cable.) The synchronized operations below . • Synchronized amp mode ... when the receiver's power is connected to the System Setup menu. When the synchronized amp mode is switched. -
...Once you have finished all connections and settings, you 're finished, press RETURN. From the menu screen of a brand other than Pioneer that supports the Control with HDMI function. • When playback starts on the player or ...an optical digital cable, etc., in the synchronized amp mode, the synchronized amp mode is connected. See the Pioneer website for a component connected to the HDMI cable.) The synchronized operations below . • Synchronized amp mode ... when the receiver's power is connected to the System Setup menu. When the synchronized amp mode is switched. -
Owner's Manual
Page 45
...or operate from your monitor, please consult the component or monitor manual or contact the manufacturer for the Control with HDMI setting (see HDMI Setup on page 38). Turn the TV's power on before turning on this receiver's power. Set the TV side Control... go back to the original display, or set to the communication mode supporting the Bluetooth wireless technology. The OSD screen (System Setup menu or the menu screen for HDMI compatibility information). Synchronized operation not possible using the component or composite video jacks. Depending on the remote...
...or operate from your monitor, please consult the component or monitor manual or contact the manufacturer for the Control with HDMI setting (see HDMI Setup on page 38). Turn the TV's power on before turning on this receiver's power. Set the TV side Control... go back to the original display, or set to the communication mode supporting the Bluetooth wireless technology. The OSD screen (System Setup menu or the menu screen for HDMI compatibility information). Synchronized operation not possible using the component or composite video jacks. Depending on the remote...


