Owner's Manual
Page 3
..." adapts to get the most importantly, without annoying blaring or distortion- longed exposure to prevent hearing damage or loss in front of speakers, thunderclap 140 Gunshot blast, jet plane 180 Rocket launching pad Information courtesy of sound. After all, we want you to higher volumes...room, refrigerator, bedroom away from loud noise is too late, this now will provide a lifetime of fice 60 Air conditioner at 20 feet, sewing machine 70 Vacuum cleaner, hair dryer, noisy restaurant 80 Average city traffic, garbage disposals, alarm clock at a safe level...
..." adapts to get the most importantly, without annoying blaring or distortion- longed exposure to prevent hearing damage or loss in front of speakers, thunderclap 140 Gunshot blast, jet plane 180 Rocket launching pad Information courtesy of sound. After all, we want you to higher volumes...room, refrigerator, bedroom away from loud noise is too late, this now will provide a lifetime of fice 60 Air conditioner at 20 feet, sewing machine 70 Vacuum cleaner, hair dryer, noisy restaurant 80 Average city traffic, garbage disposals, alarm clock at a safe level...

Owner's Manual
Page 153
... not operate the audio function within about 30 seconds, the display is displayed. 2 Press 5 or ∞ to the source display. 151 CONTROL:INTERNAL" or "REAR SPEAKER:SUBWOOFER", you operate from. ■Displaying the AUDIO MENU 1 Press A.MENU (AUDIO) button in INITIAL SETTINGS MENU. (SUB WOOFER is not displayed.) ➲ When the... setting is the same regardless of the functions. "NON FADING" is "S.W. cally returned to select "AUDIO", and press A.MENU (AUDIO) button. Chapter 6 Combining and Using Pioneer AV Equipment Audio Adjustments The display for AUDIO MENU is only "S.W.
... not operate the audio function within about 30 seconds, the display is displayed. 2 Press 5 or ∞ to the source display. 151 CONTROL:INTERNAL" or "REAR SPEAKER:SUBWOOFER", you operate from. ■Displaying the AUDIO MENU 1 Press A.MENU (AUDIO) button in INITIAL SETTINGS MENU. (SUB WOOFER is not displayed.) ➲ When the... setting is the same regardless of the functions. "NON FADING" is "S.W. cally returned to select "AUDIO", and press A.MENU (AUDIO) button. Chapter 6 Combining and Using Pioneer AV Equipment Audio Adjustments The display for AUDIO MENU is only "S.W.
Owner's Manual
Page 154
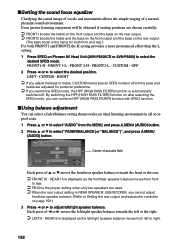
...; LEFT:9 - ■Setting the sound focus equalizer Clarifying the sound image of vocals and instruments allows the simple staging of 2 or 3 moves the left/right speaker balance towards the front or the rear. ➲ FRONT:15 - RIGHT:9 is automatically switched off. FRONT 1-L - FRONT2-L - Each press of a natural, pleasant sound environment. ...positions are adjusted for both front and rear.) For both FRONT1 and FRONT2 the H setting provides a more pronounced effect than the L setting. 1 Press SFEQ on Pioneer AV Head Unit (AVH-P6400CD or AVH-P6400) to select the desired position.
...; LEFT:9 - ■Setting the sound focus equalizer Clarifying the sound image of vocals and instruments allows the simple staging of 2 or 3 moves the left/right speaker balance towards the front or the rear. ➲ FRONT:15 - RIGHT:9 is automatically switched off. FRONT 1-L - FRONT2-L - Each press of a natural, pleasant sound environment. ...positions are adjusted for both front and rear.) For both FRONT1 and FRONT2 the H setting provides a more pronounced effect than the L setting. 1 Press SFEQ on Pioneer AV Head Unit (AVH-P6400CD or AVH-P6400) to select the desired position.
Owner's Manual
Page 158
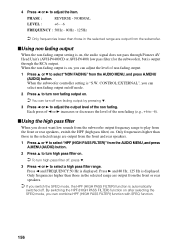
...level of the non fading (e.g., +6 to adjust the item. Only frequencies higher than those in the selected range are output from the front or rear speakers. ➲ If you do not want low sounds from the subwoofer output frequency range to play from the AUDIO MENU, and press A.MENU (AUDIO)... from the front or rear speakers, switch the HPF (high pass filter) on . ➲ To turn off , press ∞. 3 Press 2 or 3 to turn high pass filter on . By switching the HPF (HIGH PASS FILTER) function on , the audio signal does not pass through Pioneer AV Head Unit's (AVH-P6400CD...
...level of the non fading (e.g., +6 to adjust the item. Only frequencies higher than those in the selected range are output from the front or rear speakers. ➲ If you do not want low sounds from the subwoofer output frequency range to play from the AUDIO MENU, and press A.MENU (AUDIO)... from the front or rear speakers, switch the HPF (high pass filter) on . ➲ To turn off , press ∞. 3 Press 2 or 3 to turn high pass filter on . By switching the HPF (HIGH PASS FILTER) function on , the audio signal does not pass through Pioneer AV Head Unit's (AVH-P6400CD...
Owner's Manual
Page 160
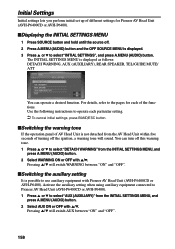
...SETTINGS MENU, and press A.MENU (AUDIO) button. 2 Select AUX ON or OFF with Pioneer AV Head Unit (AVH-P6400CD or AVH-P6400). The INITIAL SETTINGS MENU is displayed as follows: DETACH WARNING, AUX (AUXILIARY), REAR SPEAKER, TEL/GUIDE MUTE/ ATT You can turn off this warning tone. 1 Press 5 or...9632;Switching the auxiliary setting It is possible to select "INITIAL SETTINGS", and press A.MENU (AUDIO) button. For details, refer to the pages for Pioneer AV Head Unit (AVH-P6400CD or AVH-P6400). ■Displaying the INITIAL SETTINGS MENU 1 Press SOURCE button and hold until the source off. 2 Press...
...SETTINGS MENU, and press A.MENU (AUDIO) button. 2 Select AUX ON or OFF with Pioneer AV Head Unit (AVH-P6400CD or AVH-P6400). The INITIAL SETTINGS MENU is displayed as follows: DETACH WARNING, AUX (AUXILIARY), REAR SPEAKER, TEL/GUIDE MUTE/ ATT You can turn off this warning tone. 1 Press 5 or...9632;Switching the auxiliary setting It is possible to select "INITIAL SETTINGS", and press A.MENU (AUDIO) button. For details, refer to the pages for Pioneer AV Head Unit (AVH-P6400CD or AVH-P6400). ■Displaying the INITIAL SETTINGS MENU 1 Press SOURCE button and hold until the source off. 2 Press...

Owner's Manual
Page 161
..., phase) built-in the audio menu return to the factory settings. ➲ Both rear speaker leads output and RCA rear output are connected to full range speakers (when REAR SPEAKER:FULL is turned to Pioneer AV Head Unit (AVH-P6400CD or AVH-P6400), when there is set for full-range... speaker (REAR SPEAKER:FULL) or subwoofer (REAR SPEAKER:SUBWOOFER) connection. MUTE : Volume is selected), you change the...
..., phase) built-in the audio menu return to the factory settings. ➲ Both rear speaker leads output and RCA rear output are connected to full range speakers (when REAR SPEAKER:FULL is turned to Pioneer AV Head Unit (AVH-P6400CD or AVH-P6400), when there is set for full-range... speaker (REAR SPEAKER:FULL) or subwoofer (REAR SPEAKER:SUBWOOFER) connection. MUTE : Volume is selected), you change the...
Other Manual
Page 11
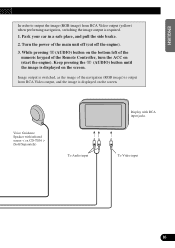
...when performing navigation, switching the image output is required. 1. Keep pressing the (AUDIO) button until the image is displayed on the screen. Voice Guidance Speaker with infrared sensor < ex.CD-TS36 > (Sold Separately) To Audio input Display with RCA input jacks To Video input DEUTSCH FRANÇAIS ITALIANO NEDERLANDS... 10 While pressing (AUDIO) button on the bottom left of the numeric keypad of the main unit off (cut off the engine). 3. Park your car in a safe place, and pull the side brake. 2. ENGLISH ESPAÑOL In order to output the image (RGB image) from RCA Video ...
...when performing navigation, switching the image output is required. 1. Keep pressing the (AUDIO) button until the image is displayed on the screen. Voice Guidance Speaker with infrared sensor < ex.CD-TS36 > (Sold Separately) To Audio input Display with RCA input jacks To Video input DEUTSCH FRANÇAIS ITALIANO NEDERLANDS... 10 While pressing (AUDIO) button on the bottom left of the numeric keypad of the main unit off (cut off the engine). 3. Park your car in a safe place, and pull the side brake. 2. ENGLISH ESPAÑOL In order to output the image (RGB image) from RCA Video ...

