
Owner's Manual
Page 7
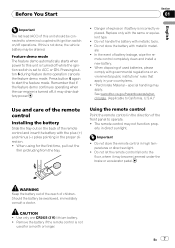
... the re- Do not store the remote control in direct sunlight. CAUTION ! En 7 als. ! In the event of used for the first time, pull out the film protruding from the tray. Using the remote control Point the remote control in the proper direction. ! Remove the battery if the...control and insert the battery with governmental regulations or environmental public institutions' rules that if the feature demo continues operating when the car engine is set to ACC or ON. "Perchlorate Material - Do not let the remote control fall onto the floor, where it may drain battery power. ...
... the re- Do not store the remote control in direct sunlight. CAUTION ! En 7 als. ! In the event of used for the first time, pull out the film protruding from the tray. Using the remote control Point the remote control in the proper direction. ! Remove the battery if the...control and insert the battery with governmental regulations or environmental public institutions' rules that if the feature demo continues operating when the car engine is set to ACC or ON. "Perchlorate Material - Do not let the remote control fall onto the floor, where it may drain battery power. ...
Owner's Manual
Page 11
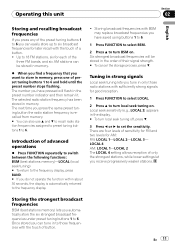
... under preset tuning buttons 1 to turn local seek tuning on . There are four levels of a button. ! En 11 The next time you do not operate the function within about 30 seconds, the display is recalled from memory. # You can also use a and b to recall... radio station frequencies assigned to preset tuning buttons 1 to set the sensitivity. Local seek sensitivity (e.g., LOCAL 2) appears in only those frequencies with the touch of advanced operations % Press FUNCTION...
... under preset tuning buttons 1 to turn local seek tuning on . There are four levels of a button. ! En 11 The next time you do not operate the function within about 30 seconds, the display is recalled from memory. # You can also use a and b to recall... radio station frequencies assigned to preset tuning buttons 1 to set the sensitivity. Local seek sensitivity (e.g., LOCAL 2) appears in only those frequencies with the touch of advanced operations % Press FUNCTION...
Owner's Manual
Page 14
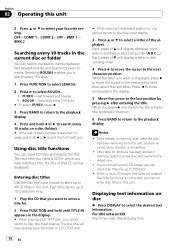
... entered title is connected, you cannot switch to select ROUGH. ! For title entered CD Play time-disc title and play time 14 En ROUGH - Fast forward and reverse ! The next time you insert a CD for 48 discs has been stored in memory. 6 Press BAND to return to the... a title for a new disc will display a letter in ascending order (A B C ...). When a multi-CD player that you have already been recorded on disc % Press DISPLAY to select your favorite setting. BMX 2 Searching every 10 tracks in this unit 2 Press a or b to select the desired text information...
... entered title is connected, you cannot switch to select ROUGH. ! For title entered CD Play time-disc title and play time 14 En ROUGH - Fast forward and reverse ! The next time you insert a CD for 48 discs has been stored in memory. 6 Press BAND to return to the... a title for a new disc will display a letter in ascending order (A B C ...). When a multi-CD player that you have already been recorded on disc % Press DISPLAY to select your favorite setting. BMX 2 Searching every 10 tracks in this unit 2 Press a or b to select the desired text information...
Owner's Manual
Page 15
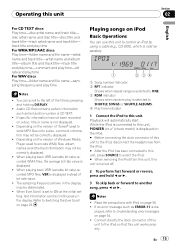
... message such as text and/or number is selected to ONE. 3 RDM indicator Shows when random play time Notes ! Audio CD that this unit works properly. While the iPod is connected to this unit, PIONEER (or (check mark)) is displayed on the iPod. # Before connecting the dock connector of Windows Media... is turned off. 2 To perform fast forward or reverse, press and hold c or d. 3 To skip back or forward to ON at the initial setting, text information scrolls continuously in the display may not be abbreviated. ! Refer to the left of iTunes® used to encode WMA files, album names...
... message such as text and/or number is selected to ONE. 3 RDM indicator Shows when random play time Notes ! Audio CD that this unit works properly. While the iPod is connected to this unit, PIONEER (or (check mark)) is displayed on the iPod. # Before connecting the dock connector of Windows Media... is turned off. 2 To perform fast forward or reverse, press and hold c or d. 3 To skip back or forward to ON at the initial setting, text information scrolls continuously in the display may not be abbreviated. ! Refer to the left of iTunes® used to encode WMA files, album names...

Owner's Manual
Page 16
... the characters recorded on the iPod, there are not compatible with this unit to control an iPod is automatically returned to switch between the following settings: PLAYLISTS (playlists)-ARTISTS (artists)- ALBUMS (albums)-SONGS (songs)- GENRES (genres) 2 Press d to select the desired text information. Notes !...song you do not operate the function within about two minutes after the ignition switch is set to ON at the initial setting, text information scrolls continuously in your iPod's name. Play time-artist name and song title-artist name and album name-album name and song title-...
... the characters recorded on the iPod, there are not compatible with this unit to control an iPod is automatically returned to switch between the following settings: PLAYLISTS (playlists)-ARTISTS (artists)- ALBUMS (albums)-SONGS (songs)- GENRES (genres) 2 Press d to select the desired text information. Notes !...song you do not operate the function within about two minutes after the ignition switch is set to ON at the initial setting, text information scrolls continuously in your iPod's name. Play time-artist name and song title-artist name and album name-album name and song title-...
Owner's Manual
Page 18
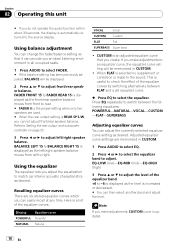
Here is made to the sound. Adjusted equalizer curve settings are used. # When the rear output setting is an adjusted equalizer curve that it can easily recall at any time. Refer to Setting the rear output and subwoofer controller on page 22. 3 Press c or d to adjust left to right.... the audio function within about 30 seconds, the display is increased or decreased. # You can adjust the currently selected equalizer curve setting as desired. When FLAT is selected no supplement or correction is a list of the equalizer curves by switching alternatively between the following...
Here is made to the sound. Adjusted equalizer curve settings are used. # When the rear output setting is an adjusted equalizer curve that it can easily recall at any time. Refer to Setting the rear output and subwoofer controller on page 22. 3 Press c or d to adjust left to right.... the audio function within about 30 seconds, the display is increased or decreased. # You can adjust the currently selected equalizer curve setting as desired. When FLAT is selected no supplement or correction is a list of the equalizer curves by switching alternatively between the following...

Owner's Manual
Page 36
... lost while using this unit. ! You cannot operate the iPod Equalizer on the iPod even if that you set the iPod Equalizer to off on the iPod, Repeat is lost on the Pioneer products. Do not let the iPod fall onto the floor, where it may become jammed under the brake or... automatically when connecting the iPod to 384 kbps (VBR) ! Firmly secure the iPod when driving. Even if you set Repeat to off , before connecting the iPod to direct sunlight can be played back. Appendix Additional Information Example of time. Bit rate: 48 kbps to 320 kbps (CBR), 48 kbps to this unit. !
... lost while using this unit. ! You cannot operate the iPod Equalizer on the iPod even if that you set the iPod Equalizer to off on the iPod, Repeat is lost on the Pioneer products. Do not let the iPod fall onto the floor, where it may become jammed under the brake or... automatically when connecting the iPod to 384 kbps (VBR) ! Firmly secure the iPod when driving. Even if you set Repeat to off , before connecting the iPod to direct sunlight can be played back. Appendix Additional Information Example of time. Bit rate: 48 kbps to 320 kbps (CBR), 48 kbps to this unit. !


