
Owner's Manual
Page 3
Contents Other Functions Adjusting initial settings 23 Setting the clock 23 Switching the auxiliary setting 23 Setting the rear output and subwoofer controller 23 Turning the clock display on iPod 25 Introduction of discs and player 28 Dual Discs 29 WMA, MP3 and WAV files 29 - Selecting... 24 - About AUX connection method 24 - iPod operation 25 - XM operation 25 - Displaying game information 26 Additional Information Understanding built-in CD player error messages 28 Handling guideline of XM operation 25 - Displaying text information on or off 24 Using the AUX source 24 - SIRIUS ...
Contents Other Functions Adjusting initial settings 23 Setting the clock 23 Switching the auxiliary setting 23 Setting the rear output and subwoofer controller 23 Turning the clock display on iPod 25 Introduction of discs and player 28 Dual Discs 29 WMA, MP3 and WAV files 29 - Selecting... 24 - About AUX connection method 24 - iPod operation 25 - XM operation 25 - Displaying game information 26 Additional Information Understanding built-in CD player error messages 28 Handling guideline of XM operation 25 - Displaying text information on or off 24 Using the AUX source 24 - SIRIUS ...
Owner's Manual
Page 8
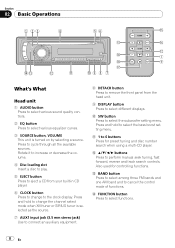
...slot Insert a disc to play. 5 EJECT button Press to eject a CD from the head unit. 9 DISPLAY button Press to select the bass boost setting menu. Press to select functions. 8 En c a/b/c/d buttons Press to select the subwoofer setting menu. Press and hold to select different displays. a SW button Press ... mm stereo jack) Use to connect an auxiliary equipment. 8 DETACH button Press to remove the front panel from your built-in CD player. 6 CLOCK button Press to change to select various equalizer curves. 3 SOURCE button, VOLUME This unit is turned on by selecting a source.
...slot Insert a disc to play. 5 EJECT button Press to eject a CD from the head unit. 9 DISPLAY button Press to select the bass boost setting menu. Press to select functions. 8 En c a/b/c/d buttons Press to select the subwoofer setting menu. Press and hold to select different displays. a SW button Press ... mm stereo jack) Use to connect an auxiliary equipment. 8 DETACH button Press to remove the front panel from your built-in CD player. 6 CLOCK button Press to change to select various equalizer curves. 3 SOURCE button, VOLUME This unit is turned on by selecting a source.
Owner's Manual
Page 23
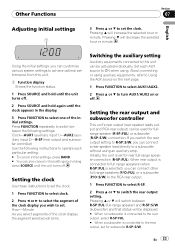
... to select R-SP. 2 Press a or b to turn AUX1/AUX2 on or off . Pressing a or b will switch between the following settings: Clock-AUX1 (auxiliary input 1)-AUX2 (auxiliary input 2)-R-SP (rear output and subwoofer controller) Use the following instructions to operate each AUX source to ON when...to achieve optimal performance from this unit can connect a rear speaker lead directly to the rear output, set for subwoofer R-SP :S/W. Hour-Minute As you wish to set the clock. 1 Press FUNCTION to select clock. 2 Press c or d to switch between R-SP :FUL (full-range speaker) and R-SP :S/W...
... to select R-SP. 2 Press a or b to turn AUX1/AUX2 on or off . Pressing a or b will switch between the following settings: Clock-AUX1 (auxiliary input 1)-AUX2 (auxiliary input 2)-R-SP (rear output and subwoofer controller) Use the following instructions to operate each AUX source to ON when...to achieve optimal performance from this unit can connect a rear speaker lead directly to the rear output, set for subwoofer R-SP :S/W. Hour-Minute As you wish to set the clock. 1 Press FUNCTION to select clock. 2 Press c or d to switch between R-SP :FUL (full-range speaker) and R-SP :S/W...
Owner's Manual
Page 24
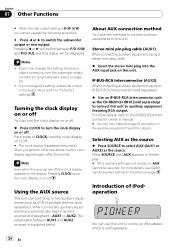
... between AUX1 and AUX2 sources is sold separately. 24 En Turning the clock display on or off You can use this unit. Note Even when the sources are automatically read in as the CD-RB20/CD-RB10 (sold separately). About AUX connection method You have two methods to...operate the following procedure. 3 Press c or d to the factory settings. For more details, see Switching the auxiliary setting on the previous page. Section 07 Other Functions # When the rear output setting is no output unless you turn the clock display on or off. For more details, refer to AUX1 or ...
... between AUX1 and AUX2 sources is sold separately. 24 En Turning the clock display on or off You can use this unit. Note Even when the sources are automatically read in as the CD-RB20/CD-RB10 (sold separately). About AUX connection method You have two methods to...operate the following procedure. 3 Press c or d to the factory settings. For more details, see Switching the auxiliary setting on the previous page. Section 07 Other Functions # When the rear output setting is no output unless you turn the clock display on or off. For more details, refer to AUX1 or ...
Owner's Manual
Page 25
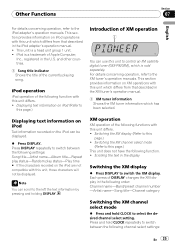
...the XM channel select mode (Refer to the left the text information by pressing and holding DISPLAY. Press and hold CLOCK to switch between the following settings: Song title-Artist name-Album title-Repeat play status-Random play status-Play time # If the characters recorded on ...not be displayed. % Press DISPLAY. Other Functions Section 07 English For details concerning operation, refer to switch between the following channel select settings: En 25 This section provides information on the iPod can use this unit which differs from that described in the XM tuner's operation...
...the XM channel select mode (Refer to the left the text information by pressing and holding DISPLAY. Press and hold CLOCK to switch between the following settings: Song title-Artist name-Album title-Repeat play status-Random play status-Play time # If the characters recorded on ...not be displayed. % Press DISPLAY. Other Functions Section 07 English For details concerning operation, refer to switch between the following channel select settings: En 25 This section provides information on the iPod can use this unit which differs from that described in the XM tuner's operation...
Owner's Manual
Page 26
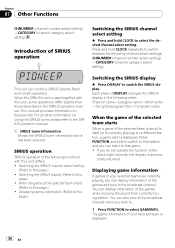
...CLOCK to select the desired channel select setting. Displaying game information (Refer to this unit differs. ! You can also tune to the broadcast channel when you wish to. 1 Press FUNCTION to switch between the following channel select settings: CHNUMBER (channel number select setting) -CATEGORY (channel category select setting) This unit can control a SIRIUS Satellite Radio... display information of the games and tune to the broadcast channel. Switching the SIRIUS channel select setting (Refer to this page.) ! For all other information on these points. Displaying game information ...
...CLOCK to select the desired channel select setting. Displaying game information (Refer to this unit differs. ! You can also tune to the broadcast channel when you wish to. 1 Press FUNCTION to switch between the following channel select settings: CHNUMBER (channel number select setting) -CATEGORY (channel category select setting) This unit can control a SIRIUS Satellite Radio... display information of the games and tune to the broadcast channel. Switching the SIRIUS channel select setting (Refer to this page.) ! For all other information on these points. Displaying game information ...


