Leaflet
Page 1
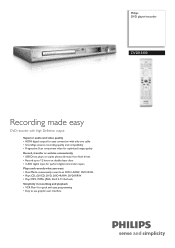
Philips DVD player/recorder DVDR3400 Recording made easy DVD recorder with High Definition output Superior audio and video quality • HDMI digital output for easy connection with only one cable • SmartAlgo ensures recording quality and compatibility • Progressive Scan component video for optimized image quality Record...copies photos & music from flash drives • Record up to 12 hours on double-layer discs • i.LINK digital input for perfect digital camcorder copies Plays and records what you want • Dual Media conveniently records on DVD+-R/RW, DVD+R DL • ...
Philips DVD player/recorder DVDR3400 Recording made easy DVD recorder with High Definition output Superior audio and video quality • HDMI digital output for easy connection with only one cable • SmartAlgo ensures recording quality and compatibility • Progressive Scan component video for optimized image quality Record...copies photos & music from flash drives • Record up to 12 hours on double-layer discs • i.LINK digital input for perfect digital camcorder copies Plays and records what you want • Dual Media conveniently records on DVD+-R/RW, DVD+R DL • ...
Leaflet
Page 2
.... With i.Link digital video input, you can copy your favorite moments with no loss in picture and sound quality. DVD player/recorder Highlights DVDR3400/37 HDMI for simple AV connection HDMI stands for the particular disc that is printed next to each TV program in most file ... in your device to the USB port on DVD+R/RW, DVD-R/RW and DVD+R DL discs. i.LINK digital input Dual Media Philips DVD Recorders support 'dual media' recording - Now you to select your eye perceives a sharper picture with family and friends. Multi-format playability(DivX) Multi-format playability ...
.... With i.Link digital video input, you can copy your favorite moments with no loss in picture and sound quality. DVD player/recorder Highlights DVDR3400/37 HDMI for simple AV connection HDMI stands for the particular disc that is printed next to each TV program in most file ... in your device to the USB port on DVD+R/RW, DVD-R/RW and DVD+R DL discs. i.LINK digital input Dual Media Philips DVD Recorders support 'dual media' recording - Now you to select your eye perceives a sharper picture with family and friends. Multi-format playability(DivX) Multi-format playability ...

Leaflet
Page 3
...-08-09 Version: 7.0.16 12 NC: 8622 810 12854 UPC: 6 09585 11468 5 © 2009 Koninklijke Philips Electronics N.V. or their respective owners. Specifications are the property of Koninklijke Philips Electronics N.V. All Rights reserved. www.philips.com DVD player/recorder Specifications DVDR3400/37 Picture/Display • D/A converter: 10 bit, 54 MHz • A/D converter: 10 bit, 27 MHz...
...-08-09 Version: 7.0.16 12 NC: 8622 810 12854 UPC: 6 09585 11468 5 © 2009 Koninklijke Philips Electronics N.V. or their respective owners. Specifications are the property of Koninklijke Philips Electronics N.V. All Rights reserved. www.philips.com DVD player/recorder Specifications DVDR3400/37 Picture/Display • D/A converter: 10 bit, 54 MHz • A/D converter: 10 bit, 27 MHz...
User manual
Page 4
... read) Beam divergence 84 degrees (DVD) 61 degrees (CD) 4 For Customer Use: Read carefully the information located at the bottom or rear of your DVD Recorder and enter below the Serial No. DVD RECORDER DVDR3400 Serial No
... read) Beam divergence 84 degrees (DVD) 61 degrees (CD) 4 For Customer Use: Read carefully the information located at the bottom or rear of your DVD Recorder and enter below the Serial No. DVD RECORDER DVDR3400 Serial No
User manual
Page 6
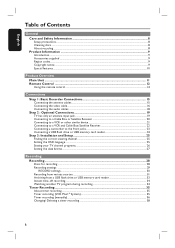
...notice...9 Special features ...10 Product Overview Main Unit ...11 Remote Control ...12 Using the remote control ...14 Connections Step 1: Basic Recorder Connections 15 Connecting the antenna cables ...15 Connecting the video cable...16 Connecting the audio cables ...18 Step 2 : Optional Connections 19... the OSD language ...25 Setting your TV channel programs...26 Setting the date & time...27 Recording Recording ...28 Discs for recording ...28 Recording settings ...29 RECORD settings ...30 Recording from various sources ...31 Archiving from a USB flash drive or USB memory card reader 33 ...
...notice...9 Special features ...10 Product Overview Main Unit ...11 Remote Control ...12 Using the remote control ...14 Connections Step 1: Basic Recorder Connections 15 Connecting the antenna cables ...15 Connecting the video cable...16 Connecting the audio cables ...18 Step 2 : Optional Connections 19... the OSD language ...25 Setting your TV channel programs...26 Setting the date & time...27 Recording Recording ...28 Discs for recording ...28 Recording settings ...29 RECORD settings ...30 Recording from various sources ...31 Archiving from a USB flash drive or USB memory card reader 33 ...

User manual
Page 7
...44 Searching forwards/backwards ...44 Zooming in ...44 Using the TOOLS options ...45 Edit Recordings Editing/ Finalizing Recording 48 About disc editing ...48 Accessing disc editing menu ...48 Playing your recordings on other DVD players (DVD±R only 50 About title editing ...51 Accessing title... ...53 Accessing video editing menu ...53 Other Information DVD Setup Menu Options 56 Accessing the Setup Menu ...56 GENERAL settings ...57 RECORD settings ...57 PLAYBACK settings ...58 DVD settings ...60 CHANNEL SETUP settings ...62 CLOCK settings ...64 Software Upgrade ...65 Installing the ...
...44 Searching forwards/backwards ...44 Zooming in ...44 Using the TOOLS options ...45 Edit Recordings Editing/ Finalizing Recording 48 About disc editing ...48 Accessing disc editing menu ...48 Playing your recordings on other DVD players (DVD±R only 50 About title editing ...51 Accessing title... ...53 Accessing video editing menu ...53 Other Information DVD Setup Menu Options 56 Accessing the Setup Menu ...56 GENERAL settings ...57 RECORD settings ...57 PLAYBACK settings ...58 DVD settings ...60 CHANNEL SETUP settings ...62 CLOCK settings ...64 Software Upgrade ...65 Installing the ...
User manual
Page 8
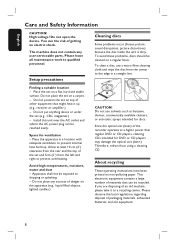
... sprays intended for discs. Do not position the set on the apparatus (e.g., liquid filled objects, lighted candles.) CAUTION! Since the optical unit (laser) of the recorder operates at least 10 cm (4") clearance from using a cleaning CD. The machine does not contain any sources of the set on a carpet. - Setup precautions Cleaning...
... sprays intended for discs. Do not position the set on the apparatus (e.g., liquid filled objects, lighted candles.) CAUTION! Since the optical unit (laser) of the recorder operates at least 10 cm (4") clearance from using a cleaning CD. The machine does not contain any sources of the set on a carpet. - Setup precautions Cleaning...

User manual
Page 9
English Introduction Your Philips recorder allows you to record TV programs or duplicate camcorder recordings to read this user manual before they can be played back on other regions cannot be played on this recorder. The recordings you have to be used for your recorder. The corresponding telephone numbers and e-mail ... take time to a DVD±RW or DVD±R and play Region 1 DVDs or DVDs manufactured to be an infringement of the recorder. If you start using your country. Quick Start Guide Region codes DVD films are keyed to a specific region code. ALL 1 Copyright ...
English Introduction Your Philips recorder allows you to record TV programs or duplicate camcorder recordings to read this user manual before they can be played back on other regions cannot be played on this recorder. The recordings you have to be used for your recorder. The corresponding telephone numbers and e-mail ... take time to a DVD±RW or DVD±R and play Region 1 DVDs or DVDs manufactured to be an infringement of the recorder. If you start using your country. Quick Start Guide Region codes DVD films are keyed to a specific region code. ALL 1 Copyright ...
User manual
Page 10
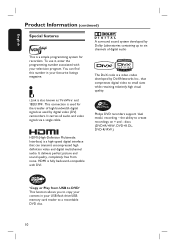
English Product Information (continued) Special features This is also known as used for recorders. i.Link is a simple programming system for the transfer of digital audio The DivX code is a high-speed digital interface that ...favourite listings magazine. HDMI is fully backward-compatible with your USB flash drive/USB memory card reader to create recordings on + and - Philips DVD recorders support 'dual media' recording - the ability to a recordable DVD disc. 10 A surround sound system developed by Dolby Laboratories containing up to six channels of high bandwidth...
English Product Information (continued) Special features This is also known as used for recorders. i.Link is a simple programming system for the transfer of digital audio The DivX code is a high-speed digital interface that ...favourite listings magazine. HDMI is fully backward-compatible with your USB flash drive/USB memory card reader to create recordings on + and - Philips DVD recorders support 'dual media' recording - the ability to a recordable DVD disc. 10 A surround sound system developed by Dolby Laboratories containing up to six channels of high bandwidth...

User manual
Page 11
...Main Unit a b c d ef gh English i jk a STANDBY-ON - Plays a disc. (STOP) - Input for SVHS/Hi8 camcorders or SVHS/Hi8 video recorders. Turns on the remote control to select 'CAM1' in order to view the input source j DV IN - d System display panel - Video input for digital ... 30, 60 or 90 minutes interval. Go to make a forward/ reverse search. É(PLAY) - Audio input for camcorders or video recorders. Starts recording the current TV channel or the current video input source. - Opens/closes the disc tray. Press and hold to the previous/next chapter ...
...Main Unit a b c d ef gh English i jk a STANDBY-ON - Plays a disc. (STOP) - Input for SVHS/Hi8 camcorders or SVHS/Hi8 video recorders. Turns on the remote control to select 'CAM1' in order to view the input source j DV IN - d System display panel - Video input for digital ... 30, 60 or 90 minutes interval. Go to make a forward/ reverse search. É(PLAY) - Audio input for camcorders or video recorders. Starts recording the current TV channel or the current video input source. - Opens/closes the disc tray. Press and hold to the previous/next chapter ...

User manual
Page 12
...OPEN/CLOSE ç ZOOM DISC MENU PLAY/PAUSE REC MODE TIMER EDIT a b c d e f g h i j k l m n o a 2 - Fast reverse or fast forward search. Stops playback/recording. Selects a chapter/track number to the left or right. n AUDIO - Clears a timer entry. Enters/exits the setup menu. Enlarges a picture on the... recorder or switch to previous or next chapter/track. While in the selection playlist/ copylist. - Clears a track/file in tuner, selects the next...
...OPEN/CLOSE ç ZOOM DISC MENU PLAY/PAUSE REC MODE TIMER EDIT a b c d e f g h i j k l m n o a 2 - Fast reverse or fast forward search. Stops playback/recording. Selects a chapter/track number to the left or right. n AUDIO - Clears a timer entry. Enters/exits the setup menu. Enlarges a picture on the... recorder or switch to previous or next chapter/track. While in the selection playlist/ copylist. - Clears a track/file in tuner, selects the next...

User manual
Page 13
... MODE - EDIT - Accesses the contents of the TV set (Philips TV only.) z TV MUTE H - Selects the recorder's input source (DV, EXT1, EXT2, CAM1, CAM2 or Tuner.) r SELECT - s REPEAT - Pauses the playback or recording. Adjusts the volume of the connected USB flash drive/ USB memory...previous menu of the TV set up a One Touch Recording at 30, 60 or 90 minutes interval. wl TIMER - e; Plays a disc. - u OK - v BACK2 - Selects a DVD subtitle language. Enters/exits the timer recording menu. Returns to set (Philips TV only.) wj SUBTITLE - Mutes the volume of ...
... MODE - EDIT - Accesses the contents of the TV set (Philips TV only.) z TV MUTE H - Selects the recorder's input source (DV, EXT1, EXT2, CAM1, CAM2 or Tuner.) r SELECT - s REPEAT - Pauses the playback or recording. Adjusts the volume of the connected USB flash drive/ USB memory...previous menu of the TV set up a One Touch Recording at 30, 60 or 90 minutes interval. wl TIMER - e; Plays a disc. - u OK - v BACK2 - Selects a DVD subtitle language. Enters/exits the timer recording menu. Returns to set (Philips TV only.) wj SUBTITLE - Mutes the volume of ...

User manual
Page 15
... will have to disconnect some of the cables before you make sure that these devices are disconnected from the power outlet. 15 English Step 1: Basic Recorder Connections CABLE SATELLITE ANTENNA A VIDEO (CVBS) EXT 1 TV-OUT ANTENNA-IN EXT 2 S-VIDEO (Y/C) INPUT L L R R AUDIO AUDIO EXT 3 PR ... (DIGITAL AUDIO) AUDIO B TV AU D IO O UT S-V ID E O IN V ID E O IN Connecting the antenna cables These connections enable you to watch or record the cable programs. If your TV is connected via a VCR, Cable Box or Satellite Receiver, ensure that all the devices are turned on your TV...
... will have to disconnect some of the cables before you make sure that these devices are disconnected from the power outlet. 15 English Step 1: Basic Recorder Connections CABLE SATELLITE ANTENNA A VIDEO (CVBS) EXT 1 TV-OUT ANTENNA-IN EXT 2 S-VIDEO (Y/C) INPUT L L R R AUDIO AUDIO EXT 3 PR ... (DIGITAL AUDIO) AUDIO B TV AU D IO O UT S-V ID E O IN V ID E O IN Connecting the antenna cables These connections enable you to watch or record the cable programs. If your TV is connected via a VCR, Cable Box or Satellite Receiver, ensure that all the devices are turned on your TV...

User manual
Page 16
.../ blue/green - B If your video connection. Option 2: Using an S-Video cable Use an S-video cable (not supplied) to connect the S-VIDEO (Y/C) OUTPUT jack on the recorder to the S-Video input jack (or labeled as Y/C or S-VHS) on the TV. not supplied) to connect the Y PB PR -OUTPUT jacks on the... recorder to the corresponding component video input jacks (or labeled as A/V In, Video In or Composite) on the TV. The progressive scan video quality is only ...
.../ blue/green - B If your video connection. Option 2: Using an S-Video cable Use an S-video cable (not supplied) to connect the S-VIDEO (Y/C) OUTPUT jack on the recorder to the S-Video input jack (or labeled as Y/C or S-VHS) on the TV. not supplied) to connect the Y PB PR -OUTPUT jacks on the... recorder to the corresponding component video input jacks (or labeled as A/V In, Video In or Composite) on the TV. The progressive scan video quality is only ...

User manual
Page 17
English Step 1: Basic Recorder Connections (continued) Option 4 EXT 3 PR PB Y COMPONENT VIDEO VIDEO (CVBS) PR COMPONENT Y VIDEO L L R R S-VIDEO (Y/C) COAXIAL PB (DIGITAL AUDIO) AUDIO OUTPUT HDMI ~ MAINS Option 4: Using a HDMI ... is only compatible with HDMI compliant products. - Proper working is unplugged, the { HDMI Video Resolution } setting will automatically switch to the HDMI IN on this recorder to default value {480i}. PLAYBACK Settings". When the HDMI cable is guaranteed with HDMI compliant devices and DVI-TV. Helpful Hints: - Note: - Digital devices from...
English Step 1: Basic Recorder Connections (continued) Option 4 EXT 3 PR PB Y COMPONENT VIDEO VIDEO (CVBS) PR COMPONENT Y VIDEO L L R R S-VIDEO (Y/C) COAXIAL PB (DIGITAL AUDIO) AUDIO OUTPUT HDMI ~ MAINS Option 4: Using a HDMI ... is only compatible with HDMI compliant products. - Proper working is unplugged, the { HDMI Video Resolution } setting will automatically switch to the HDMI IN on this recorder to default value {480i}. PLAYBACK Settings". When the HDMI cable is guaranteed with HDMI compliant devices and DVI-TV. Helpful Hints: - Note: - Digital devices from...

User manual
Page 18
... power outlet. 18 TIPS: Before making or changing any connections, make sure that all . Option 1: Using an audio cable You can connect the recorder to an AV amplifier/receiver with a digital multichannel sound decoder in order to the AUDIO-L/-R INPUT jacks on the amplifier/ receiver. Use a coaxial ... (mini system, TV) or receiver in order to the digital input jack on this recorder, this may produce a strong, distorted sound or no sound at all the devices are disconnected from this recorder is connected to the audio input jacks of the connected device. Use an audio cable ...
... power outlet. 18 TIPS: Before making or changing any connections, make sure that all . Option 1: Using an audio cable You can connect the recorder to an AV amplifier/receiver with a digital multichannel sound decoder in order to the AUDIO-L/-R INPUT jacks on the amplifier/ receiver. Use a coaxial ... (mini system, TV) or receiver in order to the digital input jack on this recorder, this may produce a strong, distorted sound or no sound at all the devices are disconnected from this recorder is connected to the audio input jacks of the connected device. Use an audio cable ...

User manual
Page 19
... connect the TO TV jack on the RF modulator. D Use the supplied AV cables (yellow ends) to connect the VIDEO (CVBS) OUTPUT jack on the recorder to the antenna input jack on the RF modulator. Step 2 : Optional Connections English CABLE SATELLITE ANTENNA A VIDEO (CVBS) EXT 1 TV-OUT ANTENNA-IN EXT 2 S-VIDEO... LINE IN) on the RF modulator to view the disc playback. B Use the supplied RF coaxial cable to connect the TV-OUT jack on the recorder to the video input jack (or labeled as A/V In, Video In, Composite or Baseband) on the RF modulator. A You may have an Antenna/Cable ...
... connect the TO TV jack on the RF modulator. D Use the supplied AV cables (yellow ends) to connect the VIDEO (CVBS) OUTPUT jack on the recorder to the antenna input jack on the RF modulator. Step 2 : Optional Connections English CABLE SATELLITE ANTENNA A VIDEO (CVBS) EXT 1 TV-OUT ANTENNA-IN EXT 2 S-VIDEO... LINE IN) on the RF modulator to view the disc playback. B Use the supplied RF coaxial cable to connect the TV-OUT jack on the recorder to the video input jack (or labeled as A/V In, Video In, Composite or Baseband) on the RF modulator. A You may have an Antenna/Cable ...

User manual
Page 20
...jacks on the Cable Box/Satellite Receiver. C Use the audio/video cables to connect the VIDEO (CVBS) /AUDIO OUTPUT jacks on the recorder to a Cable Box or Satellite Receiver Option 1 If your TV. TIPS: Refer to the respective connected device's user manual for the complete... connections to your Cable Box/Satellite Receiver only has an antenna output jack (RF OUT or TO TV), See "Step 1: Basic Recorder Connections - English Step 2: Optional Connections (continued) CABLE SATELLITE ANTENNA IN OUT RF VIDEO AUDIO R L S-VIDEO Rear of a Cable Box or Satellite ...
...jacks on the Cable Box/Satellite Receiver. C Use the audio/video cables to connect the VIDEO (CVBS) /AUDIO OUTPUT jacks on the recorder to a Cable Box or Satellite Receiver Option 1 If your TV. TIPS: Refer to the respective connected device's user manual for the complete... connections to your Cable Box/Satellite Receiver only has an antenna output jack (RF OUT or TO TV), See "Step 1: Basic Recorder Connections - English Step 2: Optional Connections (continued) CABLE SATELLITE ANTENNA IN OUT RF VIDEO AUDIO R L S-VIDEO Rear of a Cable Box or Satellite ...
User manual
Page 21
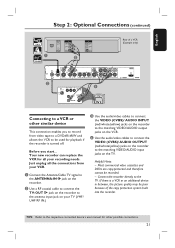
...VIDEO/AUDIO output jacks on the VCR. If there is turned off. B Use a RF coaxial cable to connect the TV-OUT jack on the recorder to the antenna input jack on your TV (VHF/ UHF RF IN.) C Use the audio/video cables to connect the VIDEO (CVBS)/ AUDIO INPUT... video cassettes and DVDs are copy-protected and therefore cannot be used for other similar device This connection enables you start... Before you to record from your recording needs. English Step 2: Optional Connections (continued) CABLE SATELLITE A ANTENNA VHF/UHF RF IN VHF/UHF RF OUT OUT VIDEO OUT AUDIO L AUDIO R ...
...VIDEO/AUDIO output jacks on the VCR. If there is turned off. B Use a RF coaxial cable to connect the TV-OUT jack on the recorder to the antenna input jack on your TV (VHF/ UHF RF IN.) C Use the audio/video cables to connect the VIDEO (CVBS)/ AUDIO INPUT... video cassettes and DVDs are copy-protected and therefore cannot be used for other similar device This connection enables you start... Before you to record from your recording needs. English Step 2: Optional Connections (continued) CABLE SATELLITE A ANTENNA VHF/UHF RF IN VHF/UHF RF OUT OUT VIDEO OUT AUDIO L AUDIO R ...

User manual
Page 22
... RF OUT OUT VIDEO OUT AUDIO L AUDIO R IN VIDEO S-VIDEO IN AUDIO L AUDIO R Rear of the recorder to the to the matching VIDEO/AUDIO output jacks on the VCR. F Use another set of audio/video cables to...Satellite Receiver. C Use a RF coaxial cable (not supplied) to connect the TV-OUT jack on the recorder to the antenna input jack on your TV (VHF/UHF RF IN.) D Use the supplied audio/ ...video cables to connect the VIDEO(CVBS) /AUDIOINPUT (red/white/yellow) jacks on the recorder to the matching VIDEO/ AUDIO input jacks on the Cable Box/ Satellite Receiver. E Use the audio...
... RF OUT OUT VIDEO OUT AUDIO L AUDIO R IN VIDEO S-VIDEO IN AUDIO L AUDIO R Rear of the recorder to the to the matching VIDEO/AUDIO output jacks on the VCR. F Use another set of audio/video cables to...Satellite Receiver. C Use a RF coaxial cable (not supplied) to connect the TV-OUT jack on the recorder to the antenna input jack on your TV (VHF/UHF RF IN.) D Use the supplied audio/ ...video cables to connect the VIDEO(CVBS) /AUDIOINPUT (red/white/yellow) jacks on the recorder to the matching VIDEO/ AUDIO input jacks on the Cable Box/ Satellite Receiver. E Use the audio...


