
Leaflet
Page 2
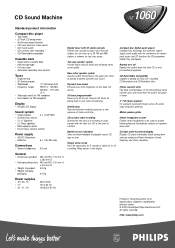
... bass sound. CD Sound Machine AZ1060 Standard product information Compact disc player • Top loader • 20 Track CD programme • Shuffle and repeat function • CD next/ previous track search • CD music search • CD synchro start recording • CD-Rewritable compatible Cassette deck • Single stereo cassette deck • Normal tape type • Full auto stop button for 5 seconds to switch on or off speakers when used...
... bass sound. CD Sound Machine AZ1060 Standard product information Compact disc player • Top loader • 20 Track CD programme • Shuffle and repeat function • CD next/ previous track search • CD music search • CD synchro start recording • CD-Rewritable compatible Cassette deck • Single stereo cassette deck • Normal tape type • Full auto stop button for 5 seconds to switch on or off speakers when used...
User manual
Page 1
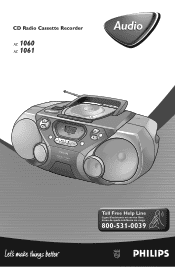
CD Radio Cassette Recorder AZ 1060 AZ 1061 Audio POWEROFTTFAUPNEERCD DBB DYNAMIC BASS BOOST PAUSE STOP-OPEN SEARCH AZ 1060 CCDD RRAADDIIOO CCAASSSSEETTTTEE RREECCOORRDDEERR PLAY RECORD VOLUME MODE CCDD SHUFFLE ALL TUNER LLBBOOAAWWTTTT TAPE PRESET BAND • • • SEARCH PLAY•PAUSE STOP SEARCH • • • DRIEGMIOTTAE LCOTNUTNROELR PROG. Toll Free Help Line Ligne d'assistance en service libre Linea de ayuda telefónica sin cargo 800-531-0039
CD Radio Cassette Recorder AZ 1060 AZ 1061 Audio POWEROFTTFAUPNEERCD DBB DYNAMIC BASS BOOST PAUSE STOP-OPEN SEARCH AZ 1060 CCDD RRAADDIIOO CCAASSSSEETTTTEE RREECCOORRDDEERR PLAY RECORD VOLUME MODE CCDD SHUFFLE ALL TUNER LLBBOOAAWWTTTT TAPE PRESET BAND • • • SEARCH PLAY•PAUSE STOP SEARCH • • • DRIEGMIOTTAE LCOTNUTNROELR PROG. Toll Free Help Line Ligne d'assistance en service libre Linea de ayuda telefónica sin cargo 800-531-0039
User manual
Page 2
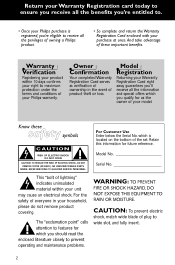
... your purchase at once. REFER SERVICING TO QUALIFIED SERVICE PERSONNEL. For Customer Use Enter below the Serial No. For the safety of product theft or loss. Owner Confirmation Your completed Warranty Registration Card serves as the owner of owning a Philips product. • So complete and return the Warranty Registration Card enclosed with your model. NO USER-SERVICEABLE PARTS INSIDE. Retain this information...
... your purchase at once. REFER SERVICING TO QUALIFIED SERVICE PERSONNEL. For Customer Use Enter below the Serial No. For the safety of product theft or loss. Owner Confirmation Your completed Warranty Registration Card serves as the owner of owning a Philips product. • So complete and return the Warranty Registration Card enclosed with your model. NO USER-SERVICEABLE PARTS INSIDE. Retain this information...
User manual
Page 6
... an electrician for replacement of . 1. Do not defeat the safety purpose of the ventilation openings. Refer all servicing to the unit: • Install all batteries correctly, + and - To prevent battery leakage which you should be particularly aware of the obsolete outlet. 10. EL 6475-E001: 00/8 6 Read these instructions - Follow all warnings - Do not use caution when moving...
... an electrician for replacement of . 1. Do not defeat the safety purpose of the ventilation openings. Refer all servicing to the unit: • Install all batteries correctly, + and - To prevent battery leakage which you should be particularly aware of the obsolete outlet. 10. EL 6475-E001: 00/8 6 Read these instructions - Follow all warnings - Do not use caution when moving...
User manual
Page 7
... card promptly. Please record the model and serial numbers found on the replacement product also expires. Box 2976, Longview,Texas 75606, (903) 242-4800 EL6095T002 / MAC5433 / 1-97 7 WHAT IS COVERED? Warranty coverage begins the day you specific legal rights.You may exchange the product in for installation or setup of the product, adjustment of customer controls on the product, and installation or repair...
... card promptly. Please record the model and serial numbers found on the replacement product also expires. Box 2976, Longview,Texas 75606, (903) 242-4800 EL6095T002 / MAC5433 / 1-97 7 WHAT IS COVERED? Warranty coverage begins the day you specific legal rights.You may exchange the product in for installation or setup of the product, adjustment of customer controls on the product, and installation or repair...
User manual
Page 8
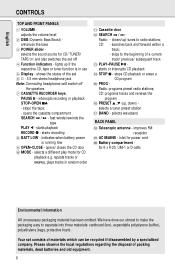
...: Connecting headphones will switch off 4 Function indicators - starts recording 8 BATT LOW - starts or interrupts CD playback $ STOP 9 - stops CD playback or erase a CD program % PROG - selects waveband BACK PANEL * Telescopic antenna - improves FM reception ( AC MAINS - for CD playback e.g. English CONTROLS TOP AND FRONT PANELS 1 VOLUME adjusts the volume level 2 DBB (Dynamic Bass Boost) enhances the bass 3 POWER slider selects the sound source for CD/ TUNER/ TAPE/OFF and also switches the set...
...: Connecting headphones will switch off 4 Function indicators - starts recording 8 BATT LOW - starts or interrupts CD playback $ STOP 9 - stops CD playback or erase a CD program % PROG - selects waveband BACK PANEL * Telescopic antenna - improves FM reception ( AC MAINS - for CD playback e.g. English CONTROLS TOP AND FRONT PANELS 1 VOLUME adjusts the volume level 2 DBB (Dynamic Bass Boost) enhances the bass 3 POWER slider selects the sound source for CD/ TUNER/ TAPE/OFF and also switches the set...
User manual
Page 9
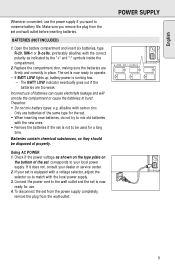
...Whenever convenient, use the power supply if you remove the plug from the wall outlet. Replace the compartment door, making sure the batteries are too weak. The set is equipped with the local power supply. 3. Incorrect use of properly. If your set is not...type for use batteries of the set is now ready to match with a voltage selector, adjust the selector so to operate. - Connect the power cord to your dealer or service center. 2. BATTERIES (NOT INCLUDED) 1. Therefore: • Do not mix battery types: e.g. To disconnect the set is running low. - Check if the power...
...Whenever convenient, use the power supply if you remove the plug from the wall outlet. Replace the compartment door, making sure the batteries are too weak. The set is equipped with the local power supply. 3. Incorrect use of properly. If your set is not...type for use batteries of the set is now ready to match with a voltage selector, adjust the selector so to operate. - Connect the power cord to your dealer or service center. 2. BATTERIES (NOT INCLUDED) 1. Therefore: • Do not mix battery types: e.g. To disconnect the set is running low. - Check if the power...
User manual
Page 10
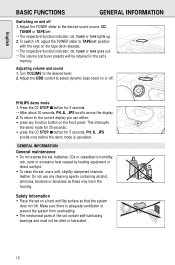
... set , use any function button on the front panel. Adjust the POWER slider to the desired level. 2. Turn VOLUME to the desired sound source: CD, TUNER or TAPE/OFF. ™ The respective function indicator: CD, TUNER or TAPE lights up. 2. Press the CD STOP 9 button for 5 seconds. Make sure there is cancelled. English BASIC FUNCTIONS GENERAL INFORMATION Switching on or off. Adjust the DBB control to the current display...
... set , use any function button on the front panel. Adjust the POWER slider to the desired level. 2. Turn VOLUME to the desired sound source: CD, TUNER or TAPE/OFF. ™ The respective function indicator: CD, TUNER or TAPE lights up. 2. Press the CD STOP 9 button for 5 seconds. Make sure there is cancelled. English BASIC FUNCTIONS GENERAL INFORMATION Switching on or off. Adjust the DBB control to the current display...
User manual
Page 11
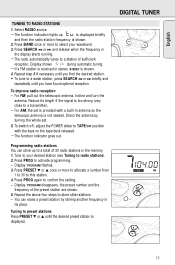
... the telescopic antenna is too strong (very close to a transmitter). - To switch off, adjust the POWER slider to your waveband. 3. Tune to TAPE/OFF position with a built-in STOP PROG. SHUFFLE TAPE ALL TUNER LBOAWTT PRESET BAND - SEARCH • • • Tuning to radio stations). 2. Reduce its place. For AM, the set . 5. Display: PROGRAM flashes. 3. Press SEARCH ∞ or § and release...
... the telescopic antenna is too strong (very close to a transmitter). - To switch off, adjust the POWER slider to your waveband. 3. Tune to TAPE/OFF position with a built-in STOP PROG. SHUFFLE TAPE ALL TUNER LBOAWTT PRESET BAND - SEARCH • • • Tuning to radio stations). 2. Reduce its place. For AM, the set . 5. Display: PROGRAM flashes. 3. Press SEARCH ∞ or § and release...
User manual
Page 12
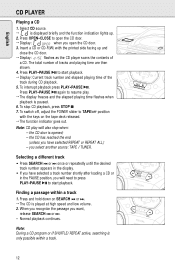
... PLAYER Playing a CD 1. To switch off, adjust the POWER slider to open the CD door. 3. When you recognize the passage you have selected REPEAT or REPEAT ALL); - Select CD source. ™ is displayed briefly and the function indication lights up and close the CD door. ™ Display: flashes as the CD player scans the contents of a CD. MODE CD TAPE ALL TUNER LBOAWTT • • • SEARCH PLAY•PAUSE STOP...
... PLAYER Playing a CD 1. To switch off, adjust the POWER slider to open the CD door. 3. When you recognize the passage you have selected REPEAT or REPEAT ALL); - Select CD source. ™ is displayed briefly and the function indication lights up and close the CD door. ™ Display: flashes as the CD player scans the contents of a CD. MODE CD TAPE ALL TUNER LBOAWTT • • • SEARCH PLAY•PAUSE STOP...
User manual
Page 13
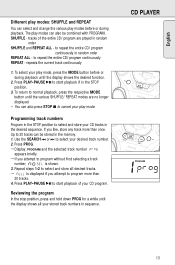
... REPEAT ALL - To select your play mode, press the MODE button before or during playback until the display shows the desired function. 2. to start playback if in the STOP position. 3. Repeat steps 1-2 to select and store all your desired track number. 2. You can be combined with PROGRAM. PROGRAM Reviewing the program In the stop position, press and hold down PROG for a while until the various SHUFFLE/ REPEAT modes are played in the memory. 1. Use...
... REPEAT ALL - To select your play mode, press the MODE button before or during playback until the display shows the desired function. 2. to start playback if in the STOP position. 3. Repeat steps 1-2 to select and store all your desired track number. 2. You can be combined with PROGRAM. PROGRAM Reviewing the program In the stop position, press and hold down PROG for a while until the various SHUFFLE/ REPEAT modes are played in the memory. 1. Use...
User manual
Page 14
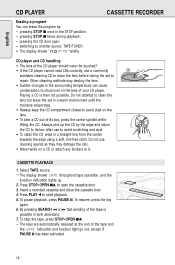
... of its box after use a commonly X available cleaning CD to clean the lens before taking the set to repair. Always pick up . 2. Insert a recorded cassette and close the cassette door. 4. has been activated. Do not use cleaning agents as they may destroy the lens. • Sudden changes in both directions. 7. Press PLAY 1 to another source: TAPE/TUNER. • The display shows ' ' briefly. To resume, press the key again. 6. switching to start playback. 5. Playing a CD...
... of its box after use a commonly X available cleaning CD to clean the lens before taking the set to repair. Always pick up . 2. Insert a recorded cassette and close the cassette door. 4. has been activated. Do not use cleaning agents as they may destroy the lens. • Sudden changes in both directions. 7. Press PLAY 1 to another source: TAPE/TUNER. • The display shows ' ' briefly. To resume, press the key again. 6. switching to start playback. 5. Playing a CD...
User manual
Page 15
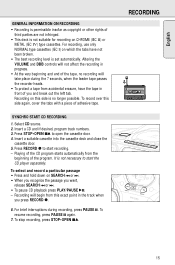
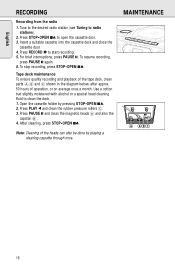
..., program track numbers. 3. Press STOP•OPEN 9/ to open the cassette door. 4. Playing of the CD program starts automatically from accidental erasure, have not been broken. • The best recording level is not necessary to start the CD player separately. RECORDING 1 SYNCHRO START CD RECORDING 1. Recording on CHROME (IEC II) or METAL (IEC IV) type cassettes. POWEROFTFTAUPNEERCD DBB DYNAMIC BASS BOOST PAUSE STOP-OPEN SEARCH AZ 1060 CD RADIO CASSETTE RECORDER PLAY RECORD MODE CD SHUFFLE ALL TUNER...
..., program track numbers. 3. Press STOP•OPEN 9/ to open the cassette door. 4. Playing of the CD program starts automatically from accidental erasure, have not been broken. • The best recording level is not necessary to start the CD player separately. RECORDING 1 SYNCHRO START CD RECORDING 1. Recording on CHROME (IEC II) or METAL (IEC IV) type cassettes. POWEROFTFTAUPNEERCD DBB DYNAMIC BASS BOOST PAUSE STOP-OPEN SEARCH AZ 1060 CD RADIO CASSETTE RECORDER PLAY RECORD MODE CD SHUFFLE ALL TUNER...
User manual
Page 16
.... After cleaning, press STOP•OPEN 9/. To stop recording, press STOP•OPEN 9/. Tape deck maintenance To ensure quality recording and playback of the tape deck, clean parts A,B and C shown in the diagram below, after approx. 50 hours of the heads can also be done by pressing STOP•OPEN 9/. 2. Press RECORD 0 to clean the deck. 1. Use a cotton bud slightly moistened with alcohol or a special head cleaning fluid to start recording. 5. Press...
.... After cleaning, press STOP•OPEN 9/. To stop recording, press STOP•OPEN 9/. Tape deck maintenance To ensure quality recording and playback of the tape deck, clean parts A,B and C shown in the diagram below, after approx. 50 hours of the heads can also be done by pressing STOP•OPEN 9/. 2. Press RECORD 0 to clean the deck. 1. Use a cotton bud slightly moistened with alcohol or a special head cleaning fluid to start recording. 5. Press...
User manual
Page 17
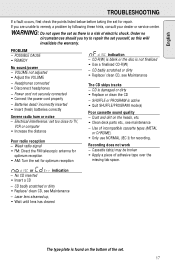
... there is a risk of the set for repair. Recording does not work - Under no circumstances should you are unable to TV, VCR or computer • Increase the distance Poor radio reception - PROBLEM - Power cord not securely connected • Connect the power cord properly - CD-R(W) is blank or the disc is active • Quit SHUFFLE/PROGRAM mode(s) Poor cassette sound quality - Use of adhesive tape over the missing tab space...
... there is a risk of the set for repair. Recording does not work - Under no circumstances should you are unable to TV, VCR or computer • Increase the distance Poor radio reception - PROBLEM - Power cord not securely connected • Connect the power cord properly - CD-R(W) is blank or the disc is active • Quit SHUFFLE/PROGRAM mode(s) Poor cassette sound quality - Use of adhesive tape over the missing tab space...
User manual
Page 44
English Français Español Meet Philips at the Internet http://www.philipsusa.com 3140 115 2805.1 CLASS 1 LASER PRODUCT Printed in Hong Kong Cmm/RM/0046 CD Radio Cassette Recorder PHILIPS CONSUMER ELECTRONICS COMPANY A Division of Philips Electronics North America Corporation Knoxville, Tennessee 37914-1810, U.S.A.
English Français Español Meet Philips at the Internet http://www.philipsusa.com 3140 115 2805.1 CLASS 1 LASER PRODUCT Printed in Hong Kong Cmm/RM/0046 CD Radio Cassette Recorder PHILIPS CONSUMER ELECTRONICS COMPANY A Division of Philips Electronics North America Corporation Knoxville, Tennessee 37914-1810, U.S.A.


