
Leaflet
Page 2
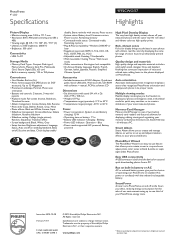
... turns PhotoFrame on and off at a time, in professionally printed photos. Trademarks are subject to change without a PC. PhotoFrame 9" LCD Specifications 9FF2CWO/37 Highlights Picture/Display • Effective viewing area: 169.6 x 111.7 mm • Resolution: 800 x 480 pixels (viewing area 680 x ...; Battery LED indicator: Charging - Auto orientation Automatic landscape/portrait recognition employs a sensor that convey an impression of Koninklijke Philips Electronics N.V. or their respective owners. Blue • Power mode supported: AC powered, Battery powered • High Pixel...
... turns PhotoFrame on and off at a time, in professionally printed photos. Trademarks are subject to change without a PC. PhotoFrame 9" LCD Specifications 9FF2CWO/37 Highlights Picture/Display • Effective viewing area: 169.6 x 111.7 mm • Resolution: 800 x 480 pixels (viewing area 680 x ...; Battery LED indicator: Charging - Auto orientation Automatic landscape/portrait recognition employs a sensor that convey an impression of Koninklijke Philips Electronics N.V. or their respective owners. Blue • Power mode supported: AC powered, Battery powered • High Pixel...
User manual
Page 2
...Slideshows 32 4.1.1 Create New Slideshow 32 4.1.2 Play All albums or selected slideshow - 33 4.1.3 Add Album to thumbnai 13 3.3 Photo selection - Philips Electronics Getting help 63 6.1 Checking Display Status 63 6.2 Taking Care of Photo Frame....... - 64 6.3 Frequently asked questions......... - 65 -7- 7.3... - 8 1.2.6 Play Photos from Memory Card.. - 9 1.2.7 Copy photos from Slideshow - 36 4.1.5 Rename Slideshow 37 4.1.6 Delete Slideshow 39 4.2 Slideshow Sequence 41 4.3 Transition Effects 42 4.4 Frequency 43 4.5 Collage 45 4.6 Background Color 46 4.7 Show Clock 47 -5- 5.
...Slideshows 32 4.1.1 Create New Slideshow 32 4.1.2 Play All albums or selected slideshow - 33 4.1.3 Add Album to thumbnai 13 3.3 Photo selection - Philips Electronics Getting help 63 6.1 Checking Display Status 63 6.2 Taking Care of Photo Frame....... - 64 6.3 Frequently asked questions......... - 65 -7- 7.3... - 8 1.2.6 Play Photos from Memory Card.. - 9 1.2.7 Copy photos from Slideshow - 36 4.1.5 Rename Slideshow 37 4.1.6 Delete Slideshow 39 4.2 Slideshow Sequence 41 4.3 Transition Effects 42 4.4 Frequency 43 4.5 Collage 45 4.6 Background Color 46 4.7 Show Clock 47 -5- 5.

User manual
Page 38
Navigate right to access the source list Navigate right to access the Main Menu. Navigate down to go to the slideshow you want to highlight the Slideshow icon. Navigate down to select and press the menu button. Philips Electronics Press the menu button to access the slideshow list. Navigate right or press the OK button to enter the on screen keyboard. - 37 - 4.1.5 Rename Slideshow A slideshow can be renamed at any time by following the instructions below. Navigate down to access rename slideshow and press OK to access the slideshow menu.
Navigate right to access the source list Navigate right to access the Main Menu. Navigate down to go to the slideshow you want to highlight the Slideshow icon. Navigate down to select and press the menu button. Philips Electronics Press the menu button to access the slideshow list. Navigate right or press the OK button to enter the on screen keyboard. - 37 - 4.1.5 Rename Slideshow A slideshow can be renamed at any time by following the instructions below. Navigate down to access rename slideshow and press OK to access the slideshow menu.

